Every account is capable of storing a complete backup of its hosting package. It’s recommended as a best practice to ensure your content can be restored or replaced if necessary. The process for creating a backup varies depending on your hosting type.
Managing Complete cPanel Backups
A complete cPanel backup creates a copy of all your files, emails, databases, and more. Once initiated, you will need to wait for the backup process to complete. Once the backup is ready for download, the server can send you an email notification to a specified address. Below are the steps for generating, downloading, and restoring a full backup.
Note: Shared, Cloud Sites, and Reseller plans are limited to cPanel backups of up to 10 GB with 150,000 inodes or fewer. If your backup exceeds 10 GB or contains more than 150,000 inodes, you will need to contact LyteHosting support for assistance in bypassing this limit.
How to Create a Full Backup in cPanel
To create a full backup in cPanel:
STEP 1: Log in to cPanel.
There are three methods to log into your cPanel.
- Method 1: Log in to your cPanel directly.
- Method 2: Log in to your cPanel through your Customer Portal.
Through your Customer Portal;
- Log in to your Customer Portal.
- Click on "Log in to cPanel".
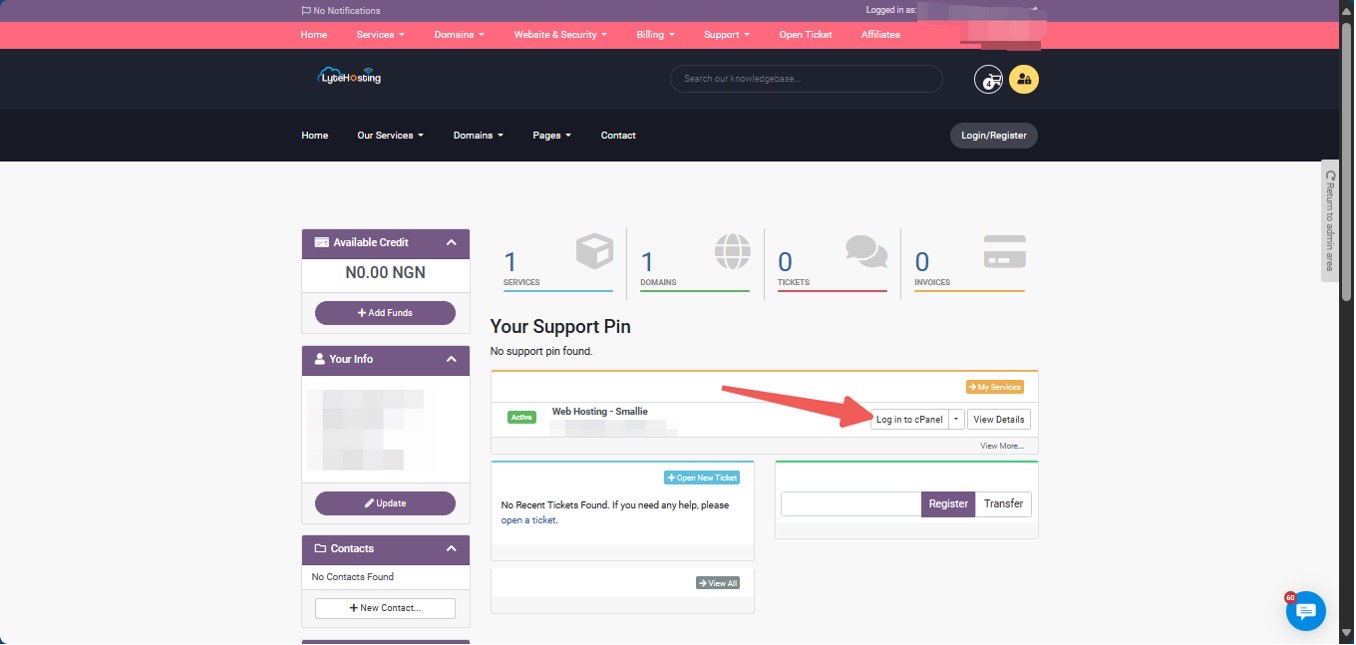
- Method 3: Log in using the details sent to your Email.
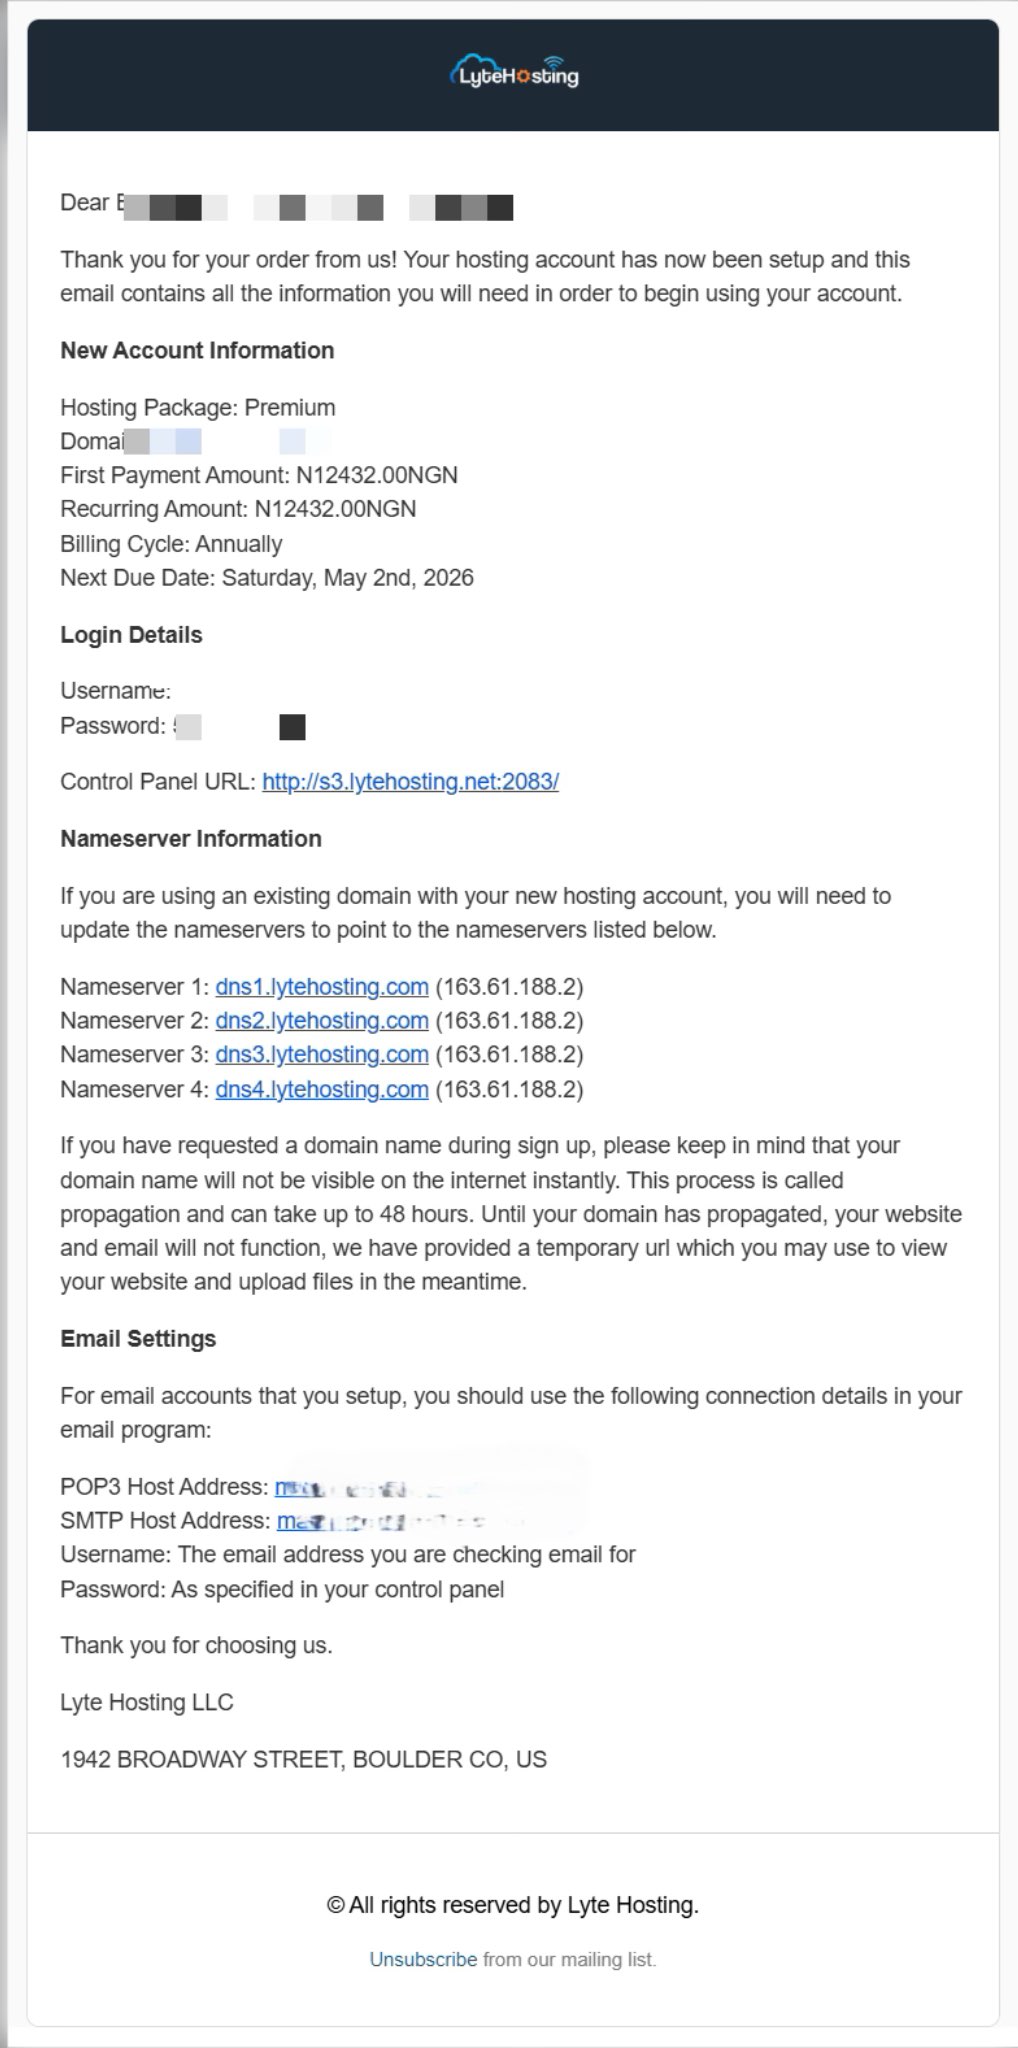
Through your Email;
- When you purchase a hosting plan, your cPanel login details (including username, password, and cPanel URL) are automatically sent to your registered email address. Simply check your inbox (or spam folder), locate the email, and use the provided credentials to access your cPanel.
STEP 2: Locate the Files section and click on Backup.
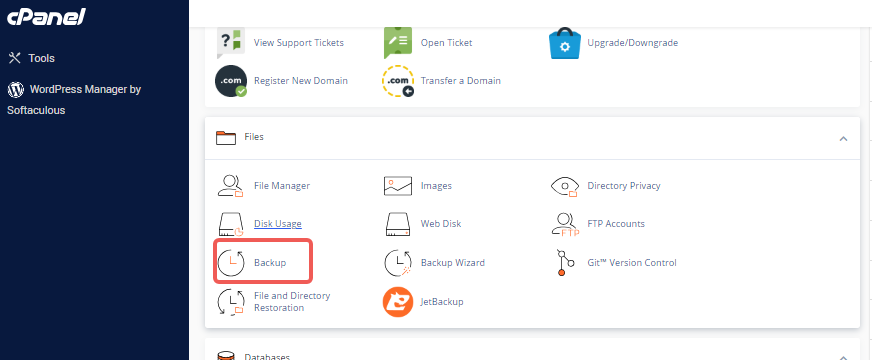
STEP 3: Under the Full Backup section, click on Download a Full Account Backup.

STEP 4: On the next page, choose Home Directory from the Backup Destination dropdown menu.
STEP 5: In the Email Address field, enter the email address where you want to receive a notification once the backup is finished. Alternatively, you can choose not to receive any notification by selecting the Do not send email notification of backup completion option.
STEP 6: Afterward, click Generate Backup.
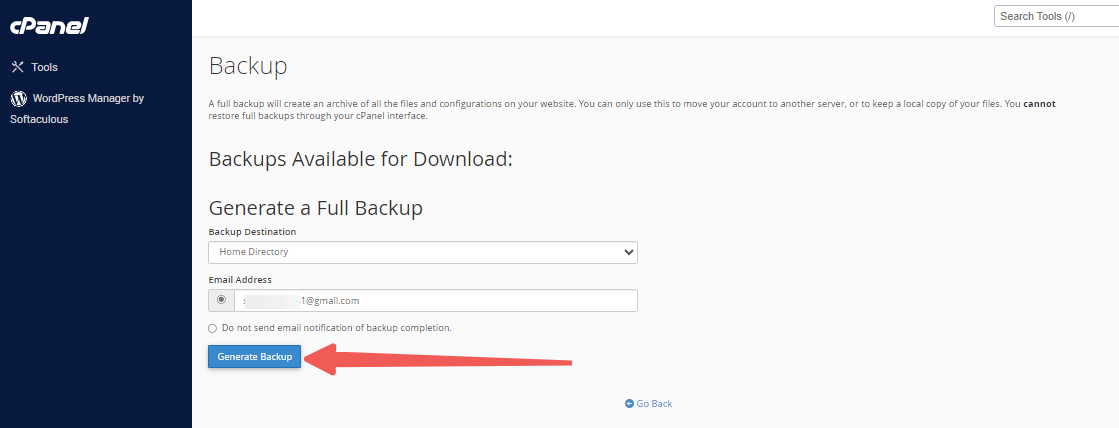
STEP 7: You will be able to track the progress of the backup. Once it's finished, click Go Back.
The backup will be created and stored as a tar.gz file in your home directory. Once the process is complete, you can download the backup via cPanel, FTP, or SSH.
How to Download a Complete Backup
STEP 1: Log in to cPanel (Refer to the steps above if you need guidance on accessing your cPanel.)
STEP 2: Locate the Files section and click on Backup.
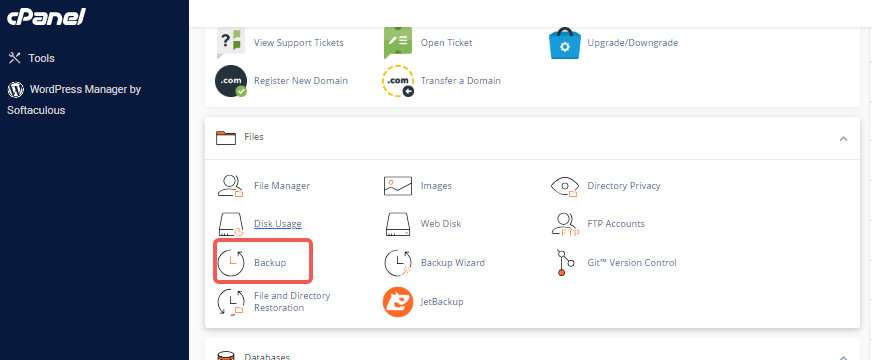
STEP 3: Under the Full Backup section, click on Download a Full Account Backup.

STEP 4: Under Backups Available for Download, click the link for the backup file you wish to download.
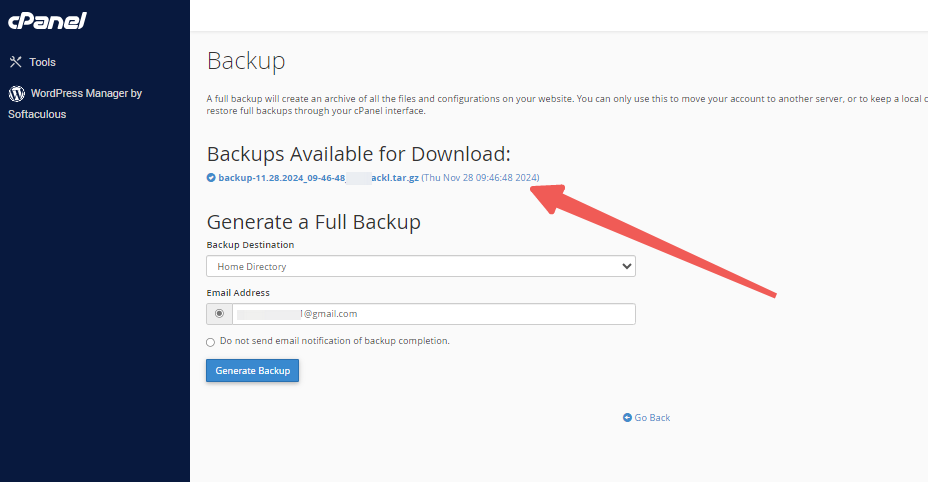
STEP 5: Then, choose a destination on your computer where you’d like to save the backup.
Compatibility Considerations
Due to changes in cPanel's backup system and other system features across different cPanel versions, there are several compatibility issues to keep in mind during the restoration process:
MySQL and PostgreSQL Database Passwords: In cPanel & WHM version 11.42 and later, while MySQL and PostgreSQL databases are restored, the user's passwords are not. This means the user will be locked out of the databases until their privileges are refreshed. The next time the user manages a database through phpPgAdmin or phpMyAdmin, the system will automatically restore their access.
Horde Webmail Client: As of cPanel version 108, the Horde webmail client has been removed. If the backup was created using an earlier version of cPanel, the user will no longer have access to Horde. However, all calendars and contacts should be automatically transferred to the Roundcube webmail client.2.


