You can use either the Spam Box or email filtering to redirect spam from your Inbox to a different folder.
Spam Box
When you enable the Spam Box (the link to the article on ‘Using SpamAssassin to Filter Unwanted Emails’ will be attached), a dedicated spam folder is created. Emails marked as spam will be delivered to this folder, allowing you to review them before deletion. You can also recover any mistakenly marked "spam" messages from your email account's Spam folder.
To activate the Spam Box:
STEP 1: Log in to cPanel.
There are three methods to log into your cPanel.
- Method 1: Log in to your cPanel directly.
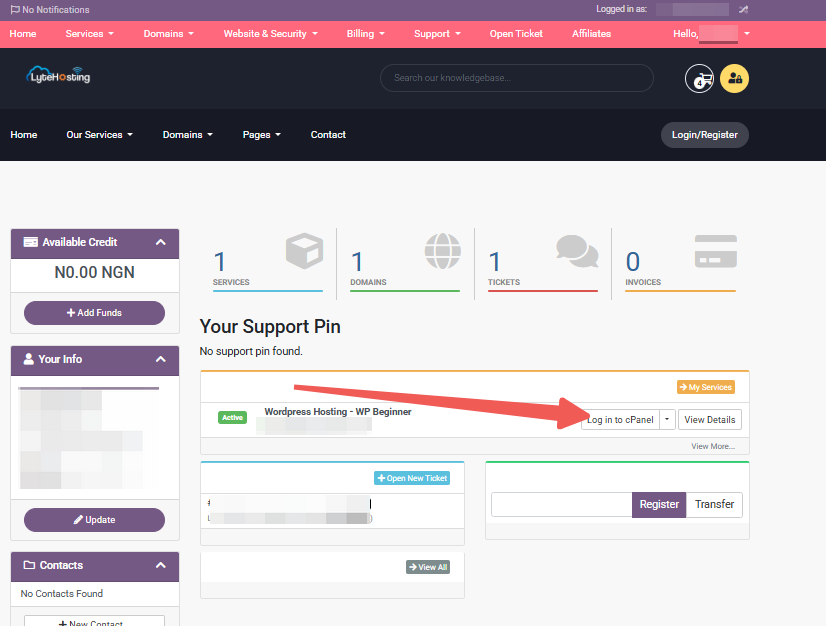
- Method 2: Log in to your cPanel through your Customer Portal.
Through your Customer Portal;
- Log in to your Customer Portal.
- Click on "Log in to cPanel".
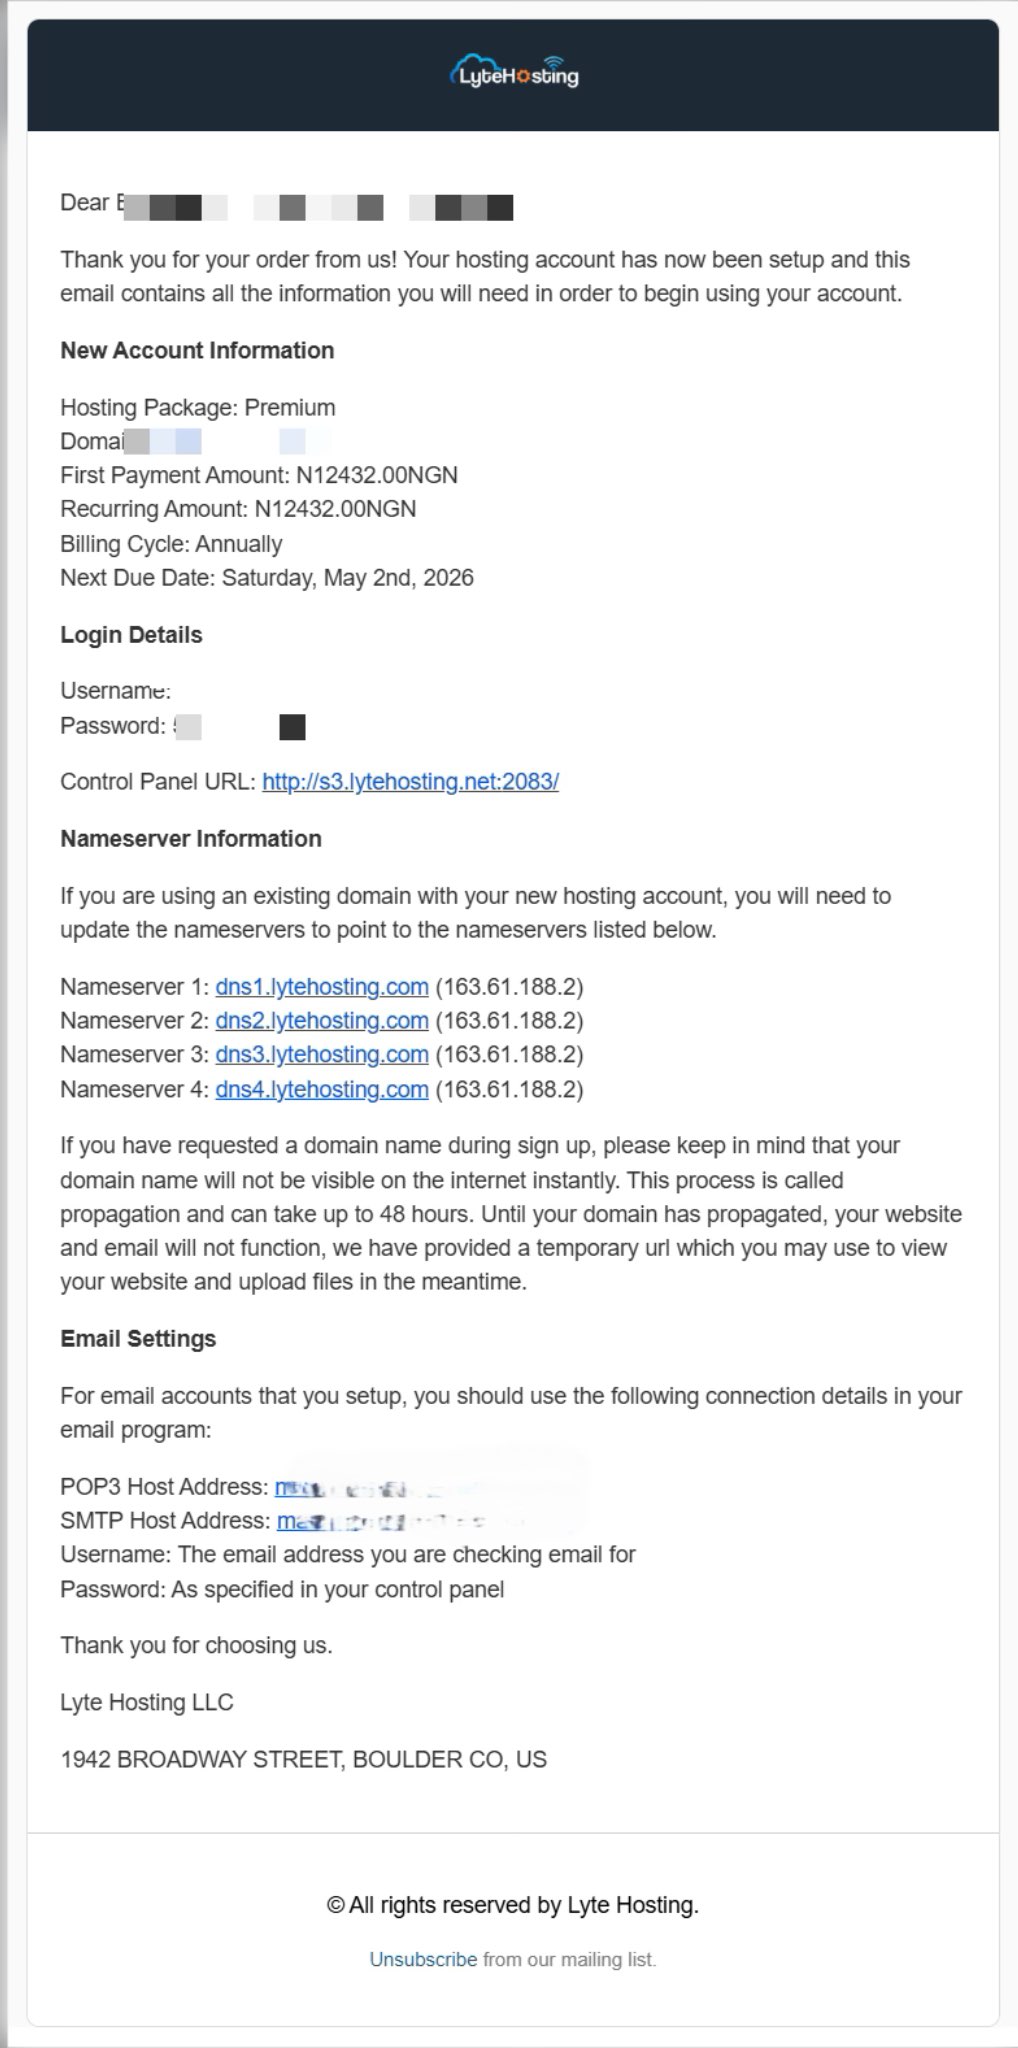
- Method 3: Log in using the details sent to your Email.
Through your Email;
- When you purchase a hosting plan, your cPanel login details (including username, password, and cPanel URL) are automatically sent to your registered email address. Simply check your inbox (or spam folder), locate the email, and use the provided credentials to access your cPanel.
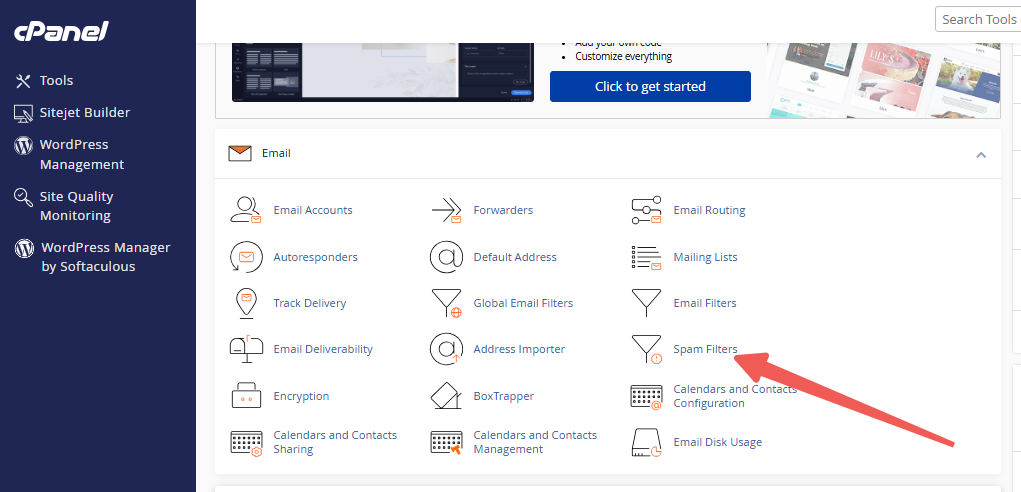
STEP 2: Locate the Email section and click on Spam Filters.
STEP 3: In the Spam Filters section, simply toggle the option in the Move New Spam to a Separate Folder (Spam Box).
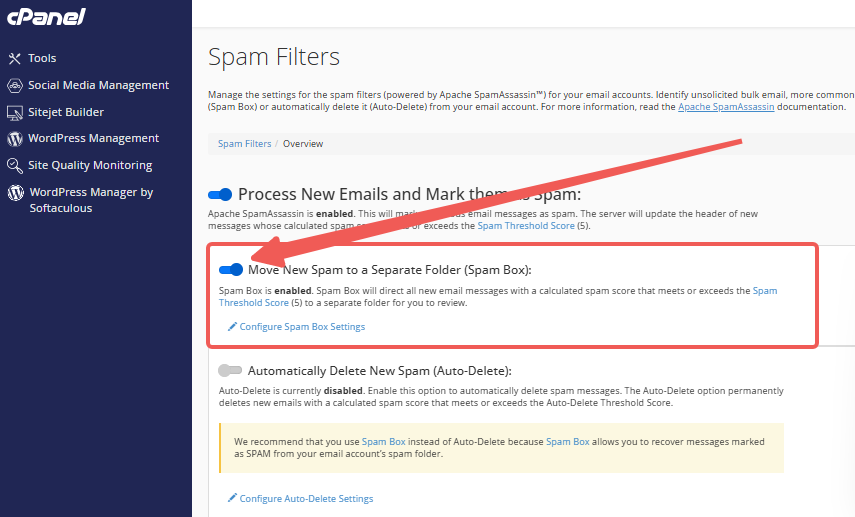
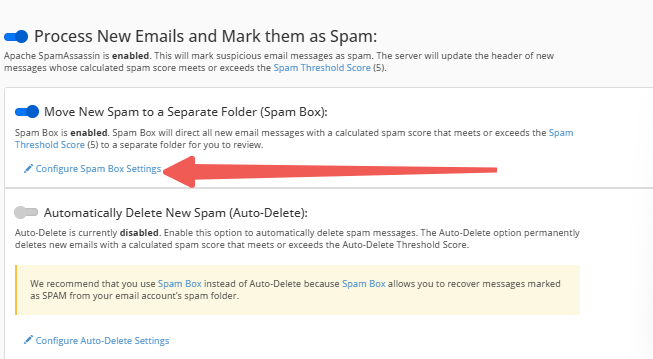
STEP 4: You can clear or empty your Spam Box folder by clicking the Configure Spam Box Settings link.
Auto-delete Spam
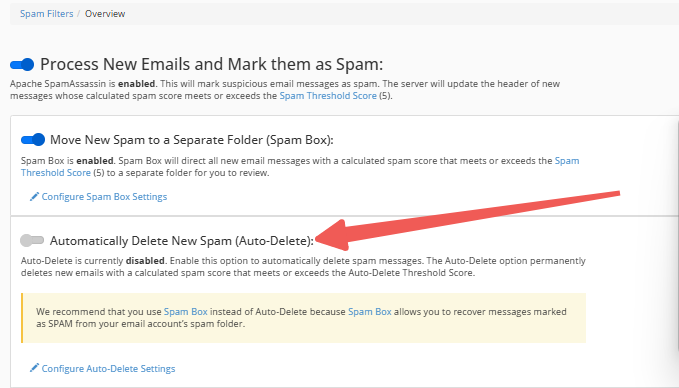
The auto-delete feature automatically removes messages that meet or exceed the defined spam score limit. To enable auto-delete, go to the Filters section and toggle the Auto-Delete Spam option.
- If the toggle bar is blue, Auto-Delete New Spam is activated.
- If the toggle bar is gray, Auto-Delete New Spam is deactivated.
It’s recommended to set the Auto-Delete spam score higher than the Spam Threshold Score, although both settings can be used together.
Note: Enabling auto-delete may result in the loss of legitimate emails if SpamAssassin (the link to the article on ‘Using SpamAssassin to Filter Unwanted Emails’ will be attached) is not properly configured.
Whitelist, Blacklist, and Calculated Spam Score Settings
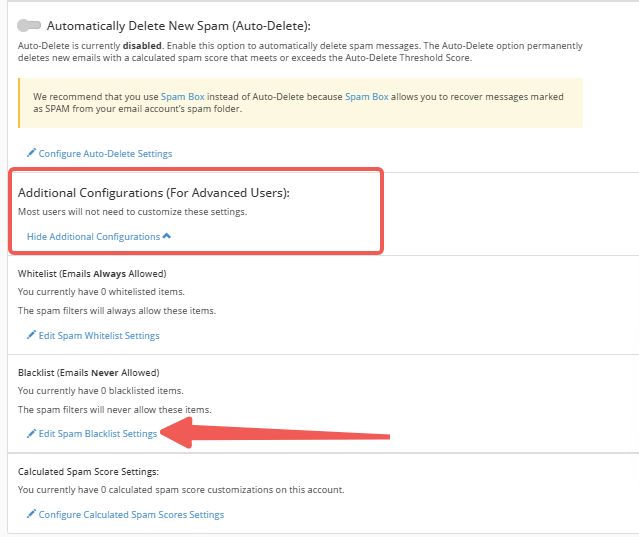
Manage your email account's spam filter settings by clicking Show Additional Configurations for more options.
Whitelist
Whitelisting ensures that emails from specific addresses or domains bypass the spam filter and go straight to your Inbox.
To whitelist:
STEP 1: Click Edit Spam Whitelist Settings.
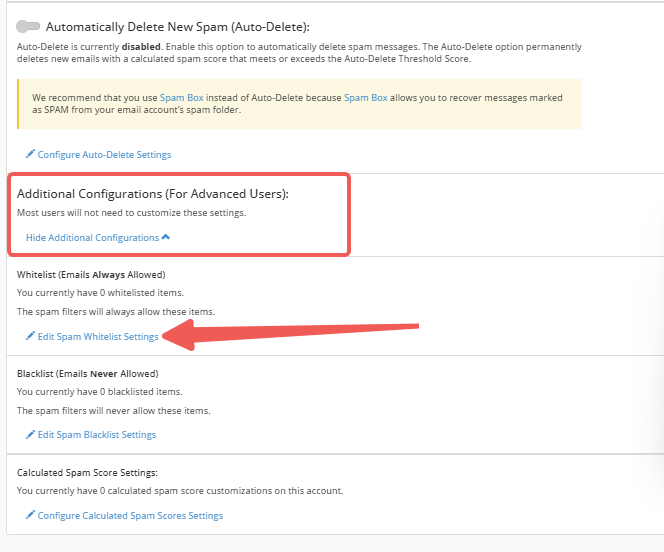
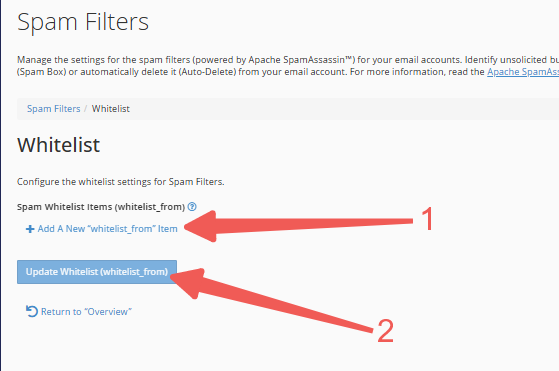
STEP 2: On the Whitelist page, click Add a New "whitelist_from" Item.
STEP 3: Enter the email address that should not be marked as spam. You can use wildcard characters like "*" and "?" for more flexibility. Then click on Update Whitelist (whitelist_from).
Note: Avoid whitelisting your domain, as this may allow spammers who impersonate your domain to bypass filters.
Blacklist
Blacklisting allows you to mark emails from specific addresses or domains as spam. This is useful if you regularly receive spam from the same source.
To blacklist:
STEP 1: Click Edit Spam Blacklist Settings.
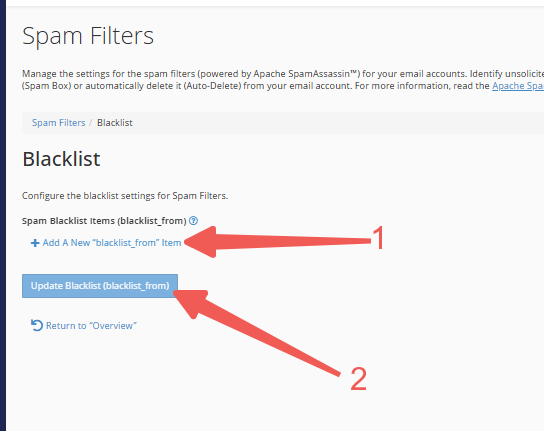
STEP 2: On the Blacklist page, click Add a New "blacklist_from" Item.
STEP 3: Enter the email address to be flagged as spam. Wildcard characters such as "*" and "?" can be used for more flexibility. Then click on Update Blacklist (blacklist_from).
Calculated Spam Score Settings
This feature is intended for advanced users. It allows you to adjust the scores of individual tests in SpamAssassin (the link to the article on ‘Using SpamAssassin to Filter Unwanted Emails’ will be attached). You can increase the score of tests that let spam through or decrease the score of tests that mistakenly mark legitimate emails as spam.
To modify a score:
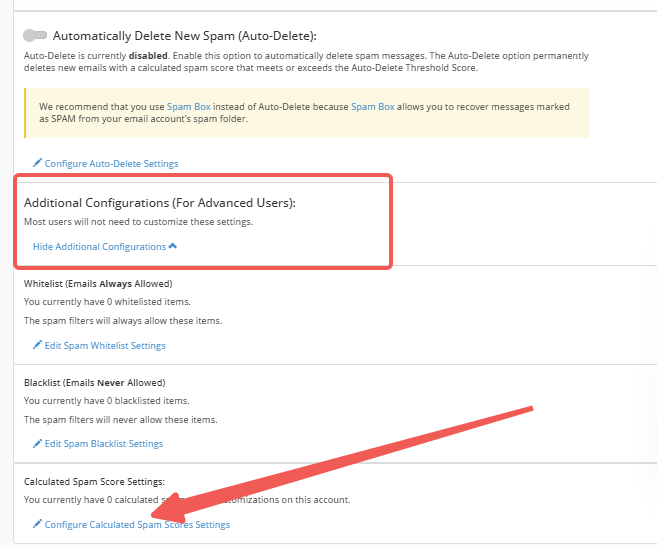
STEP 1: Click Configure Calculated Spam Score Settings.
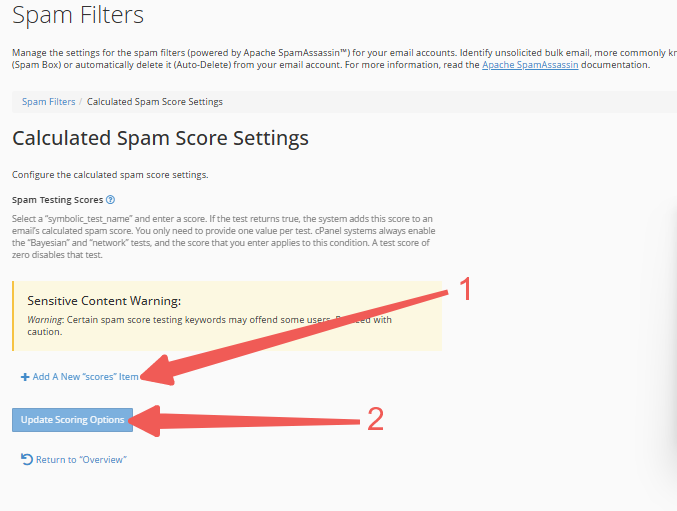
STEP 2: Click Add a New "scores" Item.
STEP 3: Select a new score from the dropdown menu.
STEP 4: Enter a value with up to 3 decimal places. (Setting the value to 0 will disable the test.)
STEP 5: Click Update Scoring Options to save your changes.
