SpamAssassin is an effective anti-spam tool designed to filter out unwanted emails across all of your email accounts in cPanel. It can be configured to mark spam messages, making them easily identifiable. Additionally, you have the option to set SpamAssassin to automatically delete any emails identified as spam.
LyteHosting recommends enabling SpamAssassin immediately after creating an email account or logging in for the first time.
Enabling and Disabling SpamAssassin
To configure your SpamAssassin settings:
STEP 1: Log in to cPanel.
There are three methods to log into your cPanel.
- Method 1: Log in to your cPanel directly.
- Method 2: Log in to your cPanel through your Customer Portal.
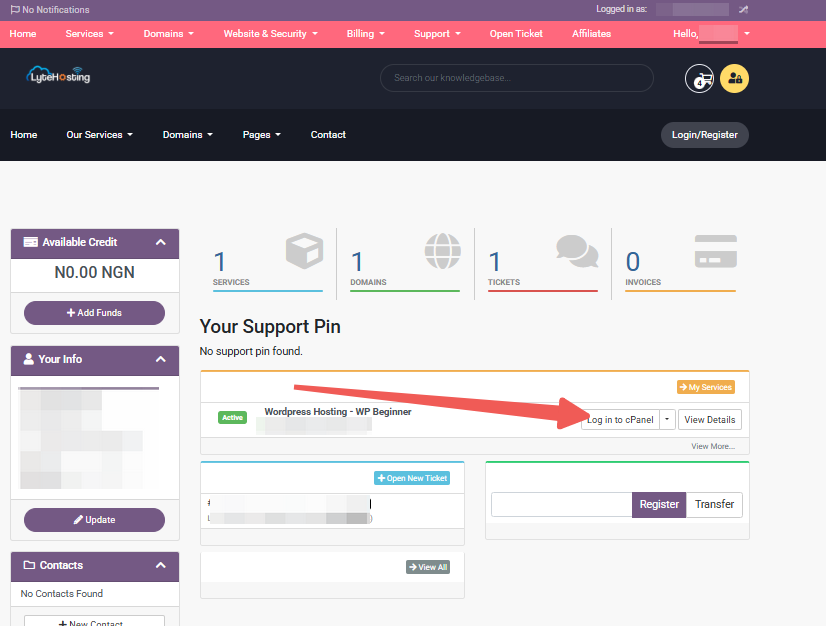
Through your Customer Portal;
- Log in to your Customer Portal.
- Click on "Log in to cPanel".
- Method 3: Log in using the details sent to your Email.
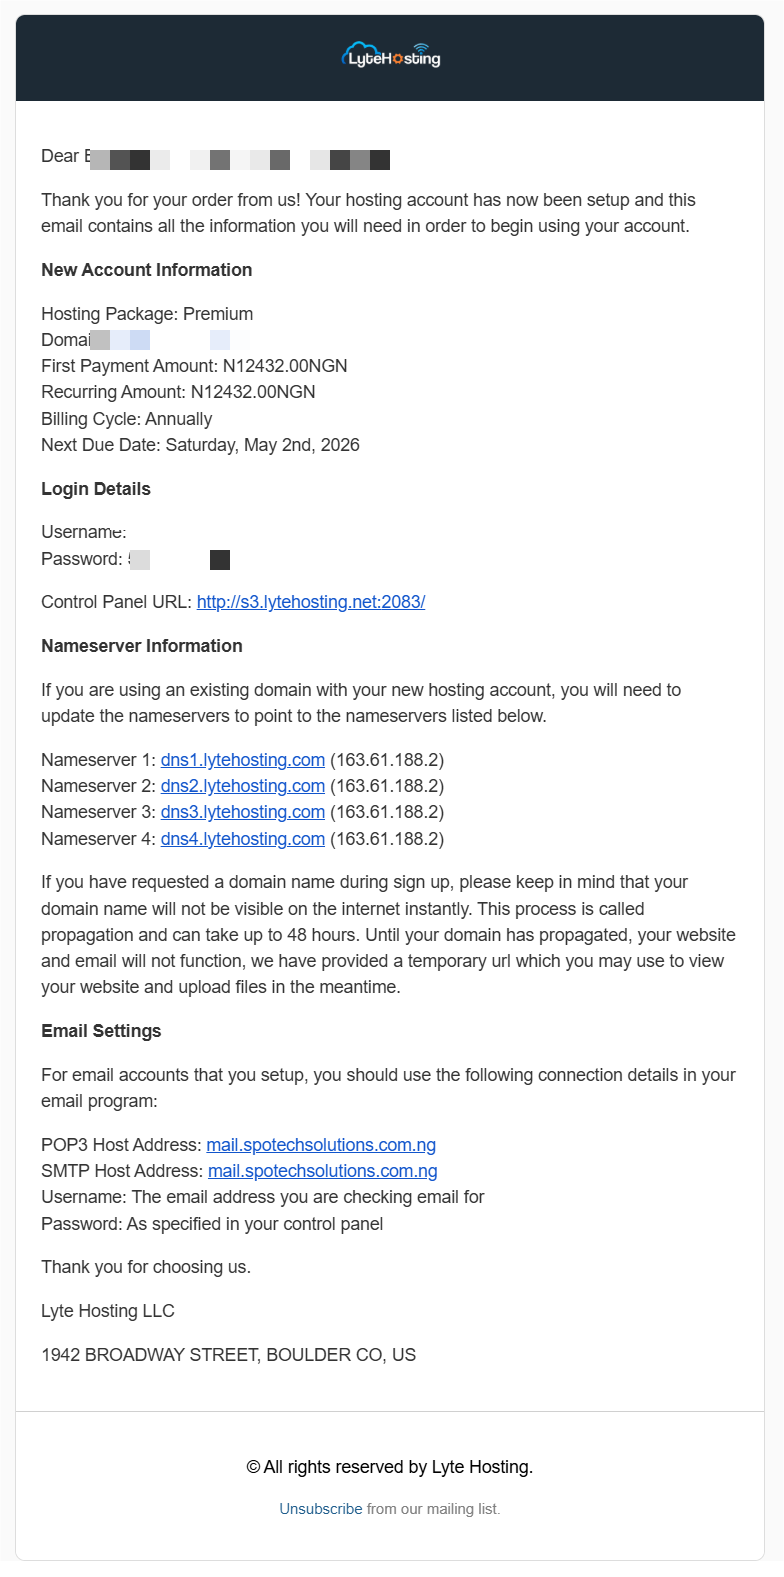
Through your Email;
- When you purchase a hosting plan, your cPanel login details (including username, password, and cPanel URL) are automatically sent to your registered email address. Simply check your inbox (or spam folder), locate the email, and use the provided credentials to access your cPanel.
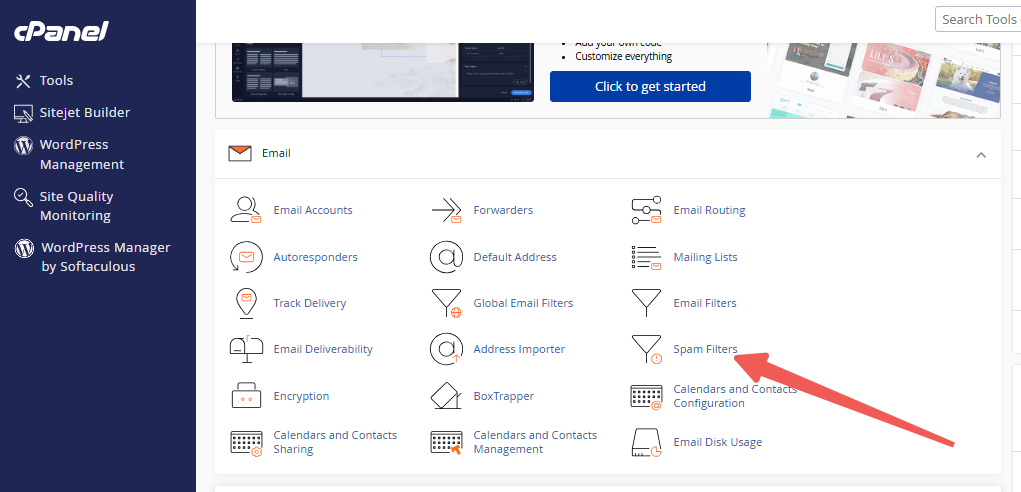
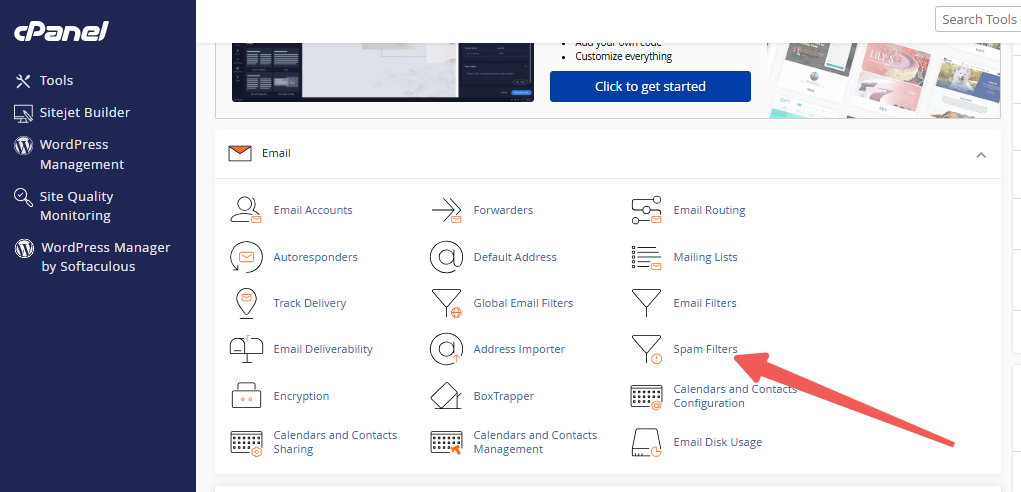
STEP 2: Locate the Email section and click on Spam Filters.
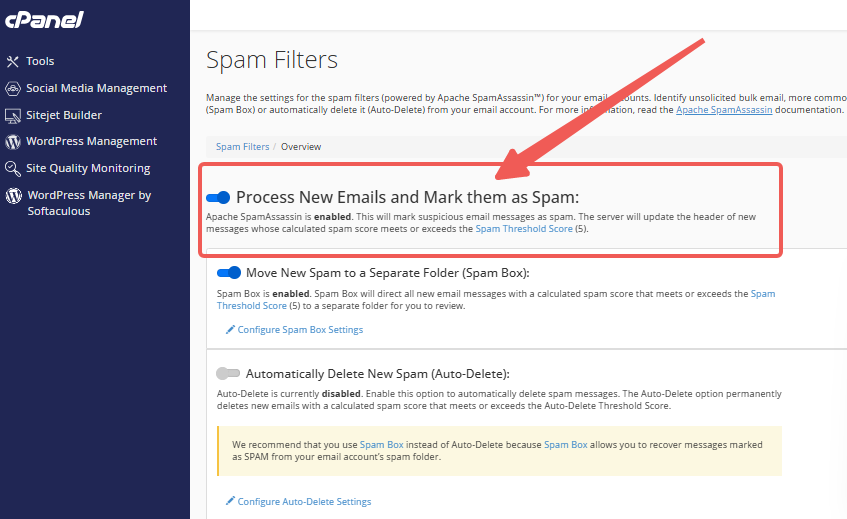
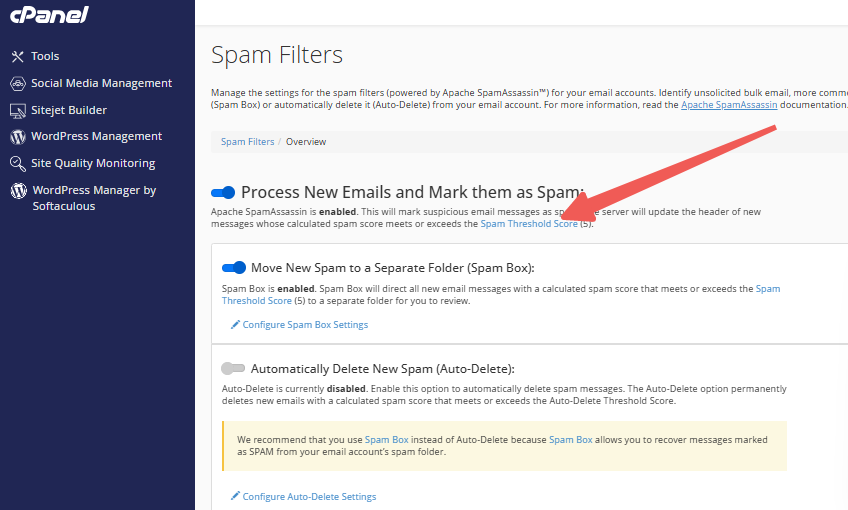
STEP 3: In the Spam Filters section, use the toggle bar to turn SpamAssassin on or off.
- When the toggle bar is blue, SpamAssassin is on.
- If the toggle bar appears grayed out, SpamAssassin is turned off.
Adjusting the Spam Score Limit
SpamAssassin evaluates each incoming email and assigns it a score based on its spam-like characteristics. By default, a score of 5 is considered spam, but you can modify the spam score limit based on your preferences:
- A score of 1 will mark all incoming emails as spam.
- A score of 5 (the default setting) is suitable for most users.
- A score of 10 means that only emails with a score above 10 will be marked as spam.
You can view and modify the spam score by clicking on the Spam Threshold Score, where you can adjust the score that will label messages as spam and move them to a separate folder.
Here’s how you can change the default score:
STEP 1: Log in to cPanel (Refer to the steps above if you need guidance on accessing your cPanel.)
STEP 2: Locate the Email section and click on Spam Filters.
STEP 3: Click on the Spam Threshold Score link.
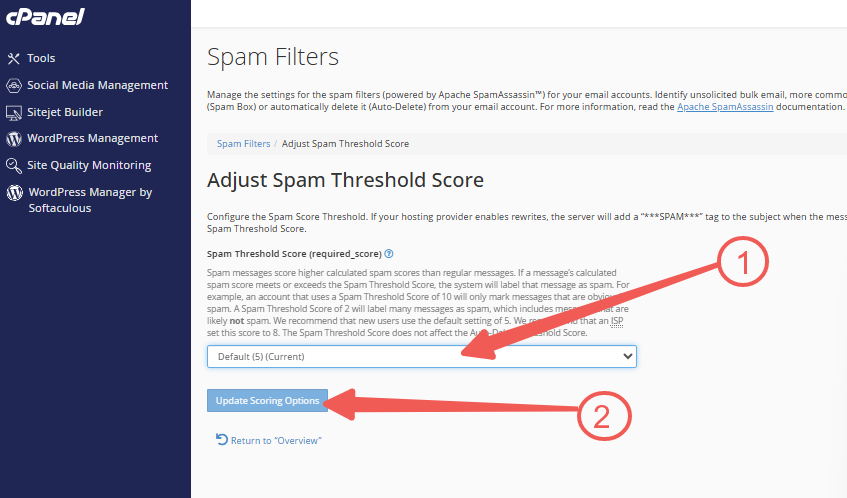
STEP 4: Choose your preferred value from the dropdown menu.
STEP 5: Click Update Scoring Options at the bottom of the page.
Note: Any changes made to these settings will impact all email accounts in your cPanel.


