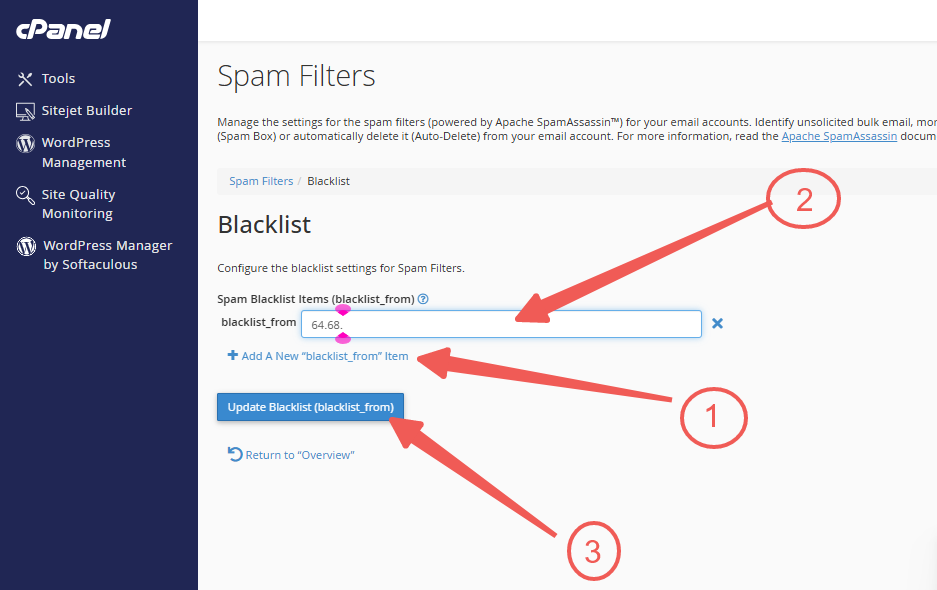
An email blacklist is a compilation of domains and IP addresses believed to be sources of spam emails. This blacklist serves to protect users by reducing spam and minimizing unwanted messages. Spam filters can be used to create a "blacklist" to block undesirable emails. These filters enable you to detect and filter spam as it reaches your server.
Follow these steps to configure spam filters:
STEP 1: Log in to cPanel.
There are three methods to log into your cPanel.
- Method 1: Log in to your cPanel directly.
- Method 2: Log in to your cPanel through your Customer Portal.
Through your Customer Portal;
- Log in to your Customer Portal.
- Click on "Log in to cPanel".
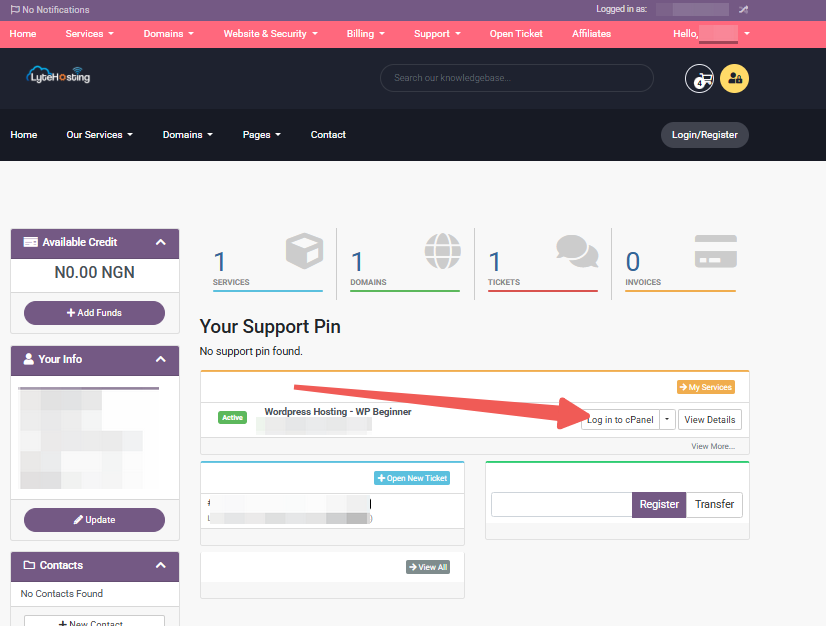
- Method 3: Log in using the details sent to your Email.
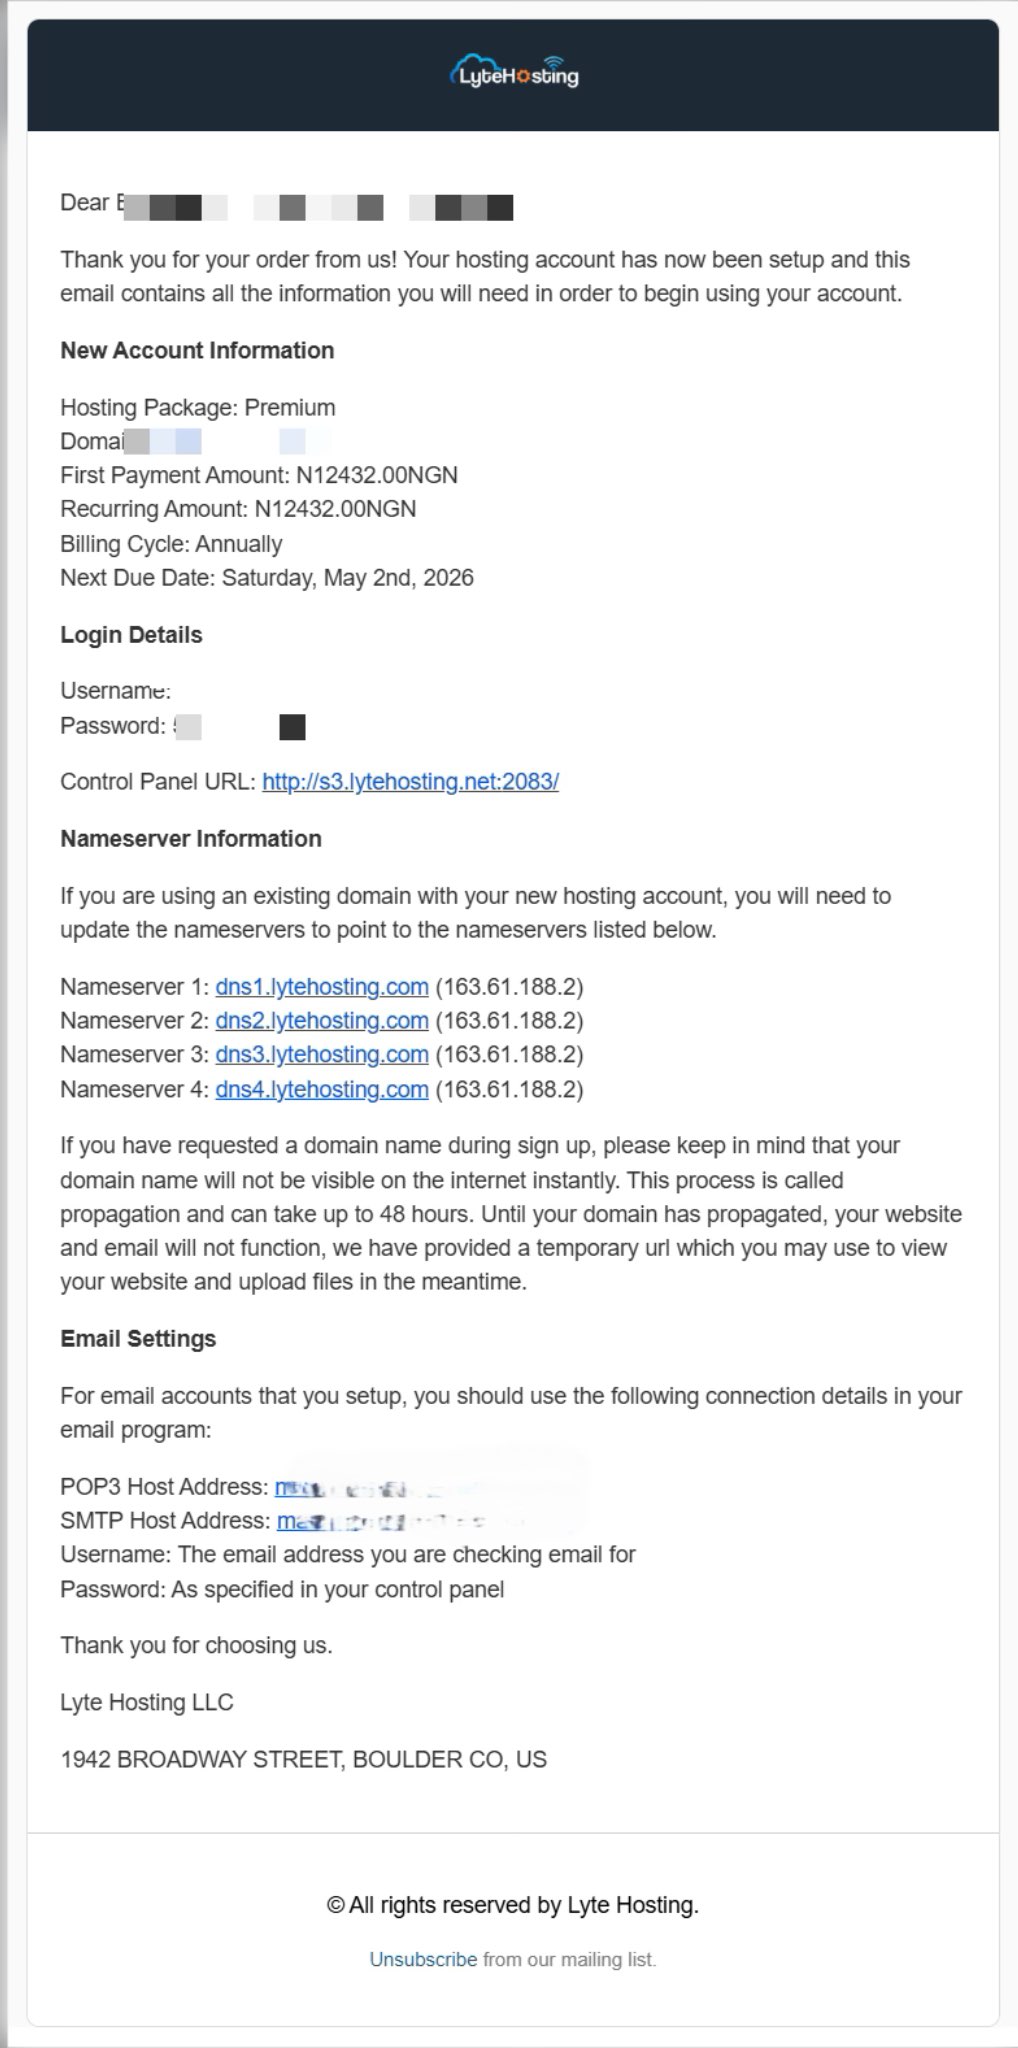
Through your Email;
- When you purchase a hosting plan, your cPanel login details (including username, password, and cPanel URL) are automatically sent to your registered email address. Simply check your inbox (or spam folder), locate the email, and use the provided credentials to access your cPanel.
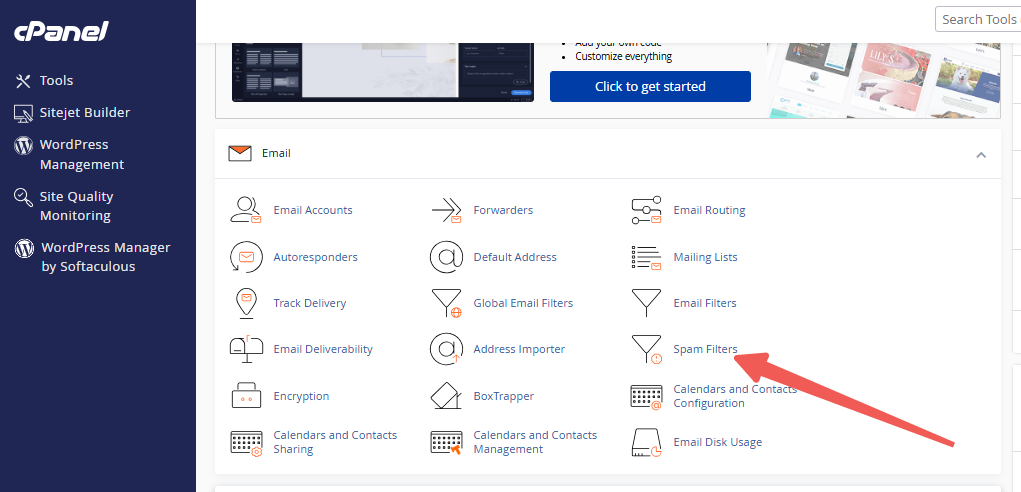
STEP 2: Locate the Email section and click on Spam Filters.
STEP 3: Locate and expand the Additional Configurations section on the Spam Filters page.
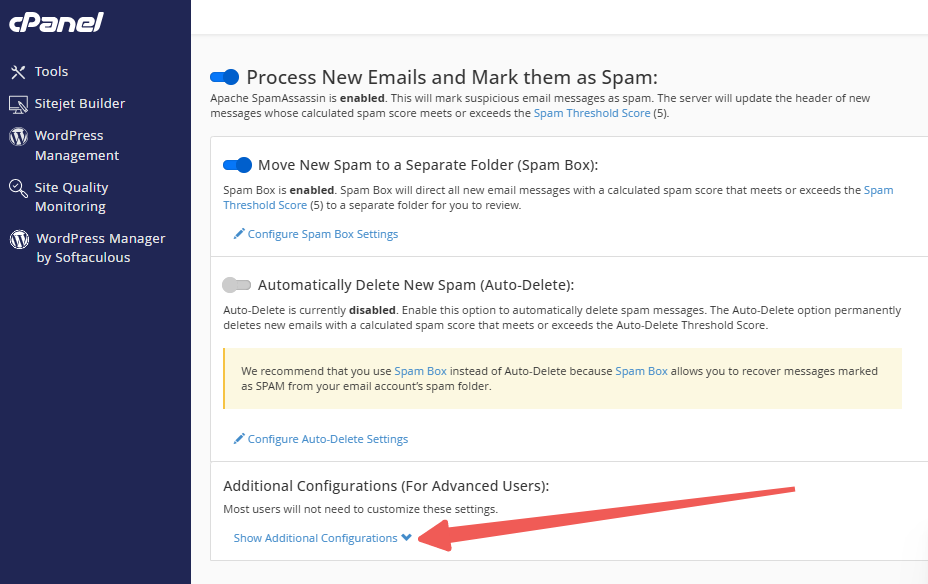
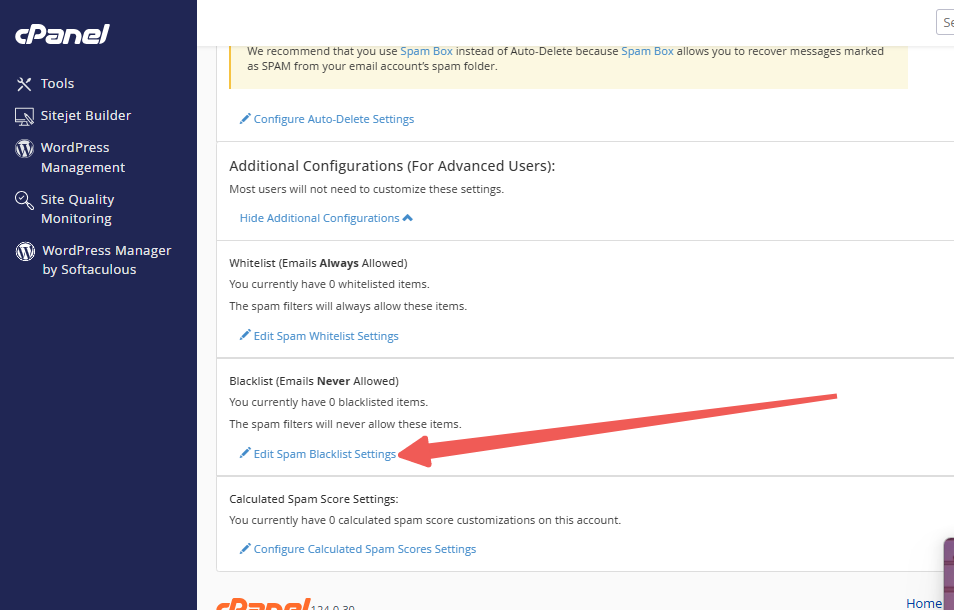
STEP 4: Scroll down to find the Blacklist section.
STEP 5: Click on Edit Spam Blacklist Settings.
STEP 6: Select the Add a New “blacklist_from” Item option.
STEP 7: Enter the domain name or IP address you want to blacklist.
STEP 8: Finally, click on Update Blacklist (blacklist_from) to save your changes.
