Use these procedures to set up Nameservers for your customers:
STEP 1: Enter your Client Area login information.
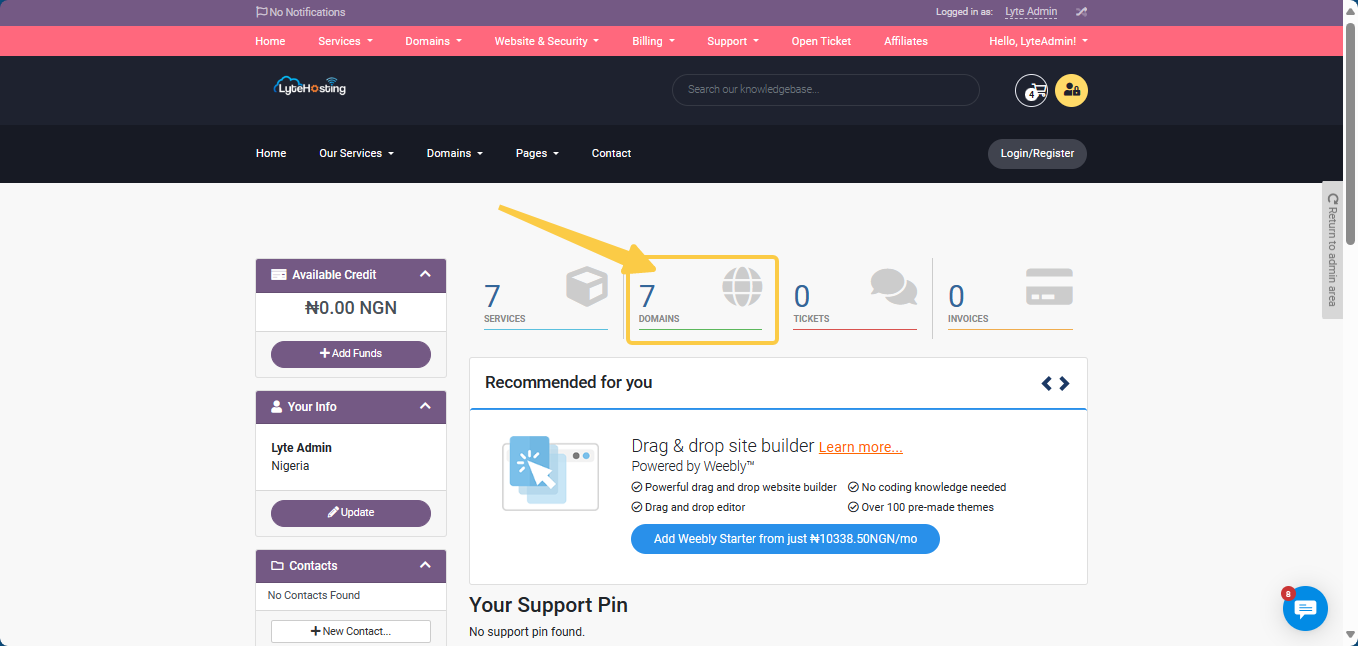
STEP 2: Click on Domains.
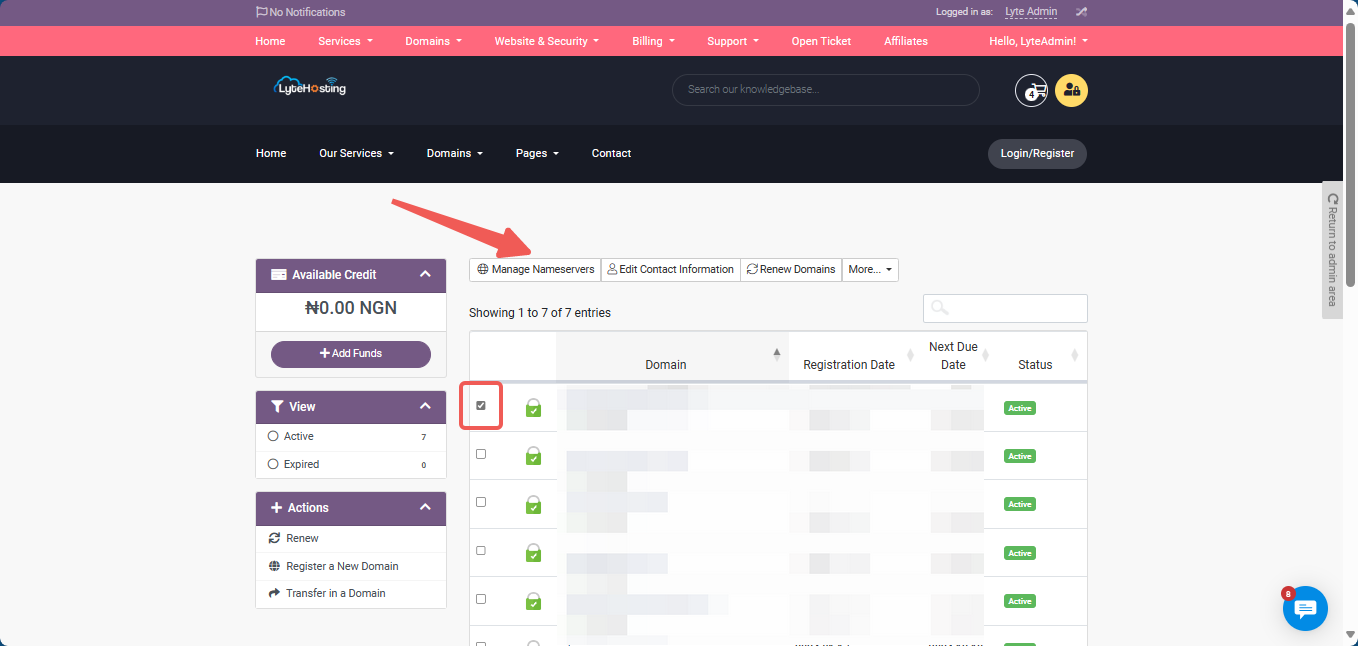
STEP 3: Mark the domain name that will be using the custom nameserver in the Domain section. Then select Manage Nameservers.
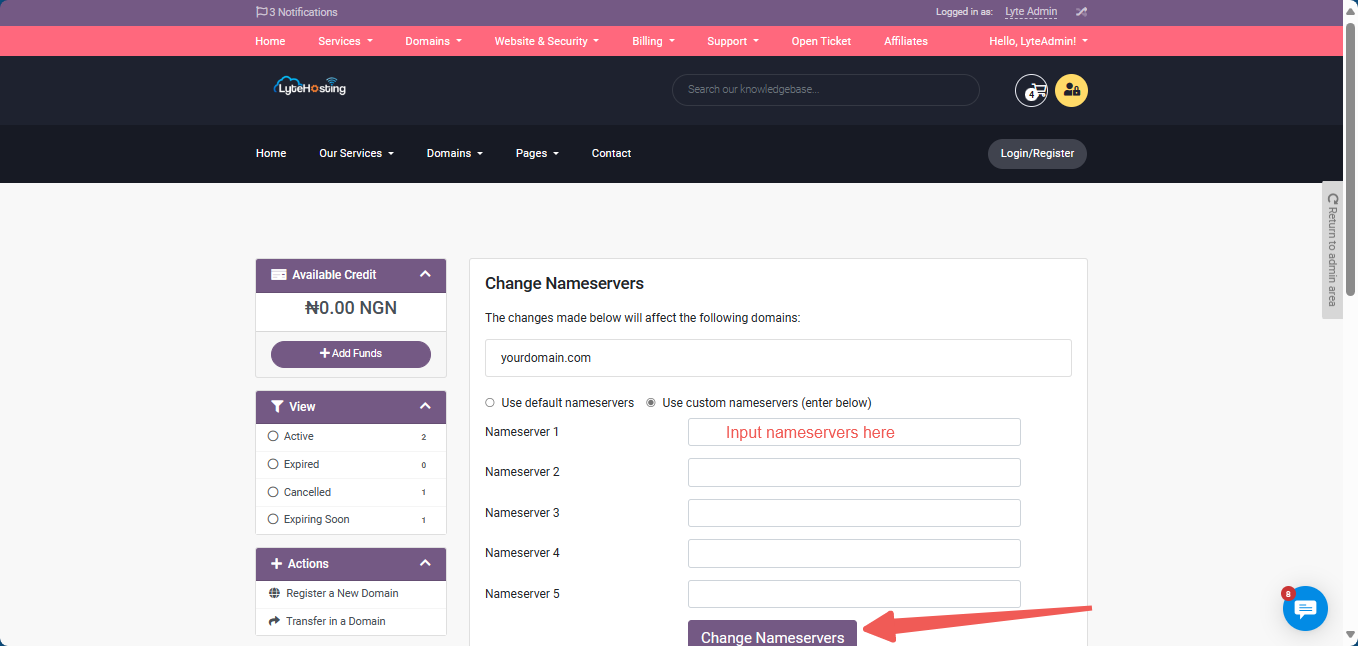
STEP 4: Click Change Nameservers after entering the New Nameservers.
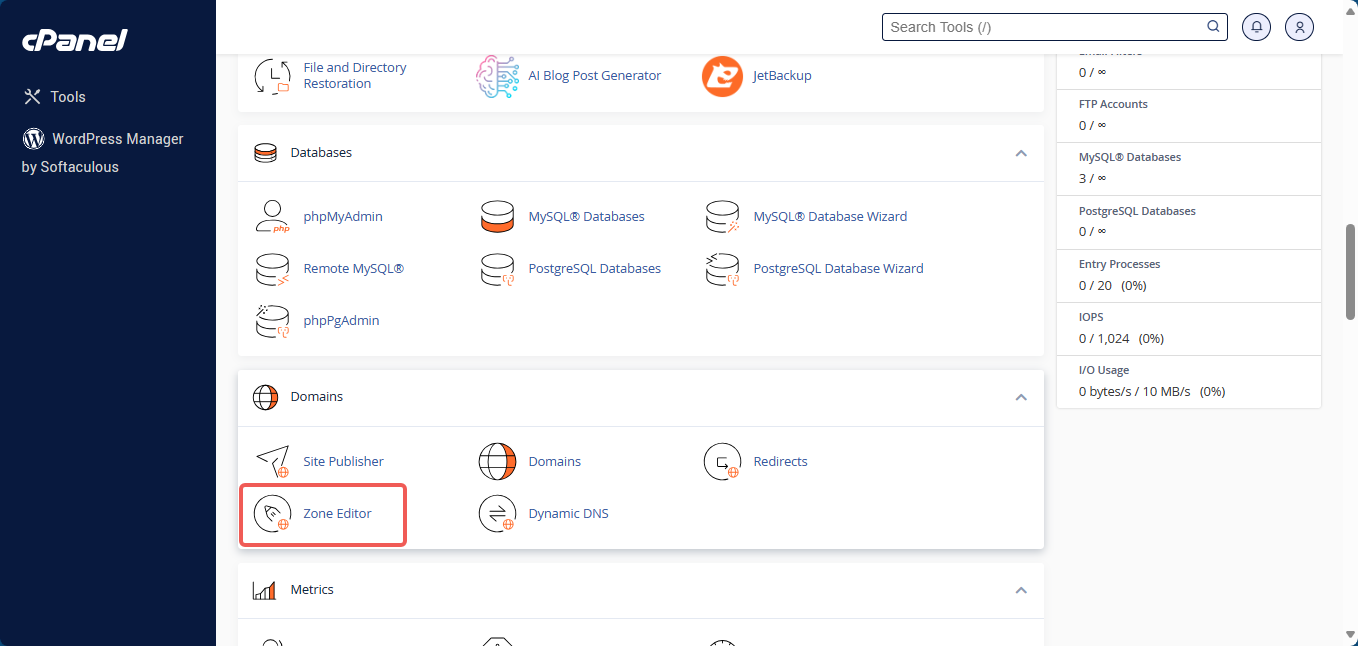
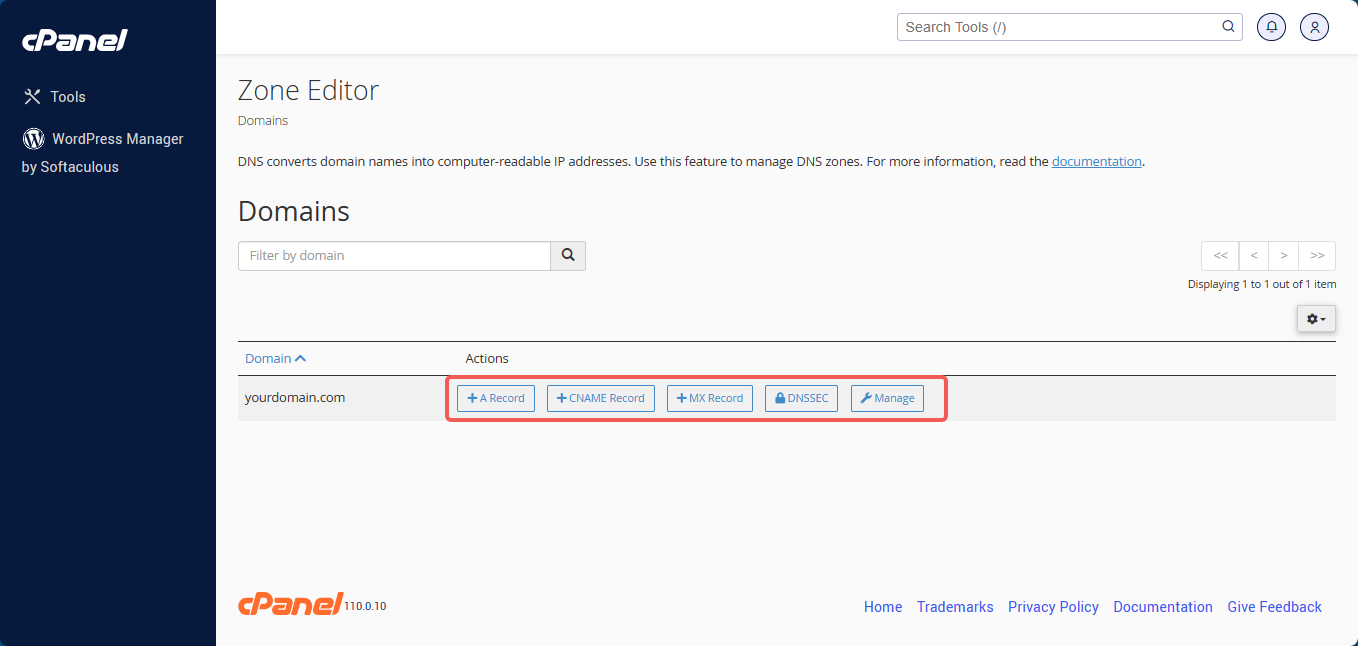
STEP 5: To proceed, click Continue in the Manage Nameservers (DNS) popup window. For the DNS Management, you will make use of the cPanel by clicking on the Domains Section - Zone Editor - Manage - Add Record.
The Client Area and your Lytehosting Welcome email contain your custom nameserver information. Please get in touch with us through live chat, email or our social media platforms (Instagram, Facebook, Twitter, TikTok: @lytehosting) if you need help obtaining your custom nameserver information.
What to anticipate following the setup;
Registering your customer nameservers could take a whole day or two. All of your domain names can be configured to use these custom name servers once your name servers have been officially registered. Propagation is the term for this delay that affects all domains with any registrar, not just those hosted by Lytehosting.


