To view detailed information about your server’s PHP configuration, you can create a simple phpinfo.php file for your primary domain. Follow the steps below to generate and access this file.
STEP 1: Log in to cPanel.
There are three methods to log into your cPanel.
- Method 1: Log in to your cPanel directly.
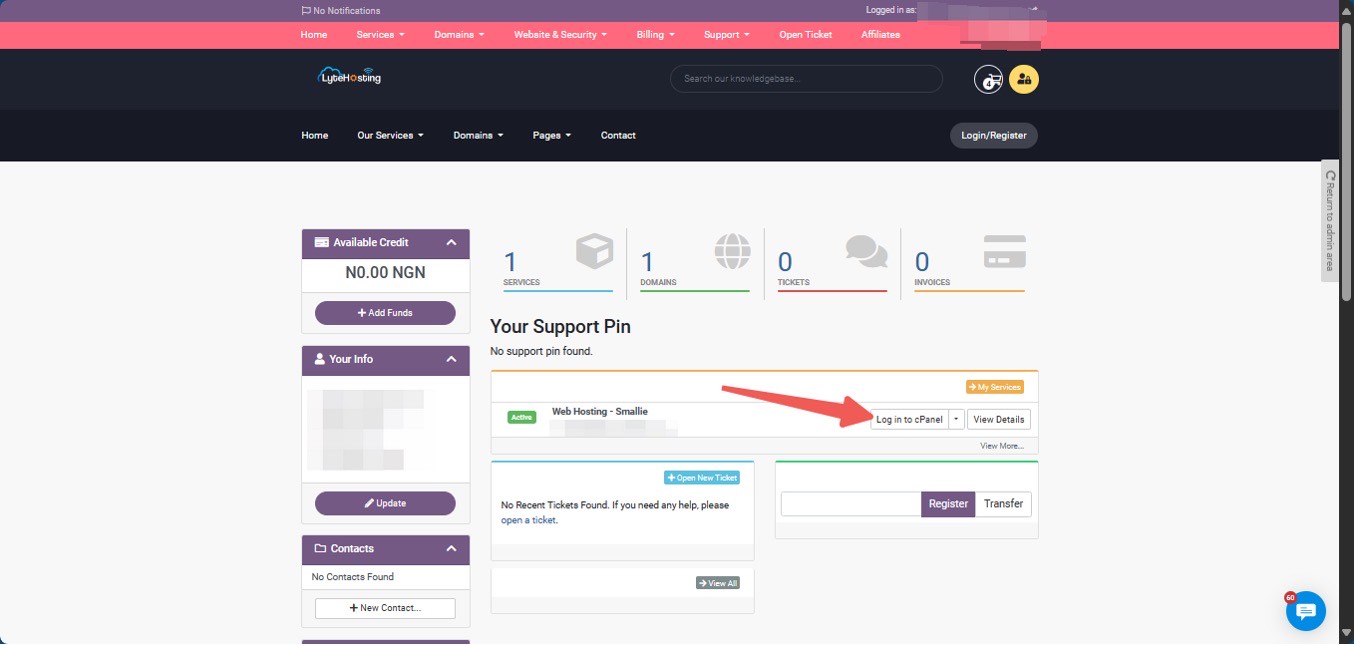
- Method 2: Log in to your cPanel through your Customer Portal.
Through your Customer Portal;
- Log in to your Customer Portal.
- Click on "Log in to cPanel".
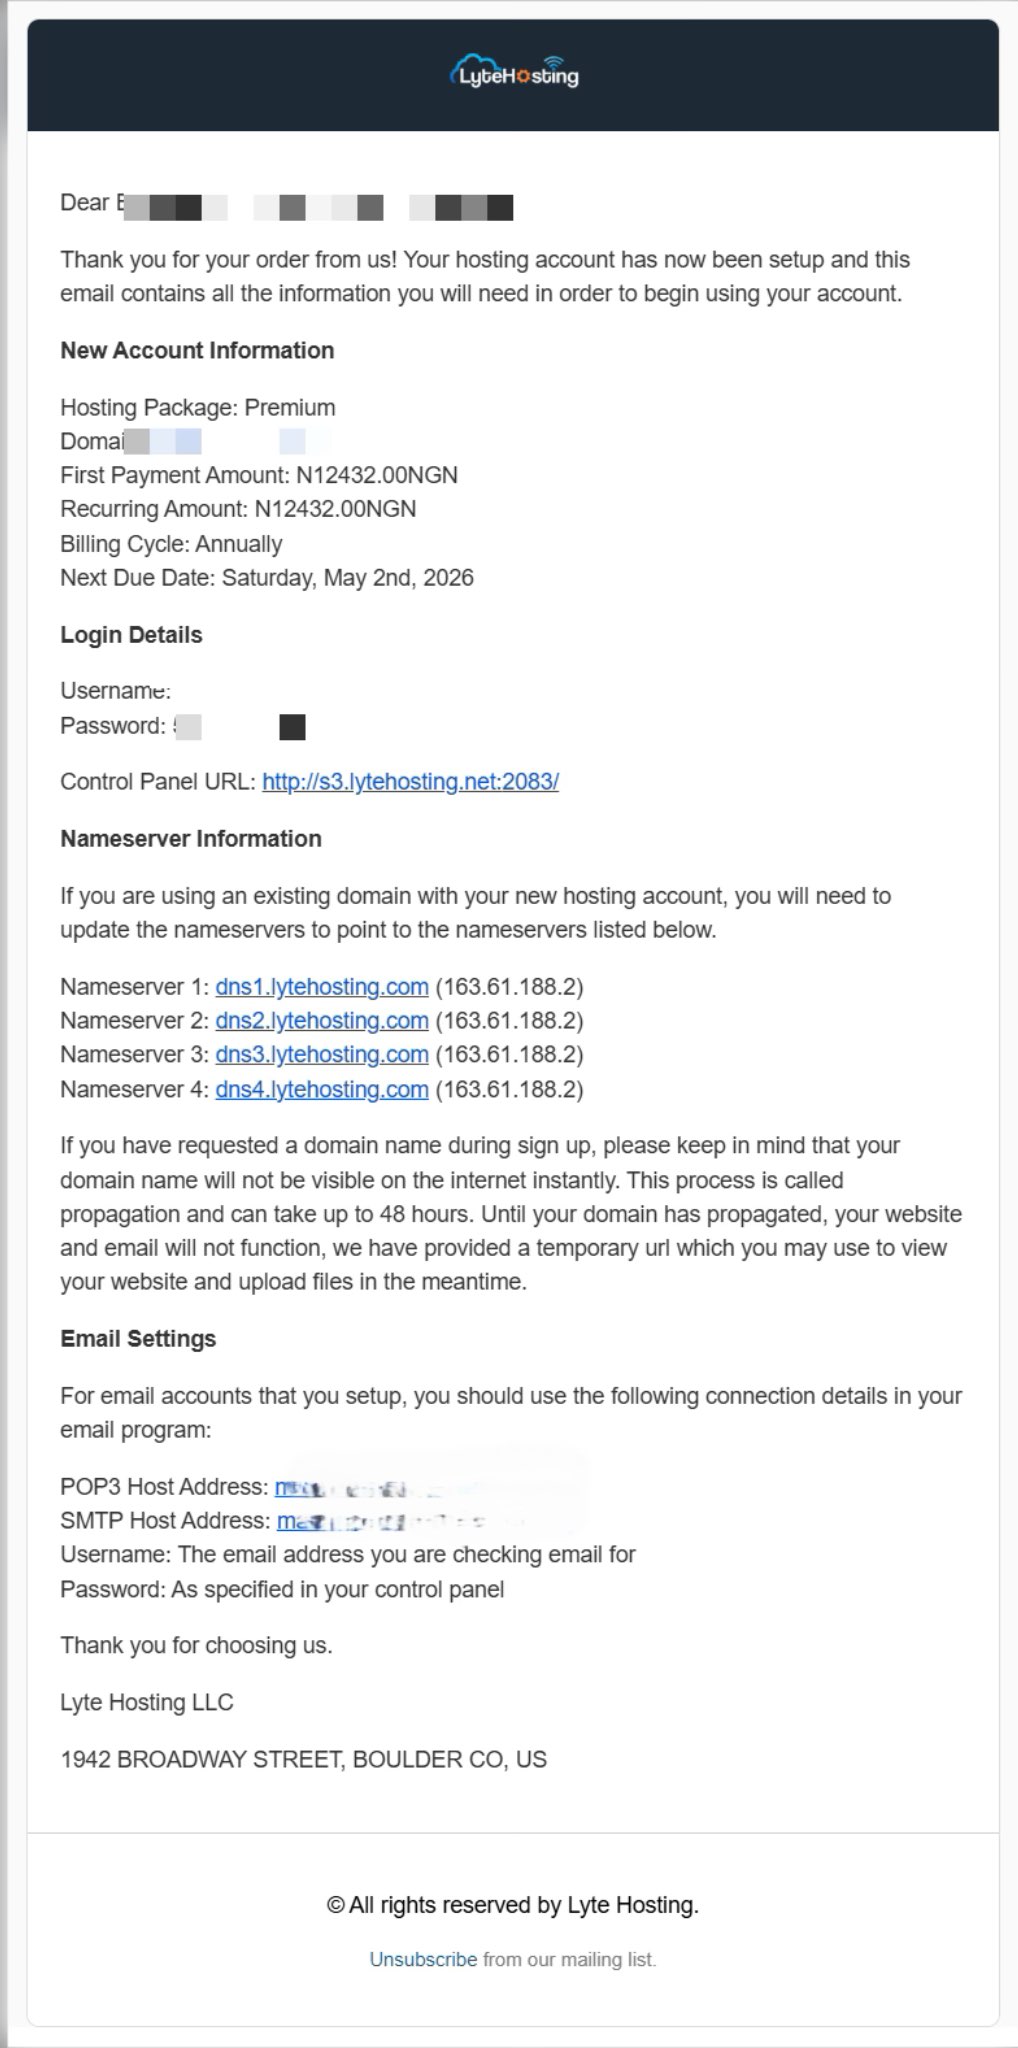
- Method 3: Log in using the details sent to your Email.
Through your Email;
- When you purchase a hosting plan, your cPanel login details (including username, password, and cPanel URL) are automatically sent to your registered email address. Simply check your inbox (or spam folder), locate the email, and use the provided credentials to access your cPanel.
STEP 2: Locate the Files section and click File Manager.

STEP 3: On the next page, find and select public_html from the list.
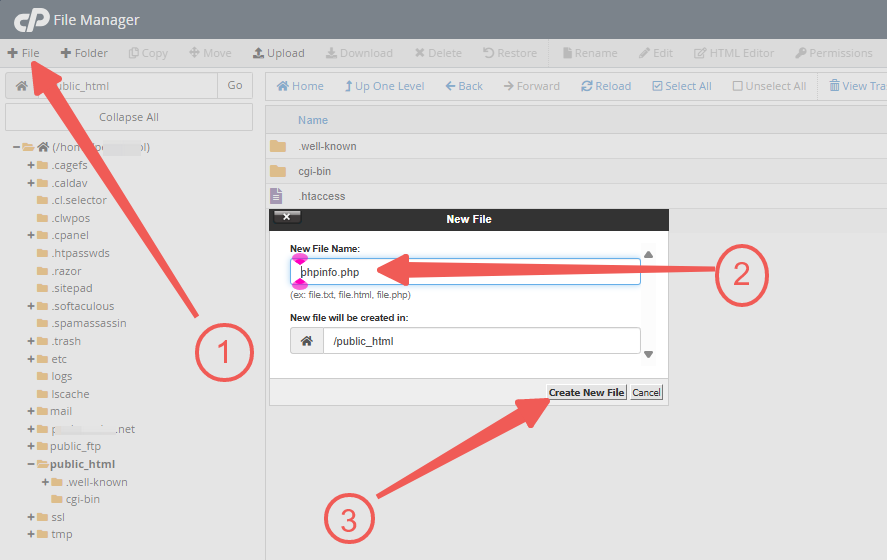
STEP 4: In the top-right menu, click +File.
STEP 5: When prompted to create a new file, enter phpinfo.php as the name. You can use any name, but phpinfo.php is commonly chosen for this purpose.
STEP 6: Click the Create New File button.
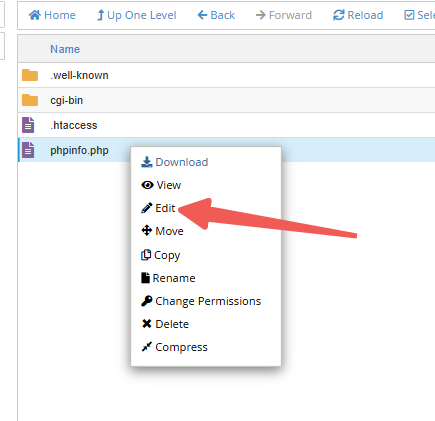
STEP 7: Find and right-click on phpinfo.php in your file list.
STEP 8: Select Edit.
STEP 9: Insert one of the following code options into the phpinfo.php file:
Show All PHP Information
Use the following code to display all PHP information:
<?php phpinfo(); // Displays all available PHP information. ?>
Show Installed Modules
Use this code to view installed PHP modules and their current values:
<?php phpinfo(INFO_MODULES); // Displays installed modules and their current values. ?>
Show php.ini Configurations
Use this code to display your custom php.ini configurations or review default settings:
<?php phpinfo(INFO_CONFIGURATION); // Displays php.ini configurations. ?>
STEP 10: Click Save Changes to finalize the file.

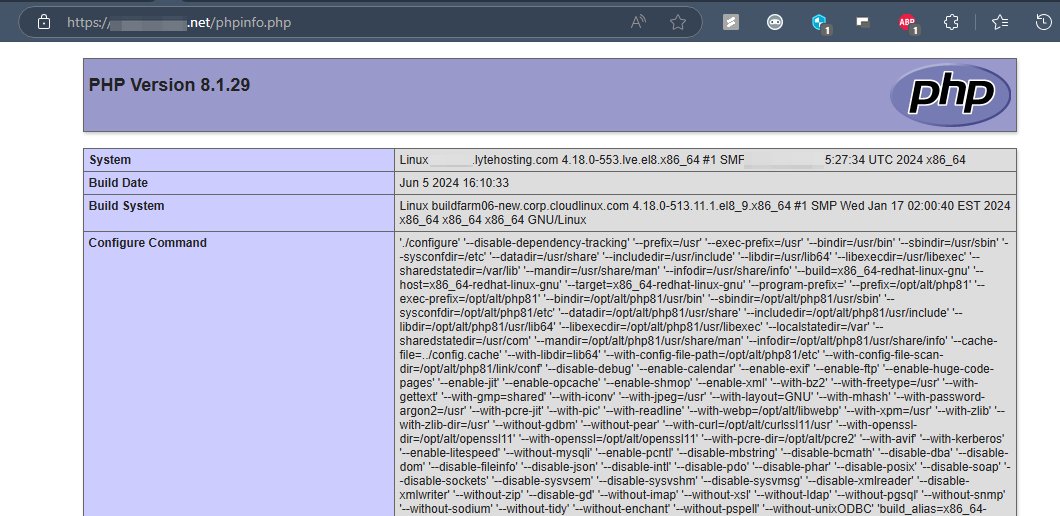
Checking PHP Information Using a Browser
You should have a phpinfo.php file in your public_html directory by now. So, all that’s left is to access the file by adding /phpinfo.php at the end of your domain name.