Exporting a database, also referred to as creating a database dump, allows you to back up your data or move it to another server. Here’s how to do it:
How to Access phpMyAdmin in your cPanel:
Once your database is created, follow these steps to access it via phpMyAdmin:
STEP 1: Log in to cPanel.
There are three methods to log into your cPanel.
- Method 1: Log in to your cPanel directly.
- Method 2: Log in to your cPanel through your Customer Portal.
Through your Customer Portal;
- Log in to your Customer Portal.
- Click on "Log in to cPanel".
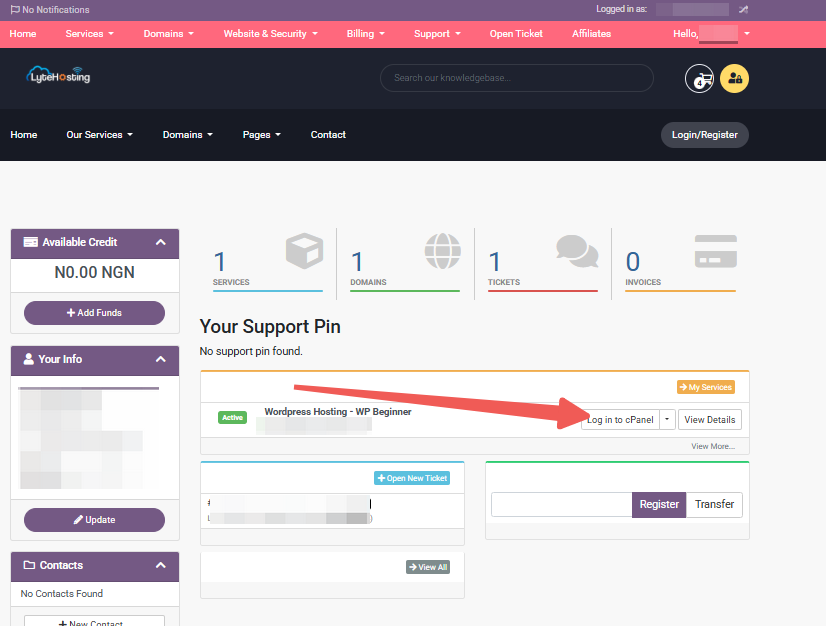
- Method 3: Log in using the details sent to your Email.
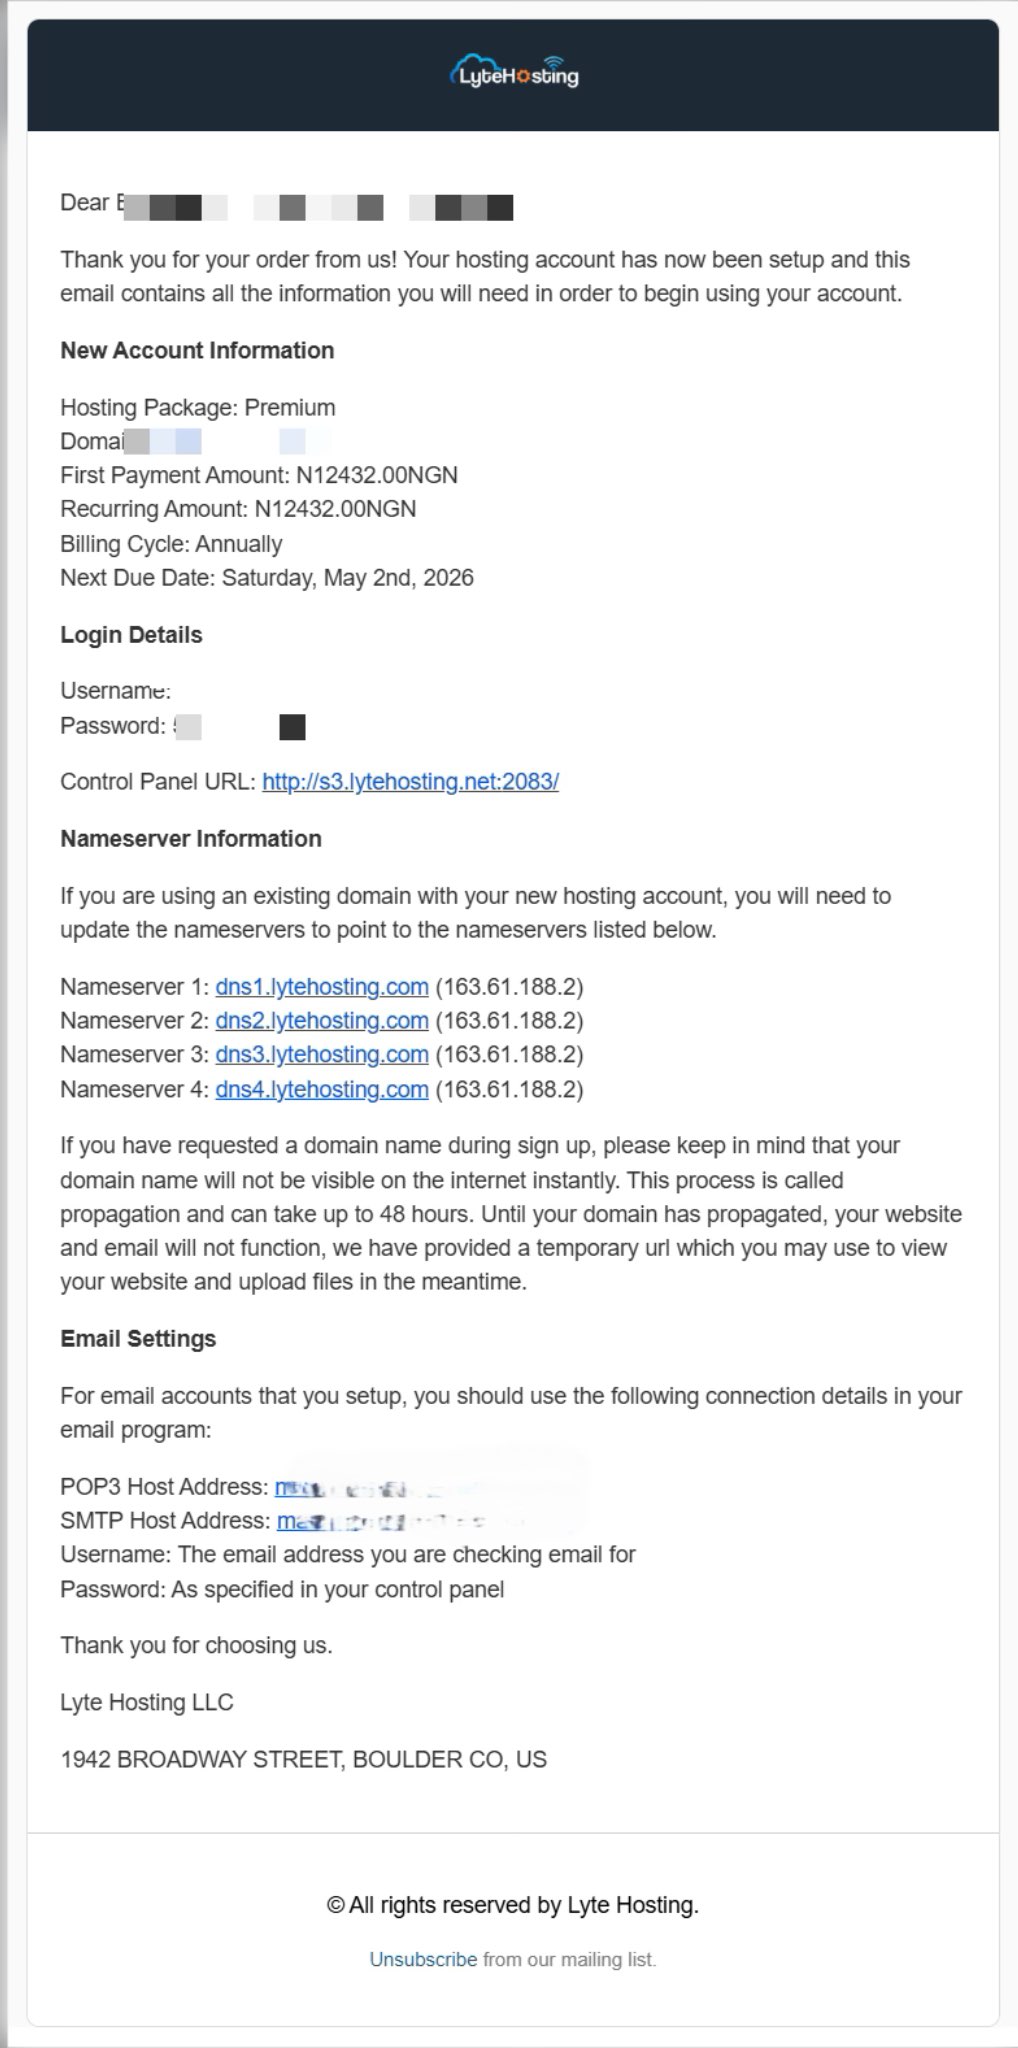
Through your Email;
- When you purchase a hosting plan, your cPanel login details (including username, password, and cPanel URL) are automatically sent to your registered email address. Simply check your inbox (or spam folder), locate the email, and use the provided credentials to access your cPanel.
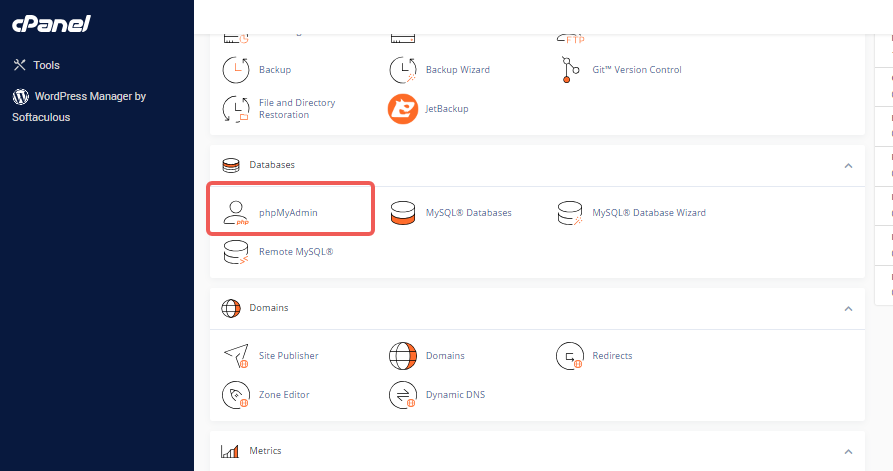
STEP 2: In the Databases section, click on phpMyAdmin.
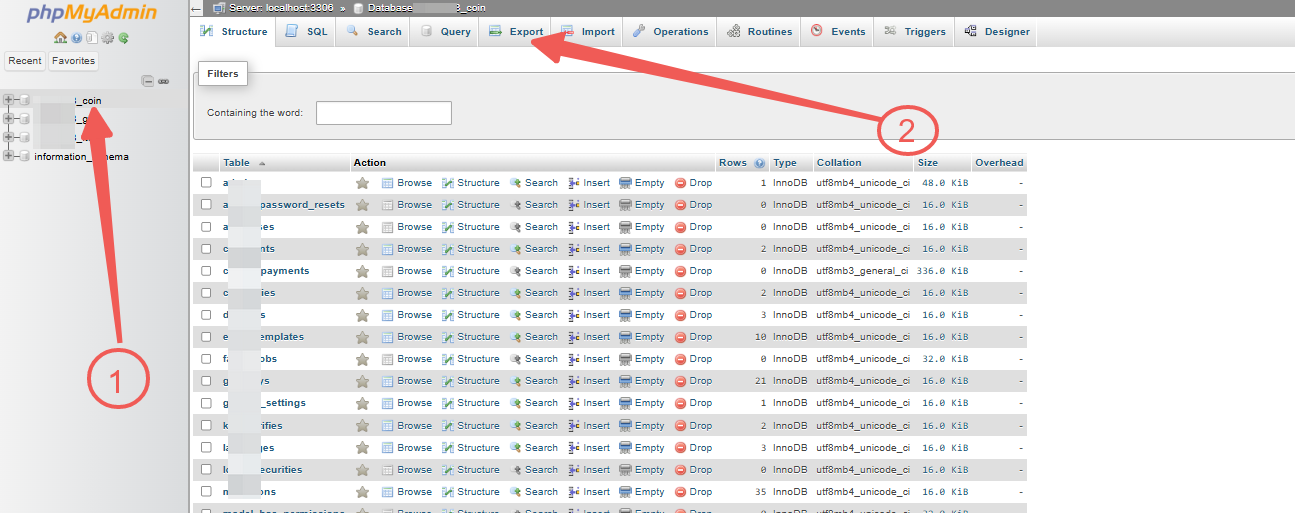
STEP 3: Once on the phpMyAdmin homepage, locate the username panel on the top left-side.
STEP 4: Expand the username to view a list of all available databases associated with your account.
STEP 5: Select the database you wish to export from the list of available databases in phpMyAdmin.
STEP 6: Click the Export tab located on the top menu.
STEP 7: By default, the Quick Export method will be selected.
STEP 8: Scroll down and click Export.
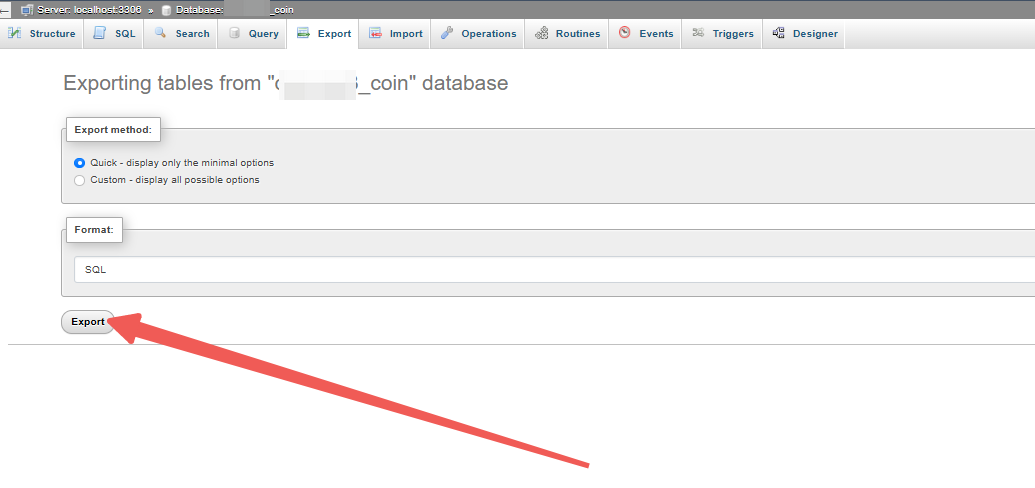
This will download a .sql file into your computer. Depending on the database's size, the downloading may take some time..
Exporting a Database through cPanel's Backup Feature
As an alternative to phpMyAdmin, you can use cPanel’s Backup tool to export your database.
STEP 1: Log in to cPanel (Refer to the steps above if you need guidance on accessing your cPanel.)
STEP 2: Locate the Files section and click on Backup.
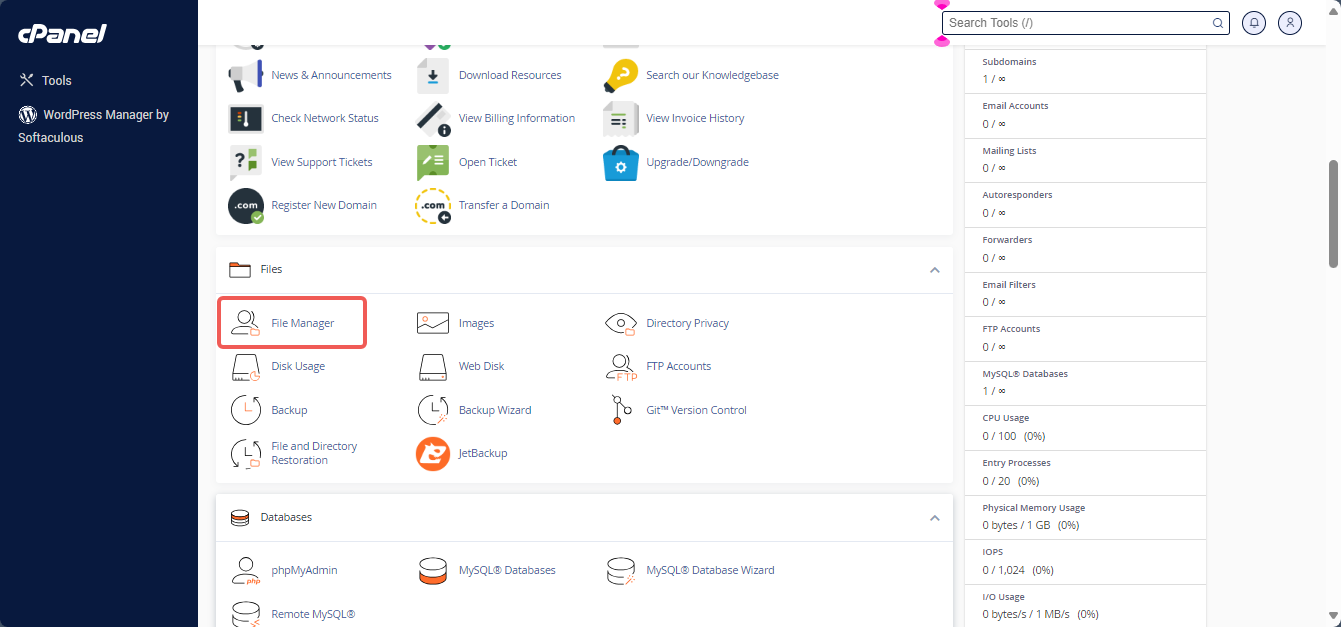
STEP 3: Scroll down the Backup page to find the Download a MySQL Database Backup section.
STEP 4: Locate and click on the name of the database you want to back up.

The system will generate and download the backup file to your device.


