The phpMyAdmin tool enables users to remove a specific column from a table without deleting the entire table. This guide explains the steps to permanently delete columns from a database table using phpMyAdmin.
Before proceeding with any irreversible actions, like deleting database columns or tables, it is highly advisable to create a backup. Without a backup, recovering accidentally deleted data will not be possible.
To drop a table from your database:
STEP 1: Log in to cPanel.
There are three methods to log into your cPanel.
- Method 1: Log in to your cPanel directly.
- Method 2: Log in to your cPanel through your Customer Portal.
Through your Customer Portal;
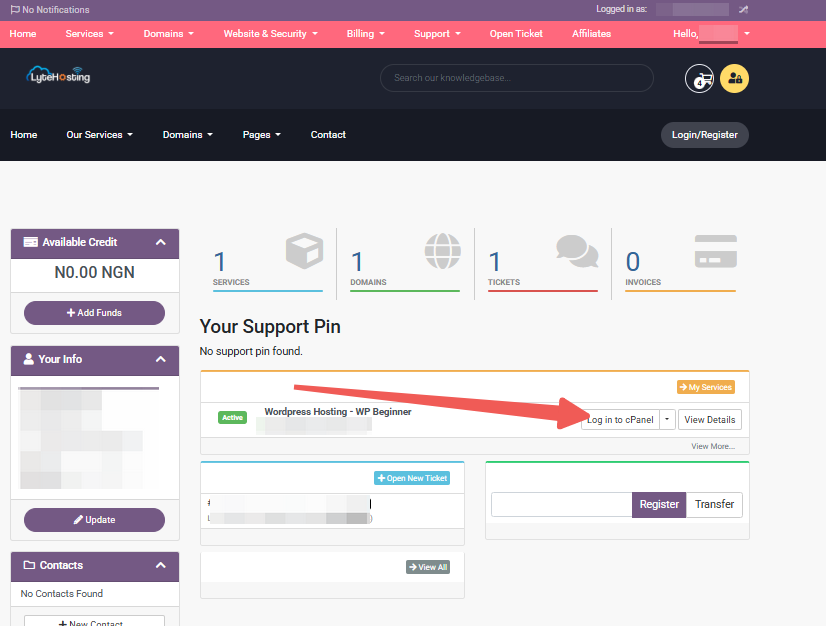
- Log in to your Customer Portal.
- Click on "Log in to cPanel".

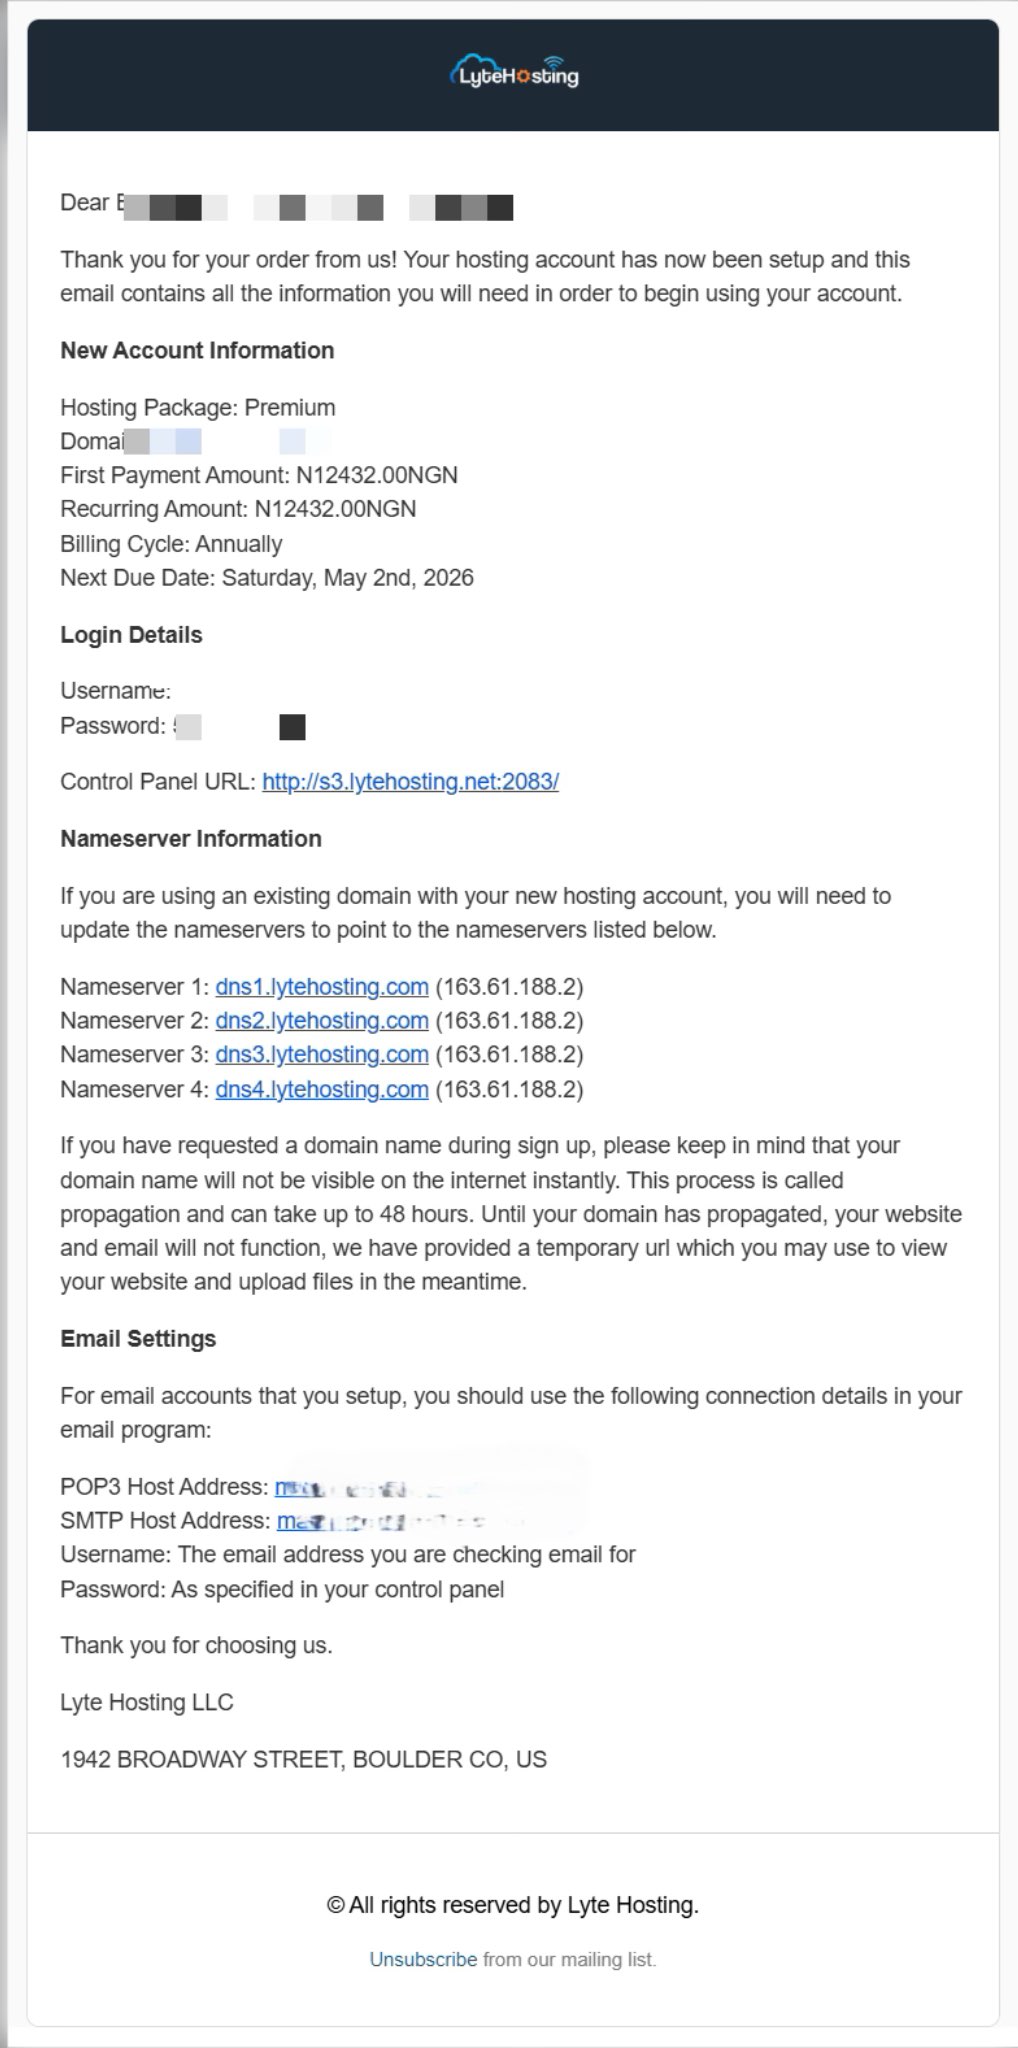
- Method 3: Log in using the details sent to your Email.
Through your Email;
- When you purchase a hosting plan, your cPanel login details (including username, password, and cPanel URL) are automatically sent to your registered email address. Simply check your inbox (or spam folder), locate the email, and use the provided credentials to access your cPanel.

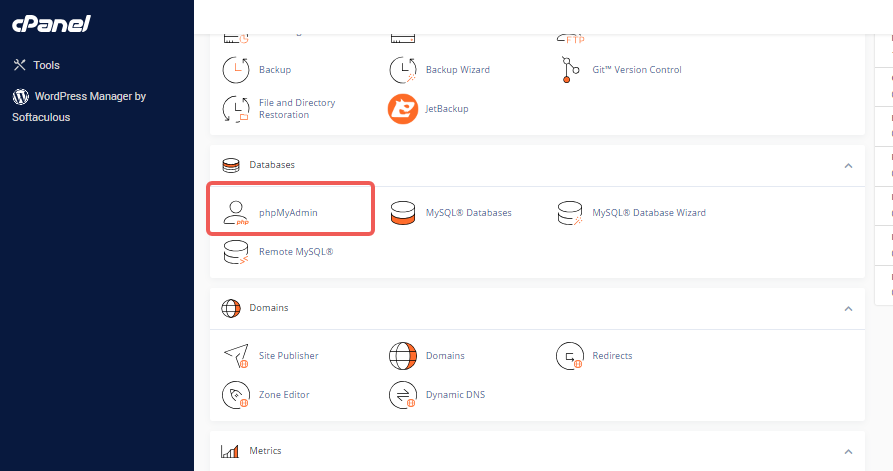
STEP 2: Locate the Databases section and click on phpMyAdmin.

STEP 3: In phpMyAdmin, find the database name in your list of databases and click the expand (+) icon.
STEP 4: From the displayed tables under the selected database, click the expand (+) icon for your chosen table.
STEP 5: Click Columns.
![]()
STEP 6: In the Structure tab under Columns, identify and select the column name(s) you want to delete permanently.
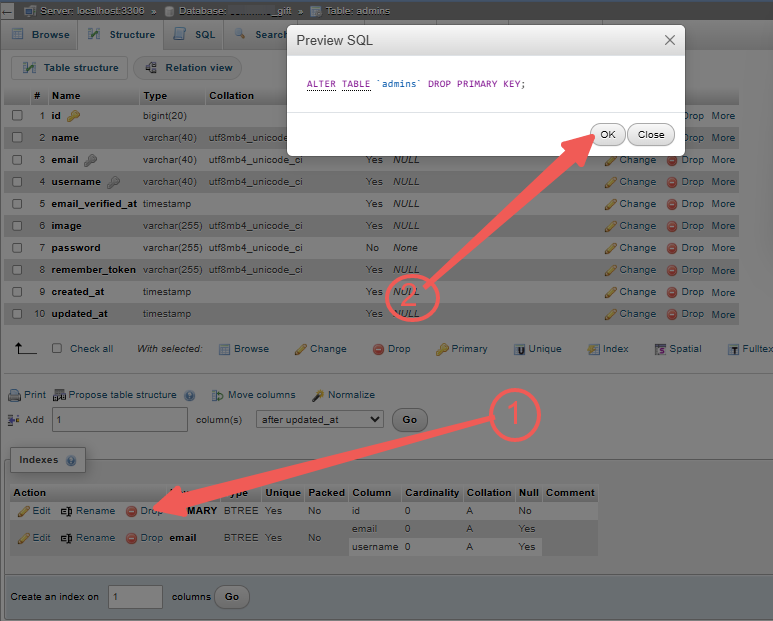
STEP 7: Then, click on ‘Drop’ from the list of available actions, as illustrated below.

STEP 8: phpMyAdmin will display the SQL command it intends to execute:
ALTER TABLE 'your_selected_table'
DROP 'your_selected_column';
STEP 9: Ensure that the column displayed is the one you want to delete. Click ‘OK’ to confirm the deletion.


