In phpMyAdmin, the Optimize Table feature is beneficial when removing a substantial portion of a table or modifying tables with variable-length rows, such as those containing VARCHAR, TEXT, BLOB, or VARBINARY columns. Deleted rows are stored in a linked list, allowing new insert operations to reuse their space. Optimizing the table helps reclaim unused space and defragment the data file, improving overall efficiency. This process can significantly enhance performance for tables that experience frequent updates or changes.
Access phpMyAdmin
To open phpMyAdmin through cPanel:
STEP 1: Log in to cPanel.
There are three methods to log into your cPanel.
- Method 1: Log in to your cPanel directly.
- Method 2: Log in to your cPanel through your Customer Portal.
Through your Customer Portal;
- Log in to your Customer Portal.
- Click on "Log in to cPanel".
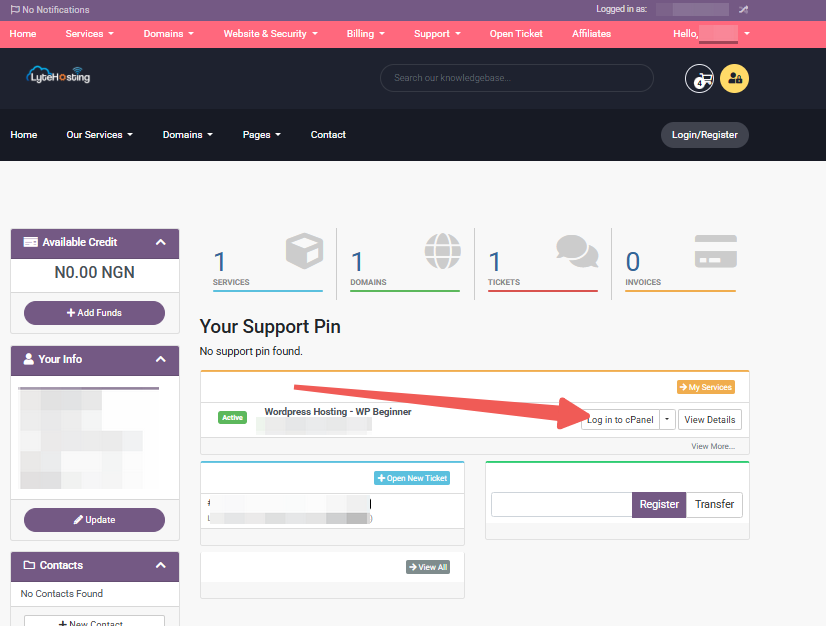
- Method 3: Log in using the details sent to your Email.
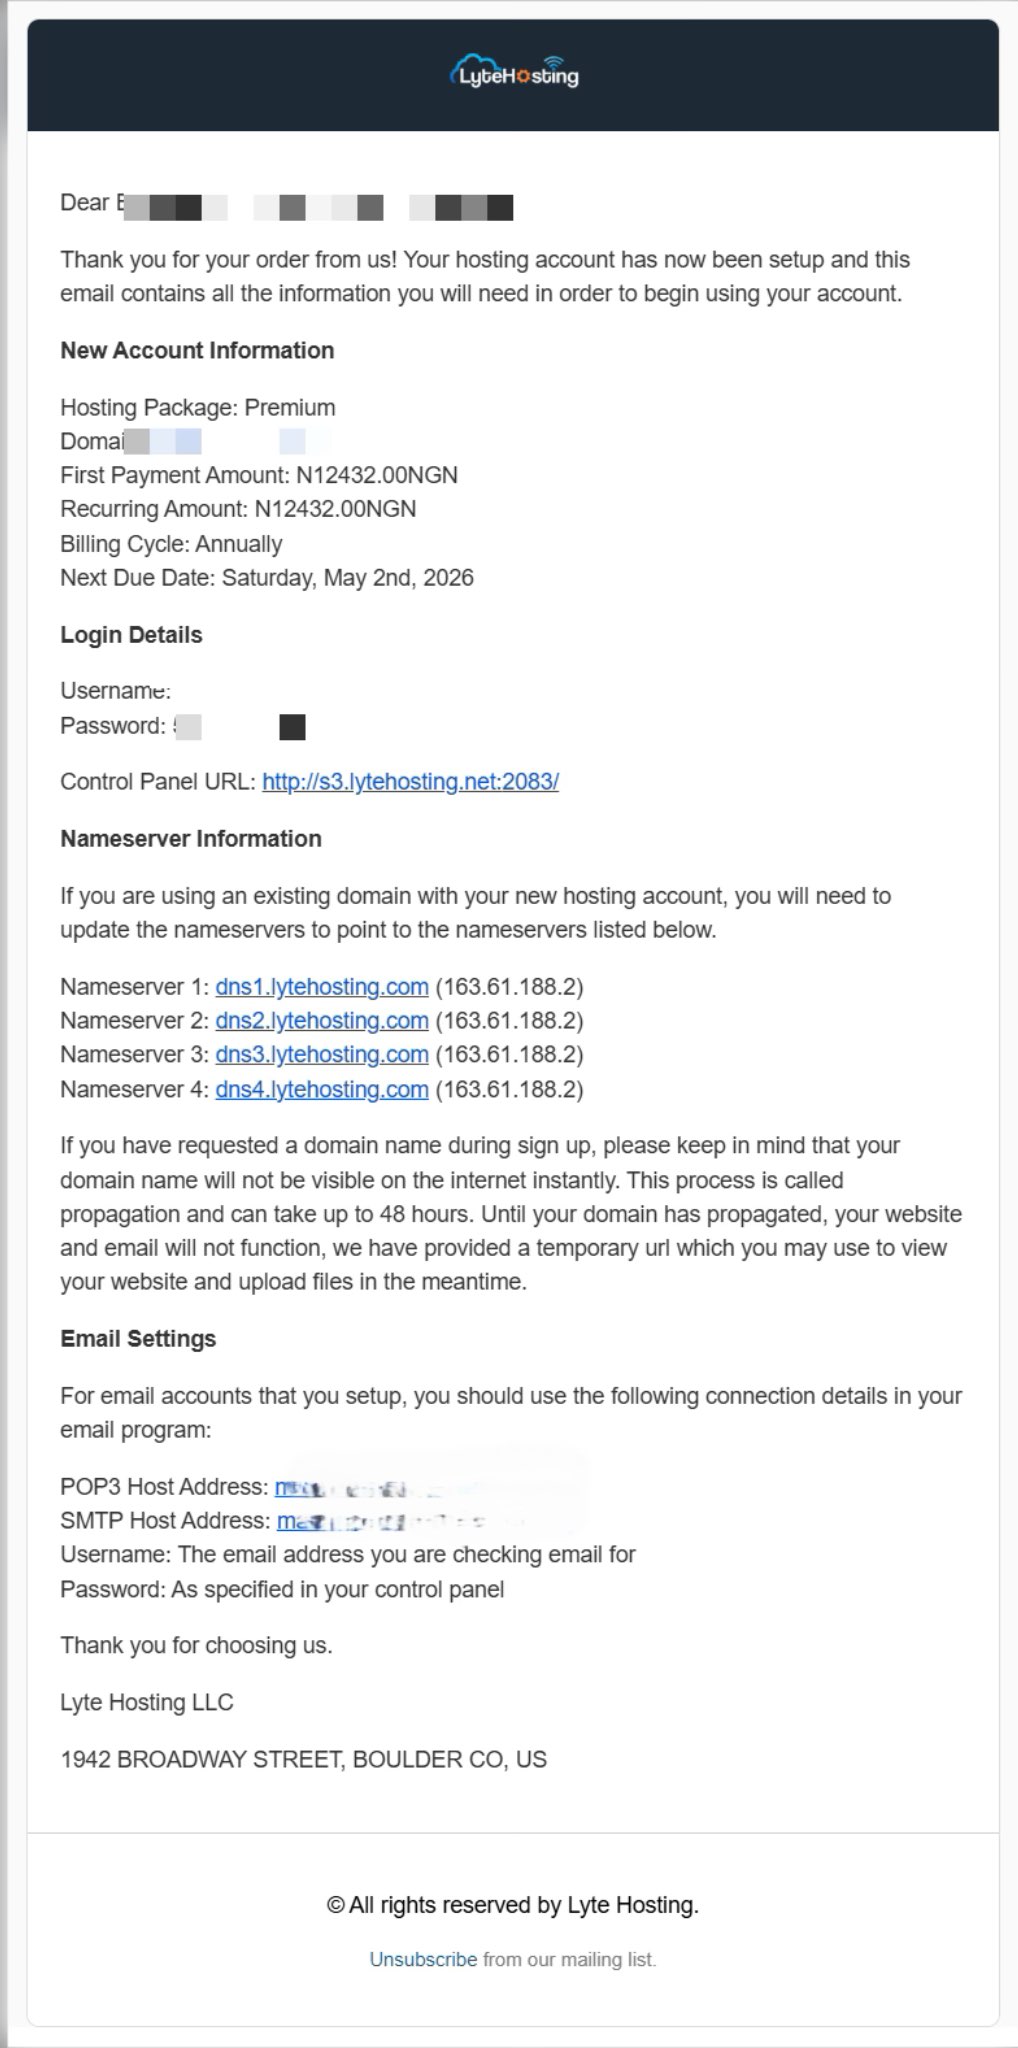
Through your Email;
- When you purchase a hosting plan, your cPanel login details (including username, password, and cPanel URL) are automatically sent to your registered email address. Simply check your inbox (or spam folder), locate the email, and use the provided credentials to access your cPanel.
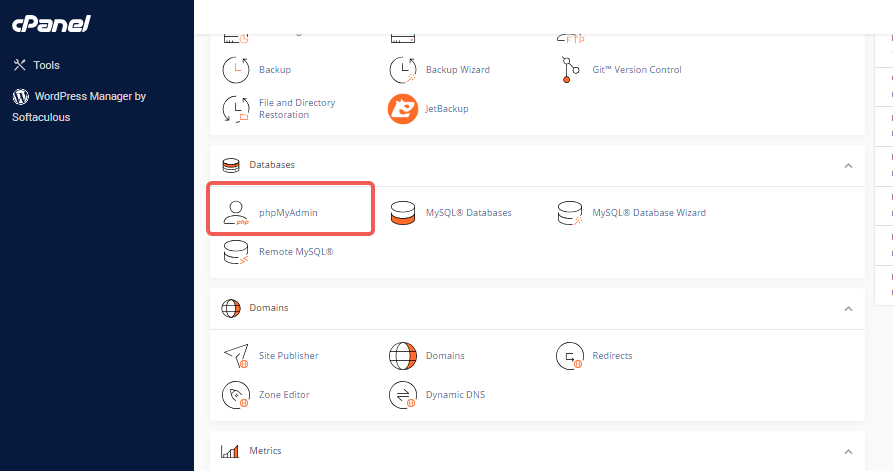
STEP 2: Locate the Databases section and click phpMyAdmin.
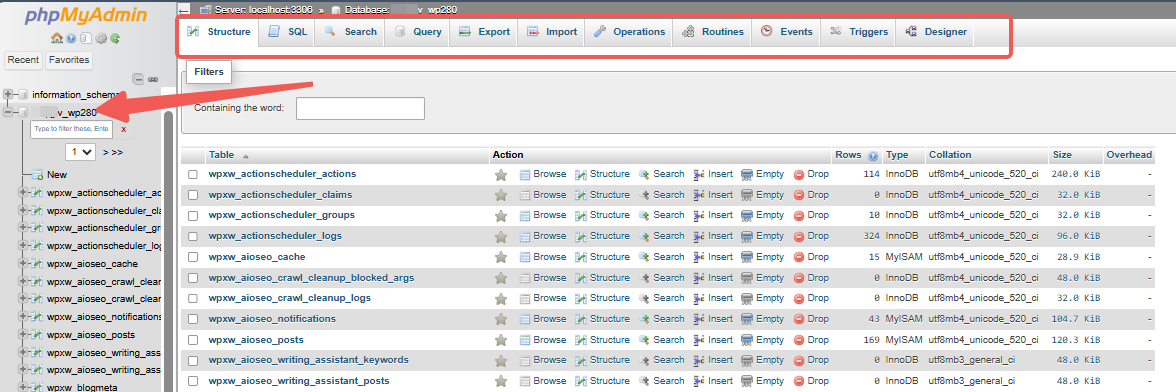
STEP 3: On the next page, select your username from the left-side menu. This will bring up a list of your available databases.
STEP 4: After selecting a database, various actions and tabs will be displayed, allowing you to manage the chosen database effectively.
Optimizing Table Performance
STEP 1: On the phpMyAdmin homepage, choose the database you want to optimize from the list in the left-side panel, which will usually direct you to the Structure tab by default.
STEP 2: A detailed list of tables will appear on both the left and right panels.
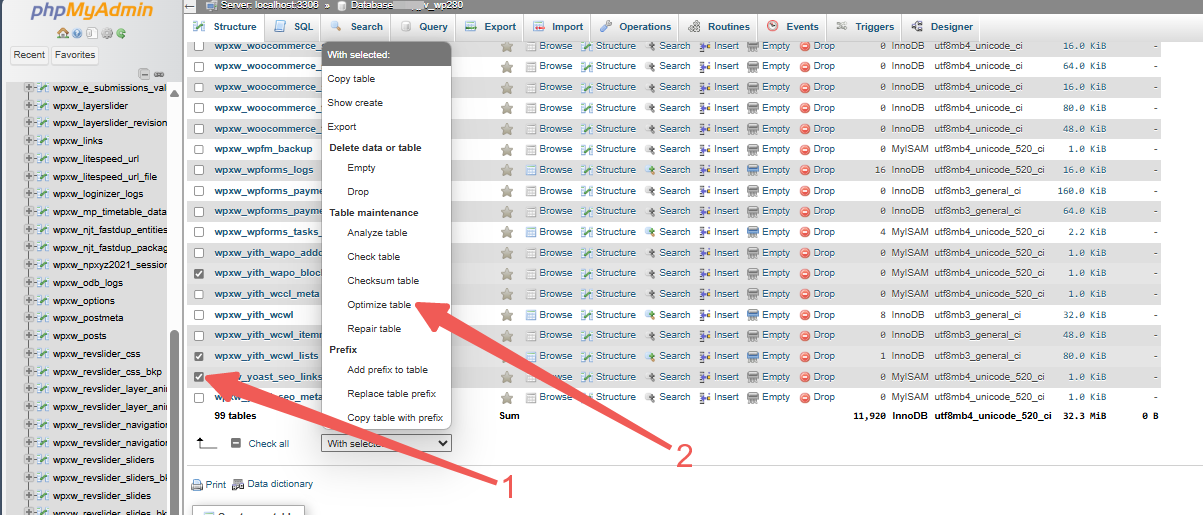
STEP 3: Check the box next to the table(s) you wish to optimize.
STEP 4: At the bottom of the page, open the With selected drop-down menu and locate the Table Maintenance option.
STEP 5: From the list, select Optimize Table to start the optimization process.
A confirmation message will appear at the top of the screen, indicating that the query has been successfully executed.


