A TXT record (Text Record) is a type of DNS record used to store text-based information about your domain. It’s often required for domain verification, for example, when setting up services like Google Workspace, Microsoft 365, or email authentication (SPF, DKIM, DMARC).
Adding a TXT record helps verify that you own the domain and ensures external services can trust the connection or configuration associated with it.
What is a TXT Record?
A TXT record allows domain owners to attach arbitrary text data to their DNS zone. This data is publicly visible and typically used to verify ownership or authenticate email senders.
Common uses of TXT records include:
- Domain ownership verification (Google, Facebook, etc.).
- Email authentication (SPF, DKIM, and DMARC).
- Service verification for third-party integrations.
For example, Google might ask you to add this TXT record to prove you own your domain:
google-site-verification=abc123xyz
When You Need to Add a TXT Record
You may need to add a TXT record when:
- Verifying your domain with email providers (like Google Workspace or Zoho Mail).
- Connecting your domain to a website builder (like Wix, Squarespace, or Shopify).
- Setting up email security protocols.
- Proving domain ownership to third-party tools or marketing platforms.
How to Add a TXT Record in Your cPanel DNS Zone Editor
If your domain’s DNS is managed through cPanel, follow these steps:
STEP 1: Log in to cPanel.
There are three methods to log into your cPanel.
- Method 1: Log in to your cPanel directly.
- Method 2: Log in to your cPanel through your Customer Portal.
Through your Customer Portal;
- Log in to your Customer Portal.
- Click on "Log in to cPanel".

- Method 3: Log in using the details sent to your Email.
Through your Email;
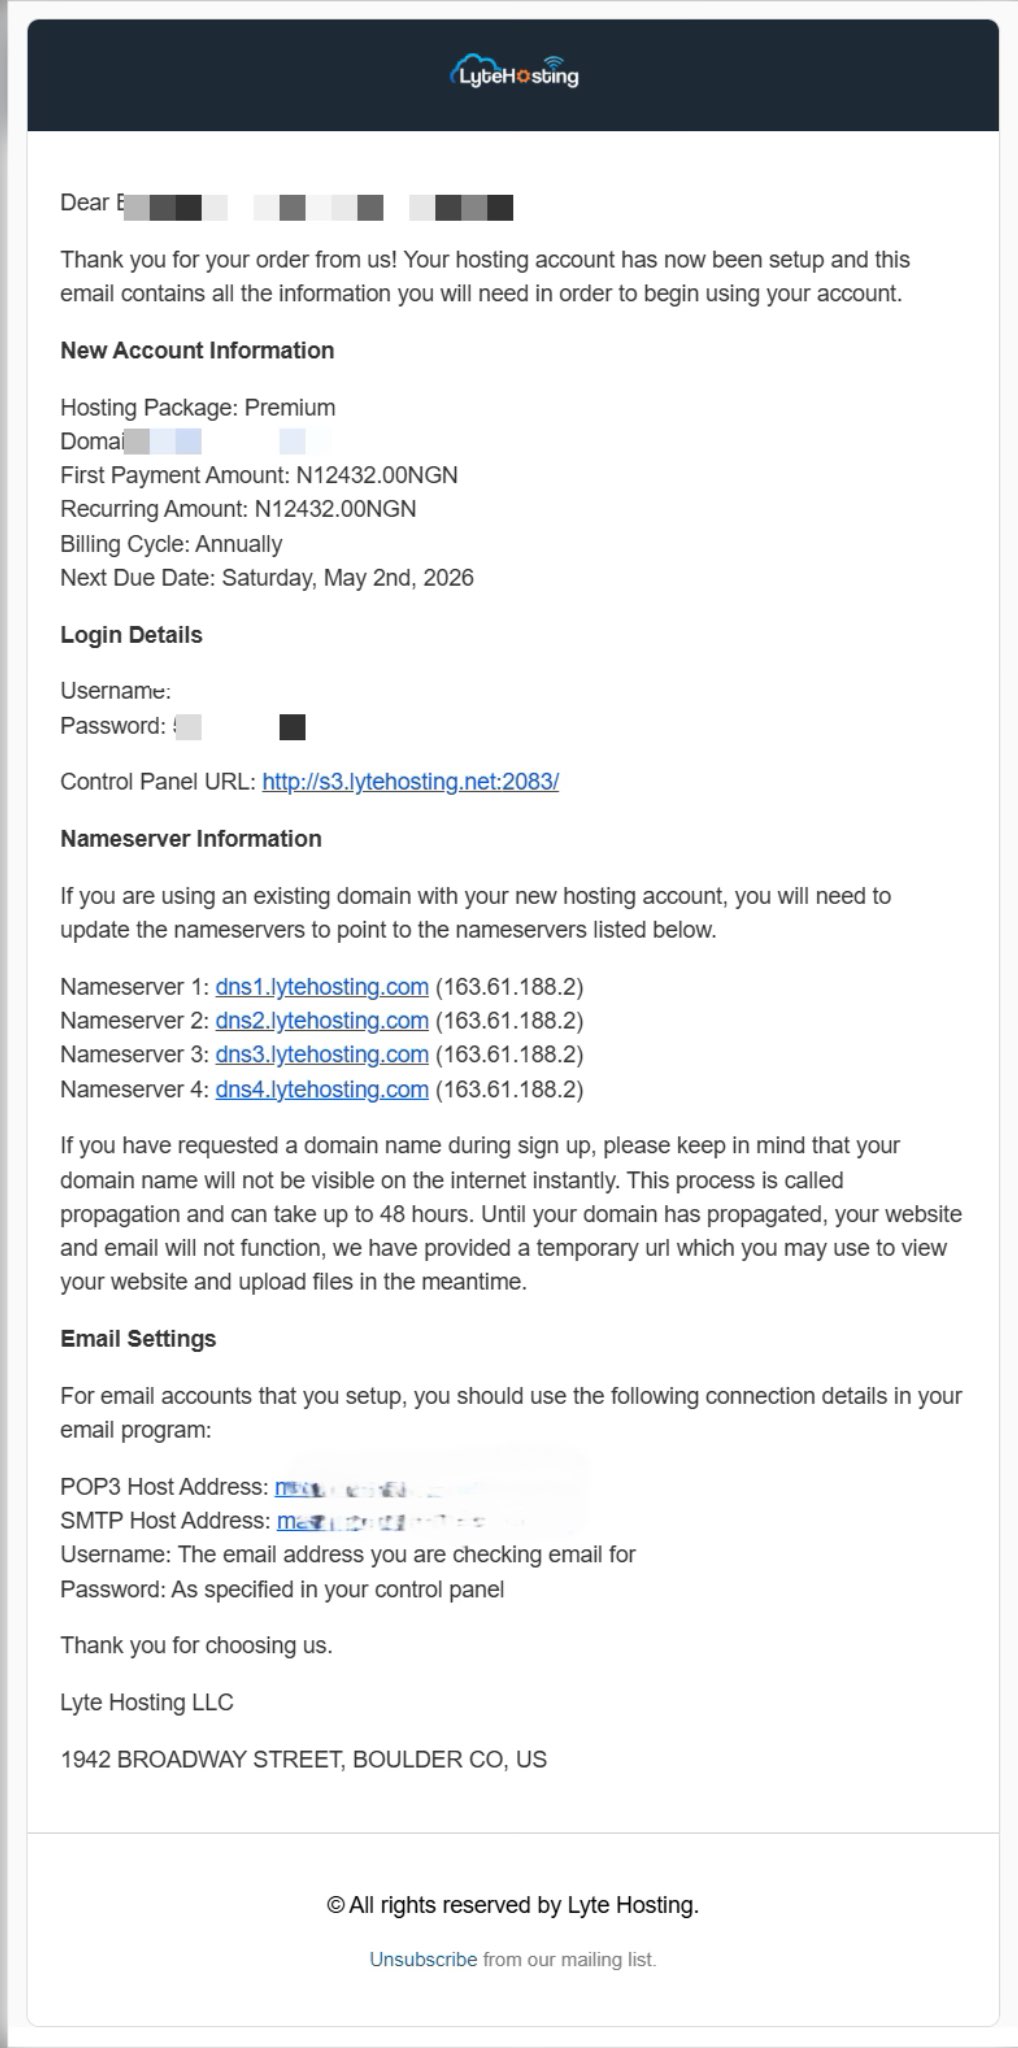
- When you purchase a hosting plan, your cPanel login details (including username, password, and cPanel URL) are automatically sent to your registered email address. Simply check your inbox (or spam folder), locate the email, and use the provided credentials to access your cPanel.
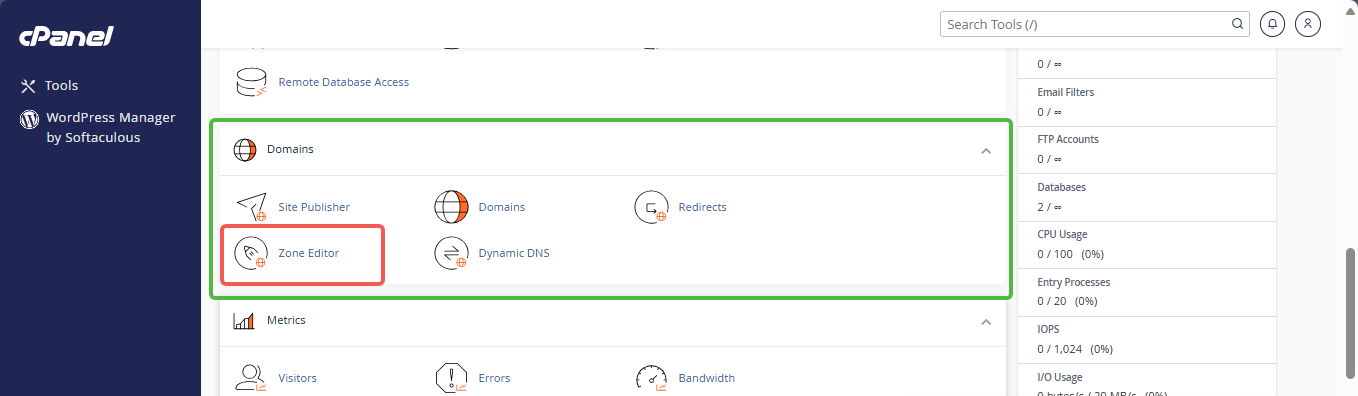
STEP 2: In the Domains section, click on Zone Editor.
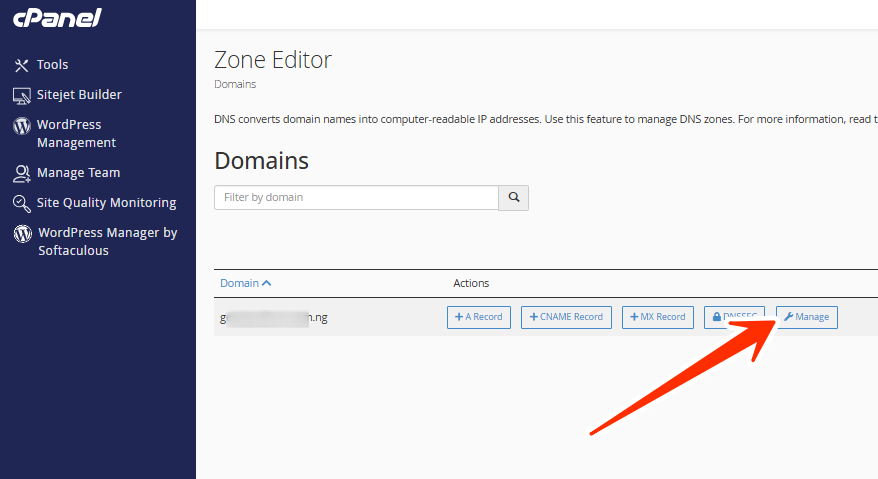
STEP 3: Locate your domain name and click Manage.
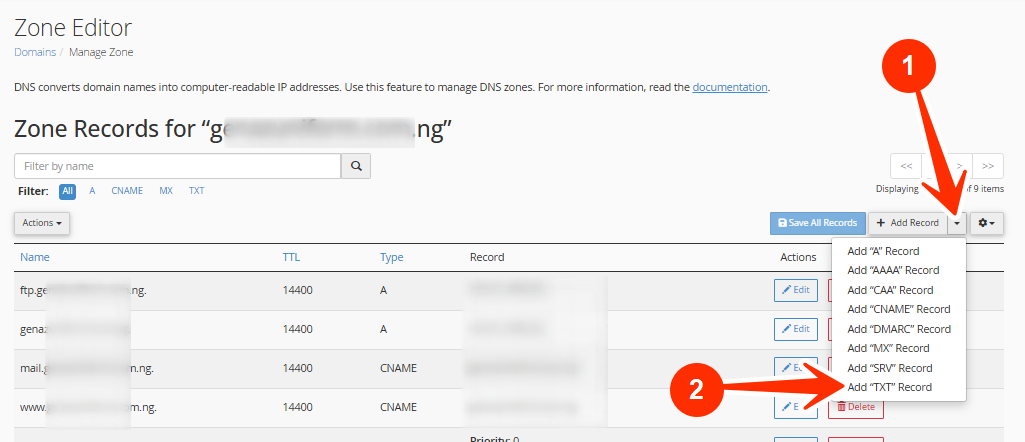
STEP 4: Click the + Add Record button and select Add “TXT” Record.
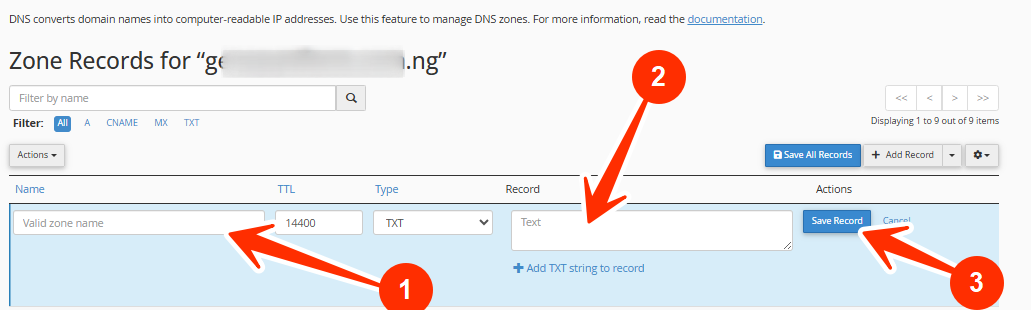
STEP 5: Fill in the fields as follows:
Name: Enter your domain name or leave it blank to apply it to the root domain (e.g., @ or example.com).
TTL: Leave the default value (usually 14400 seconds).
Type: Select TXT.
Record: Paste the TXT value provided by the service (e.g., google-site-verification=abc123xyz).
STEP 6: Click Save Record.
Once saved, your TXT record will be added to your domain’s DNS settings.
Verifying the TXT Record
After adding the TXT record, the DNS change must propagate before verification works.
- Propagation Time: Usually within a few minutes, but it can take up to 24–48 hours.
- Once DNS propagation completes, return to the service requesting verification (e.g., Google Workspace setup page) and click Verify.
If the verification fails:
- Ensure the record value matches exactly.
- Check there are no extra spaces or quotation marks.
- Wait a few hours and try verifying again.
Troubleshooting Tips
- Use a DNS lookup tool (like whatsmydns.net) to confirm that your TXT record is visible globally.
- If you manage multiple DNS zones, make sure you’re adding the record to the correct DNS host.
- Avoid duplicate TXT records for the same host, merge them if needed (for example, multiple SPF entries should be combined into one).
If you encounter issues adding or verifying your TXT record, kindly reach out to our support team for assistance.


