Additional domains that are hosted under your hosting service are called Addon Domains. Usually, addon domains have a unique website.
For your email or website to function with an addon domain that is registered with LyteHosting, you must take the following actions;
- Configure your domain to point to your LyteHosting servers.
- Include the domain in your cPanel.
- Assign the domain to your Customer Portal under the "external domain" category.
- Make DNS record updates for the domain.
Note: Unless the addon domain is registered and linked to your website content server, it will not function.
These instructions will walk you through adding your addon domain to your hosting account.
STEP 1: Link your domain to the hosting server of LyteHosting.
Your name servers and DNS records are automatically linked to your LyteHosting servers if your domain was registered with us.
But it's necessary to link your domain to your LyteHosting server once it's registered with another registrar or, if you already have a domain that you would want to host with us.
STEP 2: Go into your cPanel and set up an addon domain.
For VPS and Dedicated Hosting: Unless you set Max Addon Domains to more than zero in your WHM packages, WHM users have no way to create an addon domain in cPanels. Subdomains also need to be configured with a count that is either larger than or equal to the total number of addon domains you want to permit.
To set up a cPanel addon domain:
1. Log in to cPanel.
There are three methods to log into your cPanel.
- Method 1: Log in to your cPanel directly.
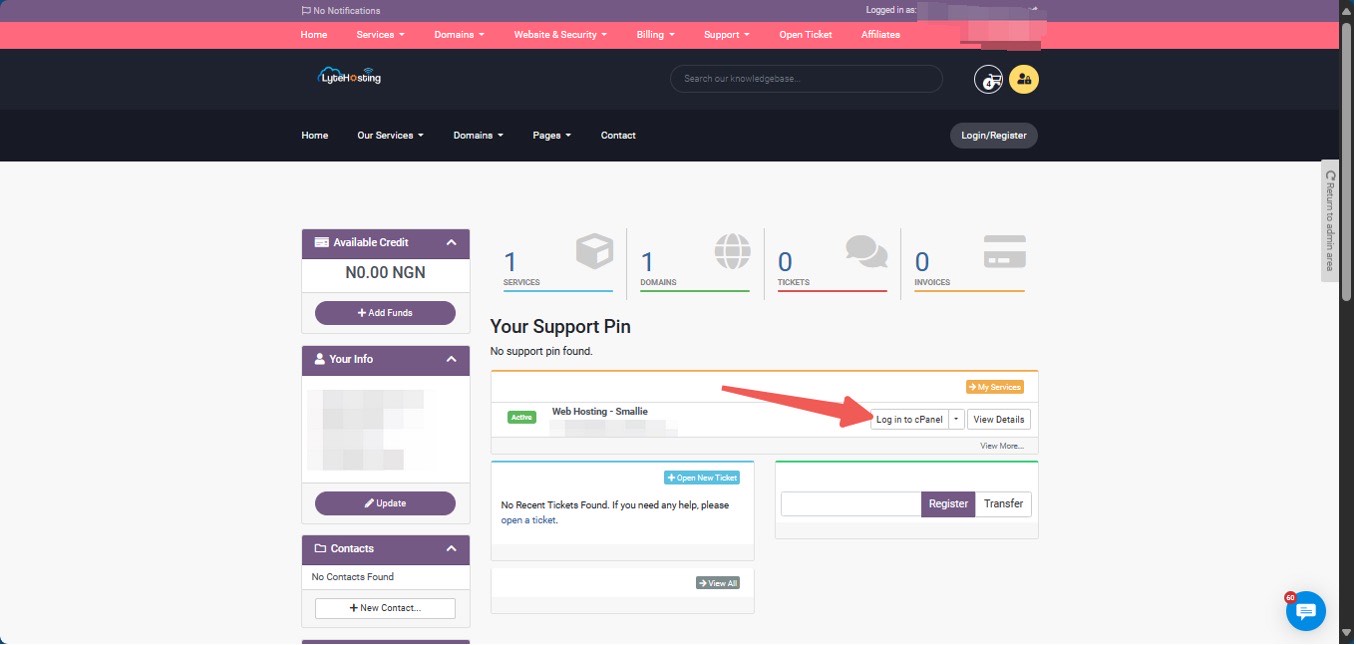
- Method 2: Log in to your cPanel through your Customer Portal.
Through your Customer Portal;
- Log in to your Customer Portal.
- Click on "Log in to cPanel".
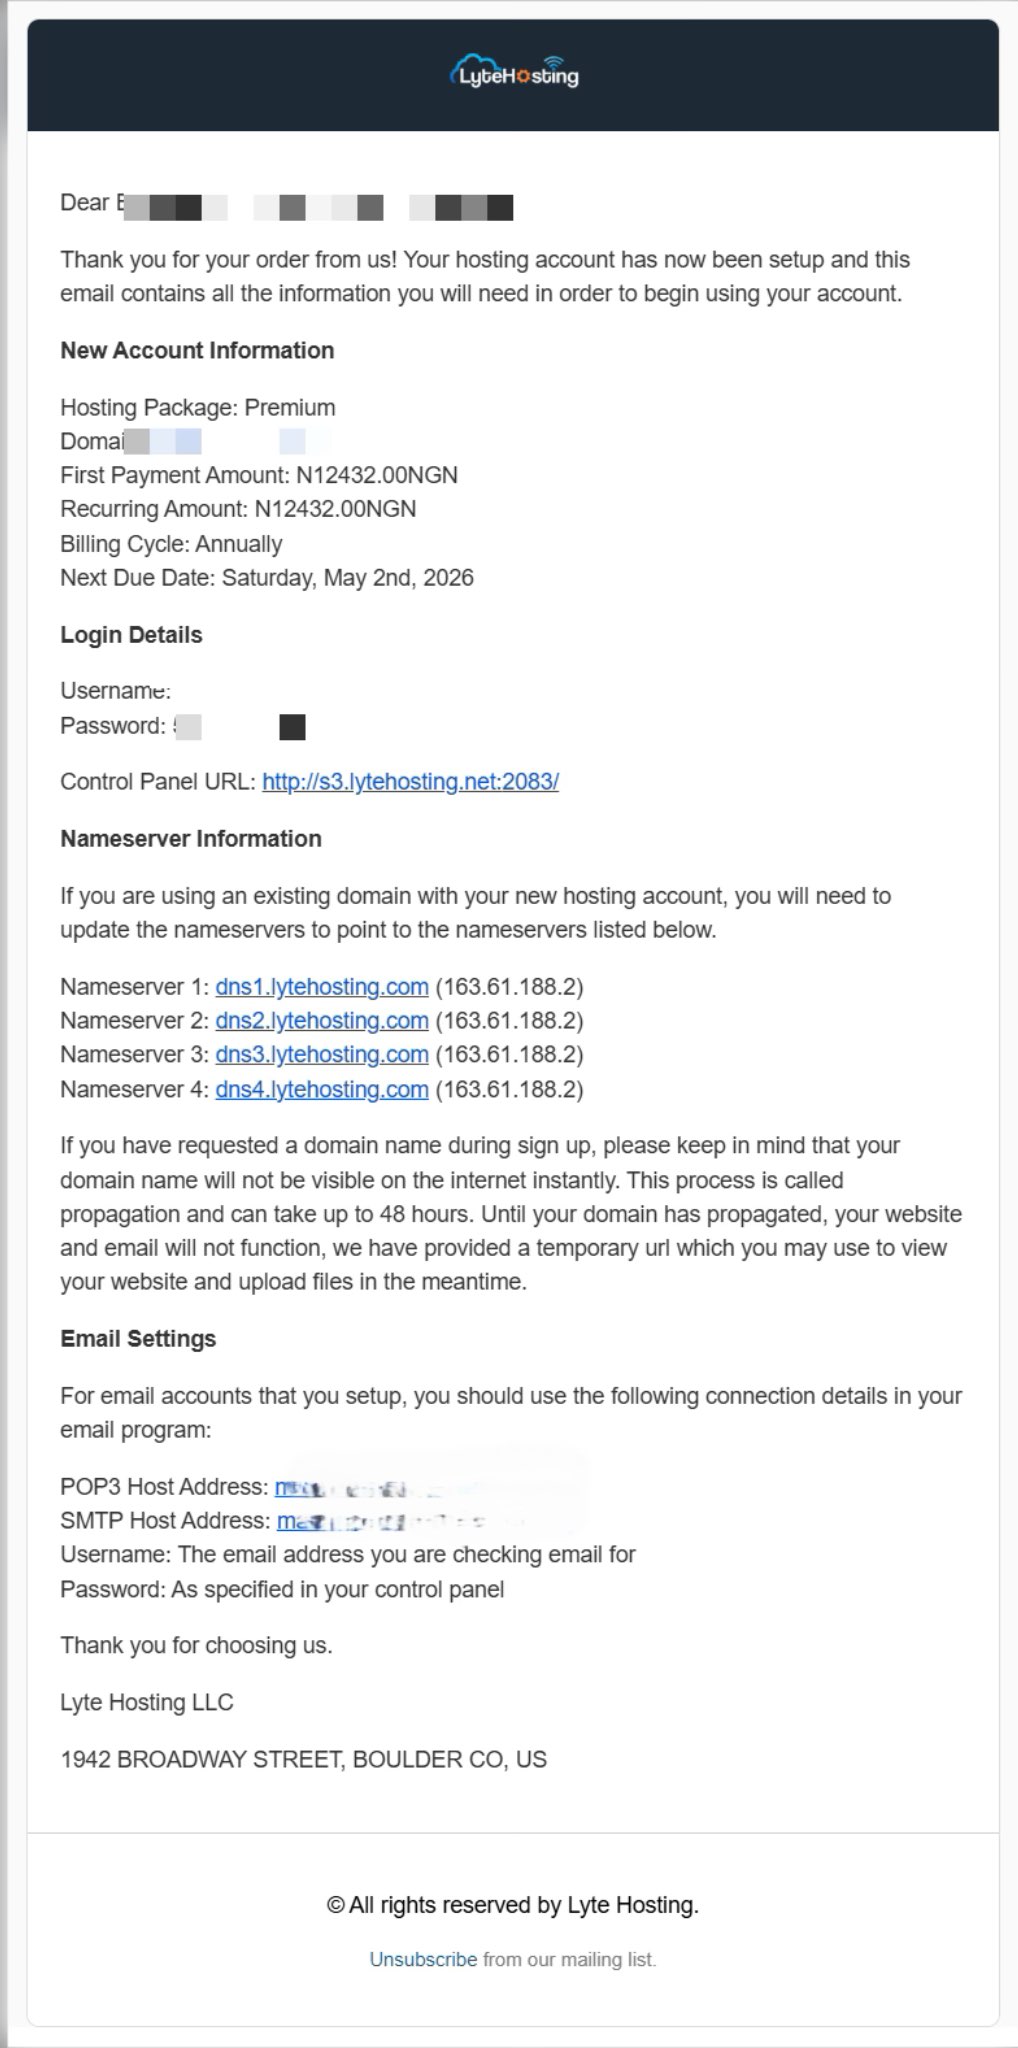
- Method 3: Log in using the details sent to your Email.
Through your Email;
- When you purchase a hosting plan, your cPanel login details (including username, password, and cPanel URL) are automatically sent to your registered email address. Simply check your inbox (or spam folder), locate the email, and use the provided credentials to access your cPanel.
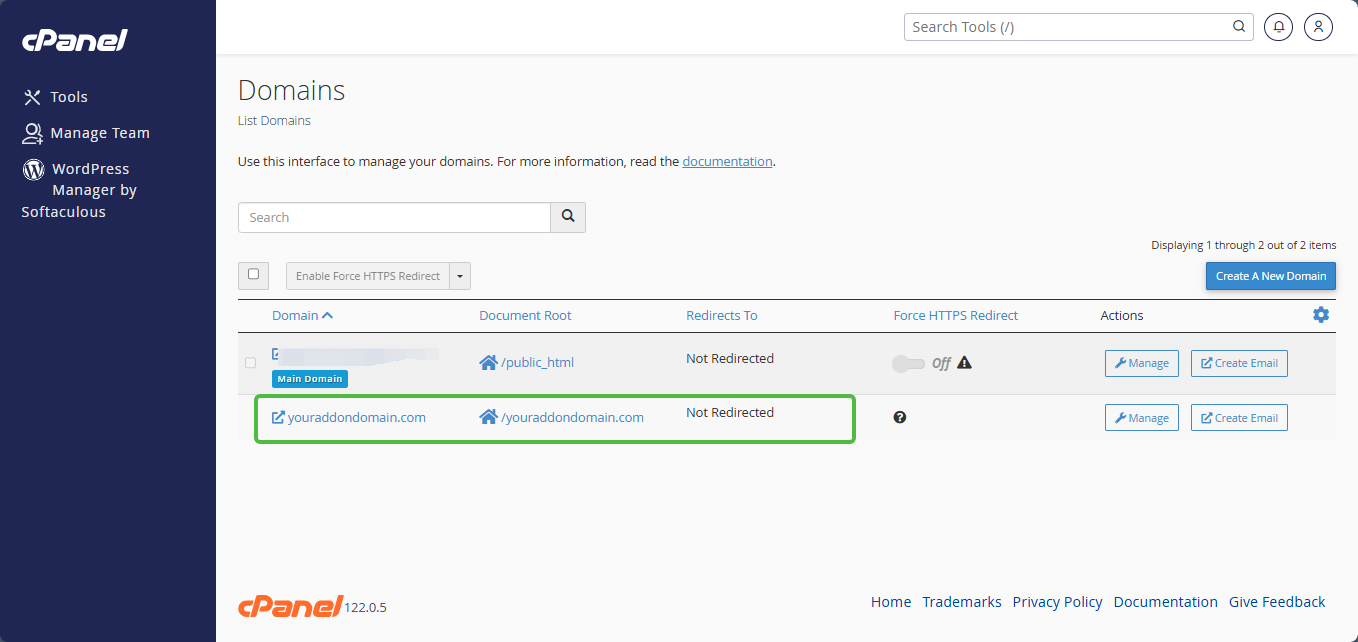
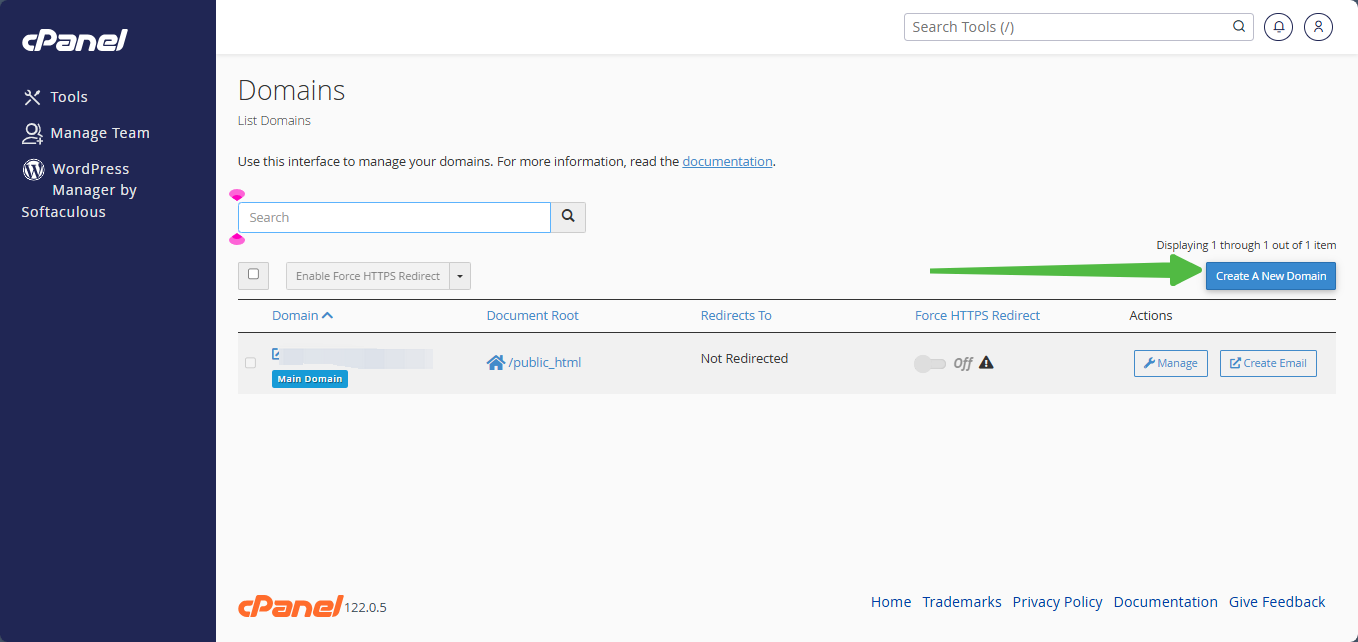
2. Click on Domains in the Domains section of cPanel.

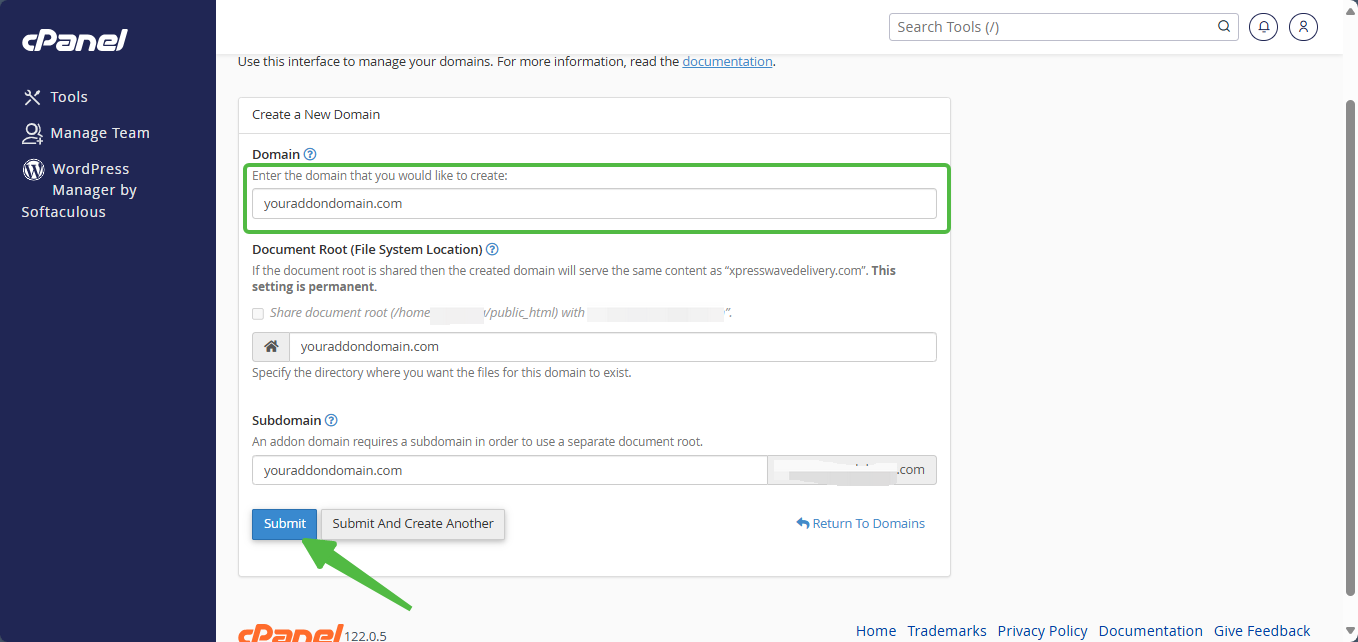
3. Click the ‘Create A New Domain’ tab on the next page.
4. In the Domain field, input the new domain.
5. Click the ‘Create A New Domain’ tab on the next page.
6. Be careful not to choose ‘Share document root (/home/username/public_html) with ‘domain.tld.’
7. Provide the directory name for the domain. Understand that this folder, also known as the ‘document root,’ is where the site files and contents of the domain, that is, your website, will be kept.
8. Click the ‘Submit tab when completed.
You've uploaded your new domain successfully now!
- By clicking the link located under the Document Root of the domain, you may access the folder for your addon domain.