Databases efficiently handle extensive information online and are essential for powering numerous web-based applications, including forums, content management systems, and e-commerce platforms.
Note: Resellers can create accounts with usernames containing up to 16 characters. However, MySQL databases and usernames will be truncated to the first 8 characters. For instance:
- cPanel username: mylongusername
- MySQL Database: mylongus_data1
- MySQL Username: mylongus_admin
This article explores the key features of MySQL Databases, such as:
- Create or Delete a MySQL Database
- Create or Delete a Database User
- Define and Modify User Privileges
- Using SSH for Database Management;
- Delete a database
- Drop 1 or multiple users
- View and assign privileges
Create or Delete a MySQL Database
How to Create a MySQL Database
STEP 1: Log in to cPanel.
There are three methods to log into your cPanel.
- Method 1: Log in to your cPanel directly.
- Method 2: Log in to your cPanel through your Customer Portal.
Through your Customer Portal;
- Log in to your Customer Portal.
- Click on "Log in to cPanel".
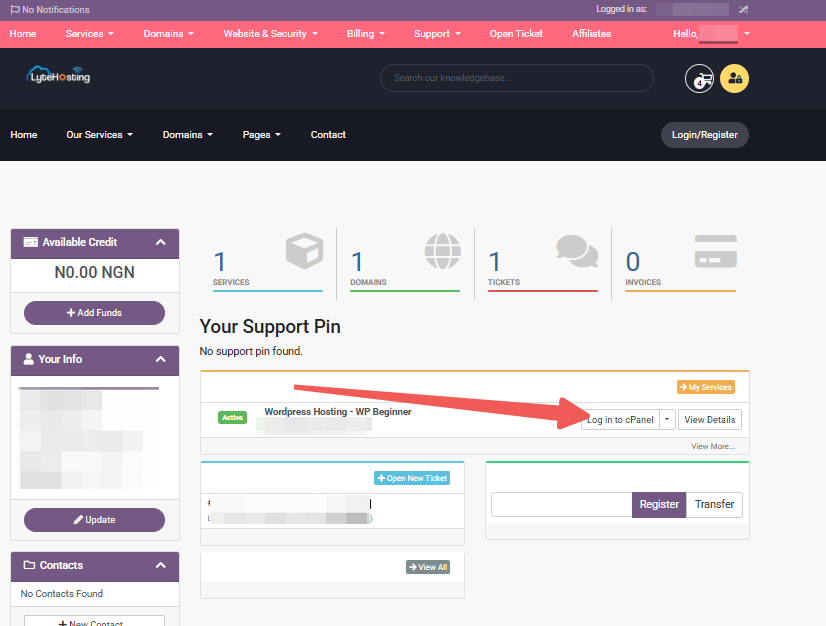
- Method 3: Log in using the details sent to your Email.
Through your Email;
- When you purchase a hosting plan, your cPanel login details (including username, password, and cPanel URL) are automatically sent to your registered email address. Simply check your inbox (or spam folder), locate the email, and use the provided credentials to access your cPanel.
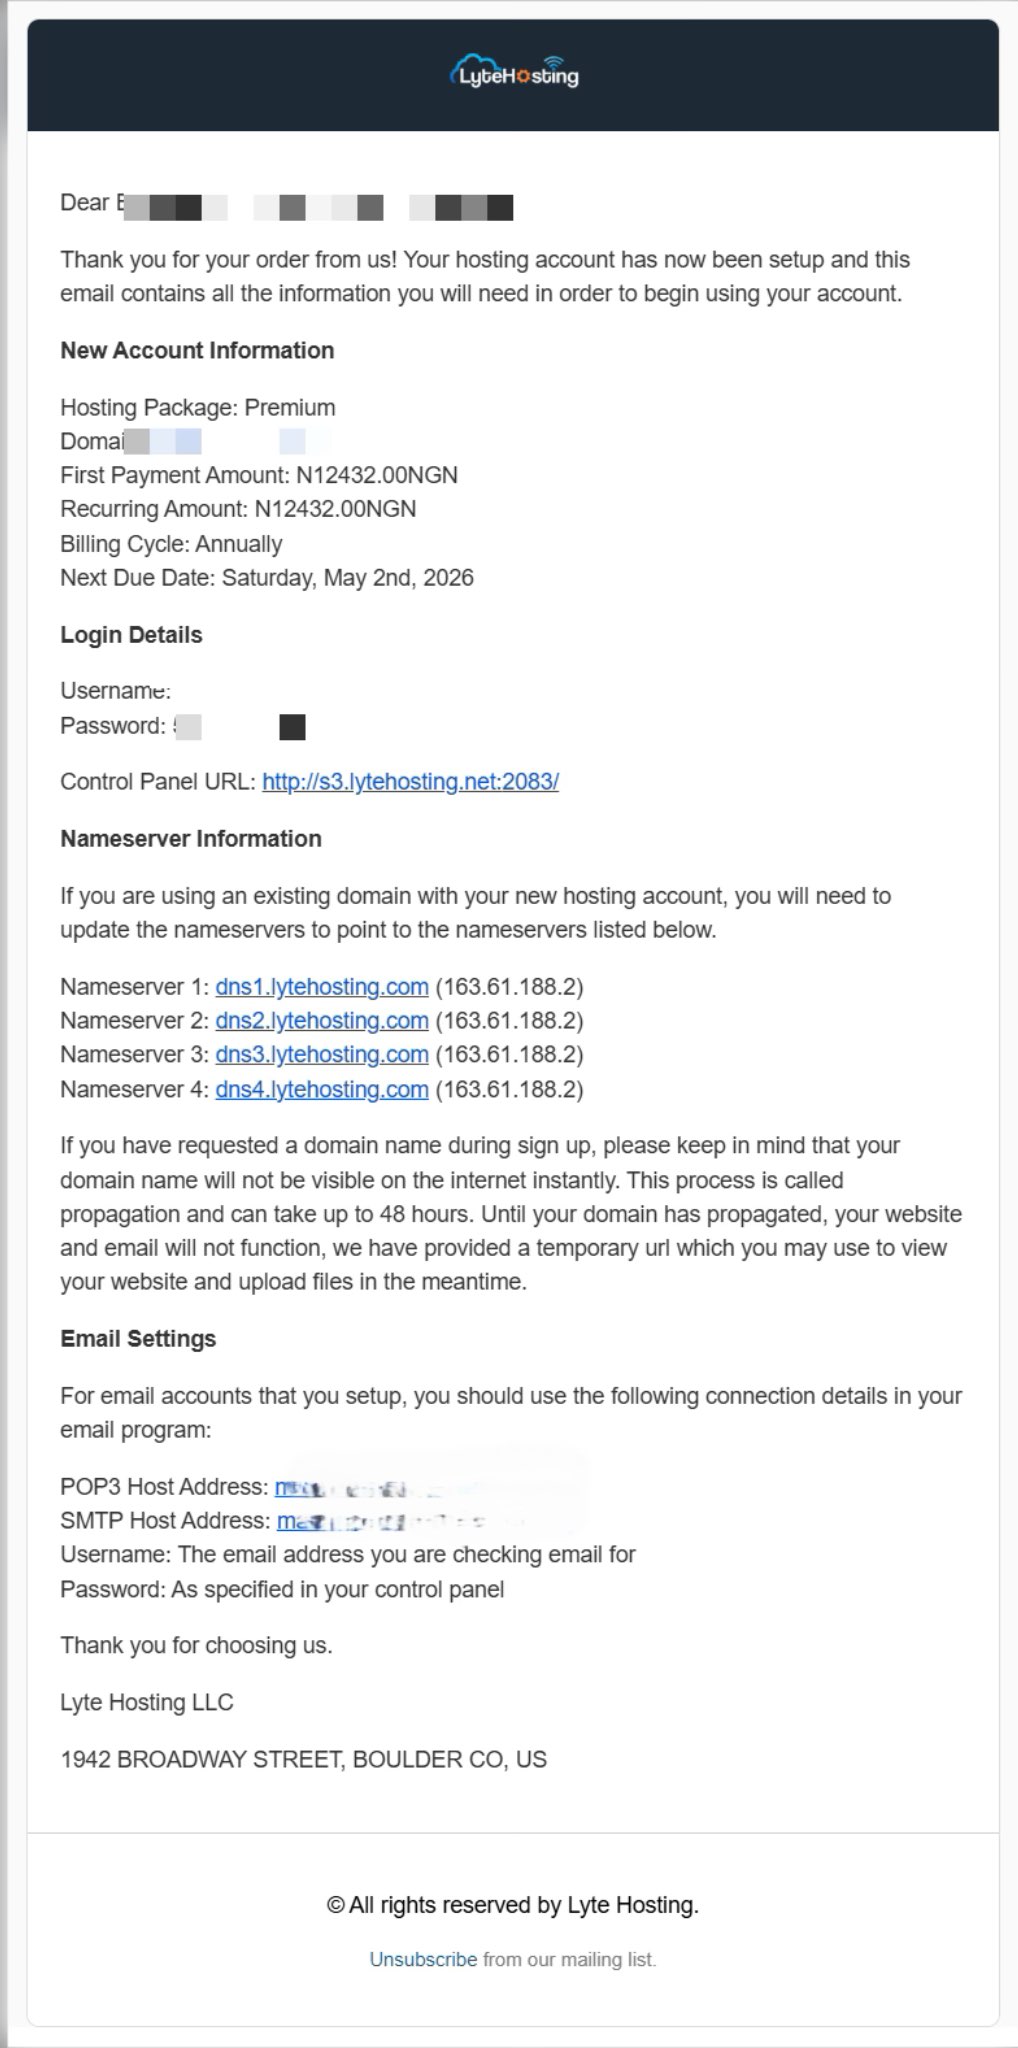
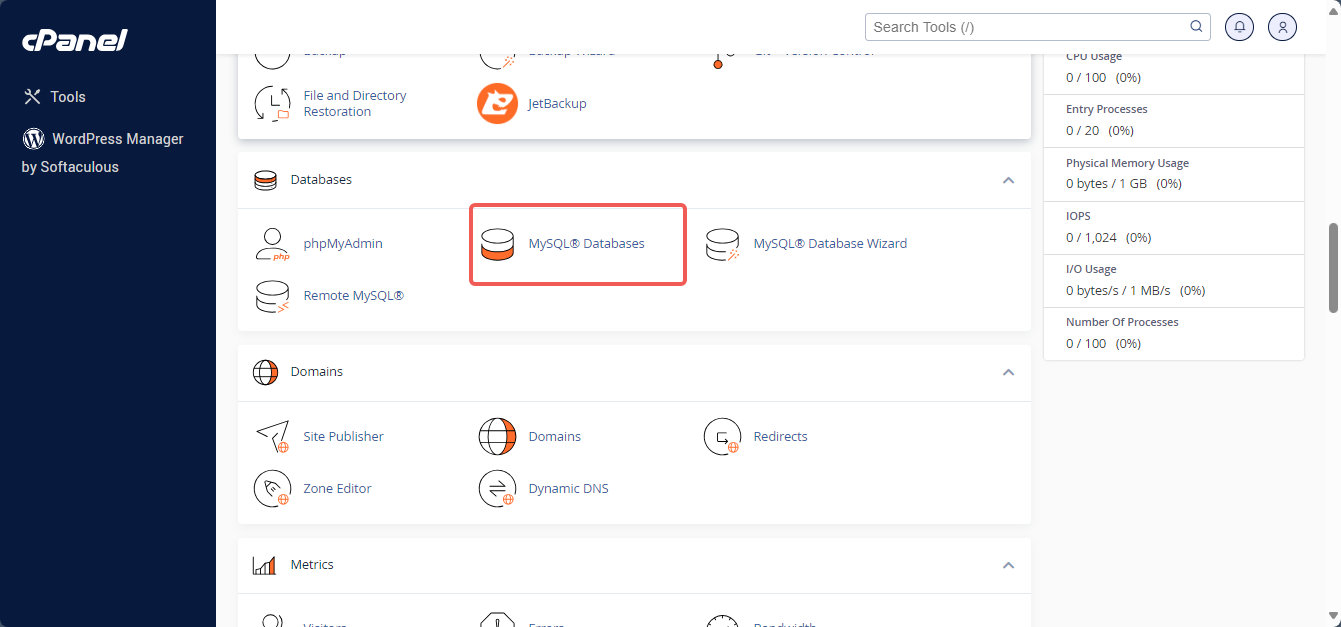
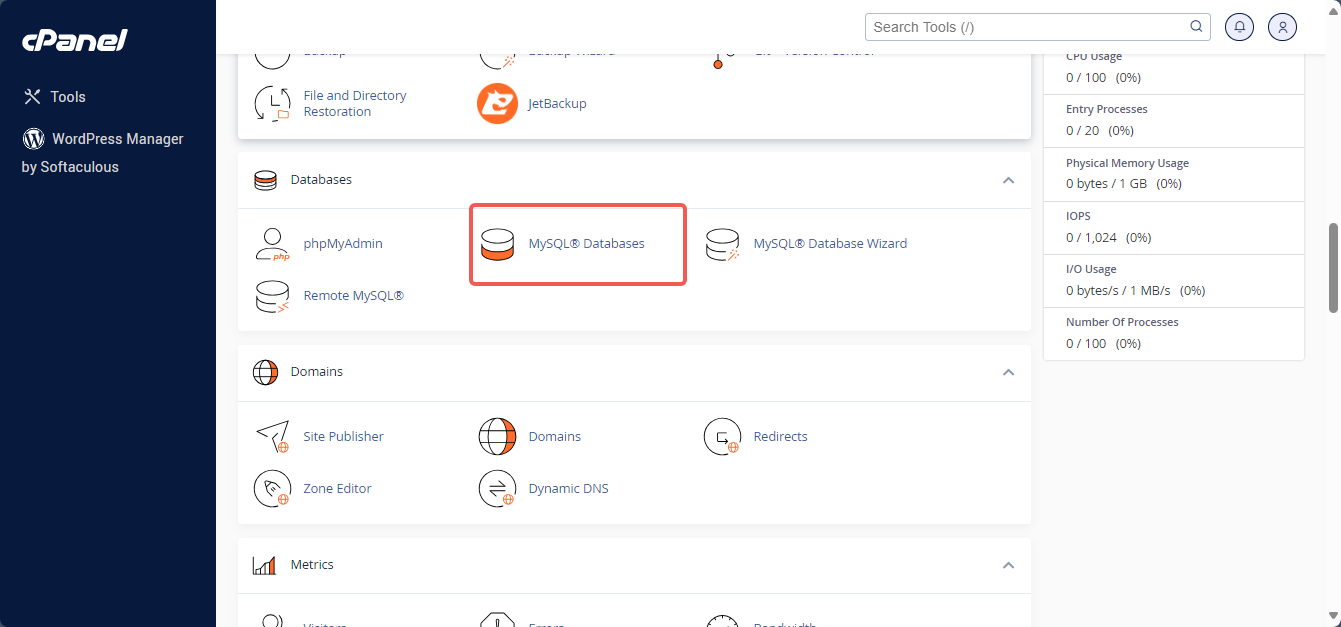
STEP 2: Locate the Databases section and click MySQL Databases.
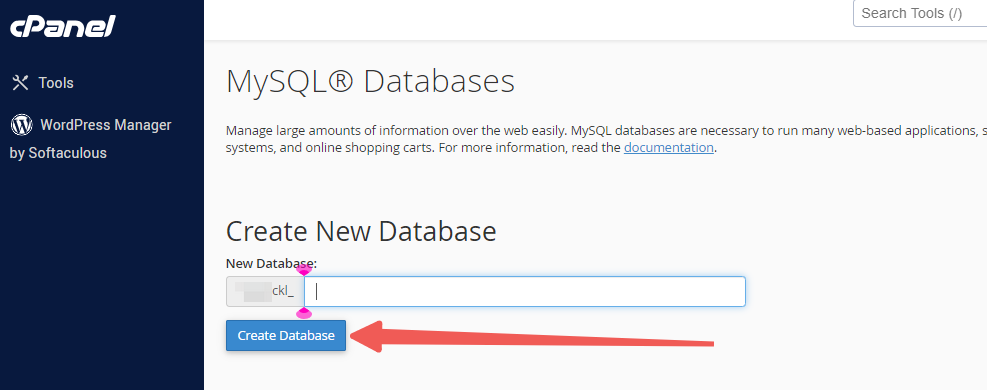
STEP 3: In the New Database field, enter the desired name for your database.
STEP 4: Click Create Database and then click Go Back. The newly created database will be listed in the Current Databases section.
How to Delete a MySQL Database
STEP 1: In cPanel, go to the Current Databases section under MySQL Databases.
STEP 2: Locate the database you want to delete in the table and click Delete in the Actions column.
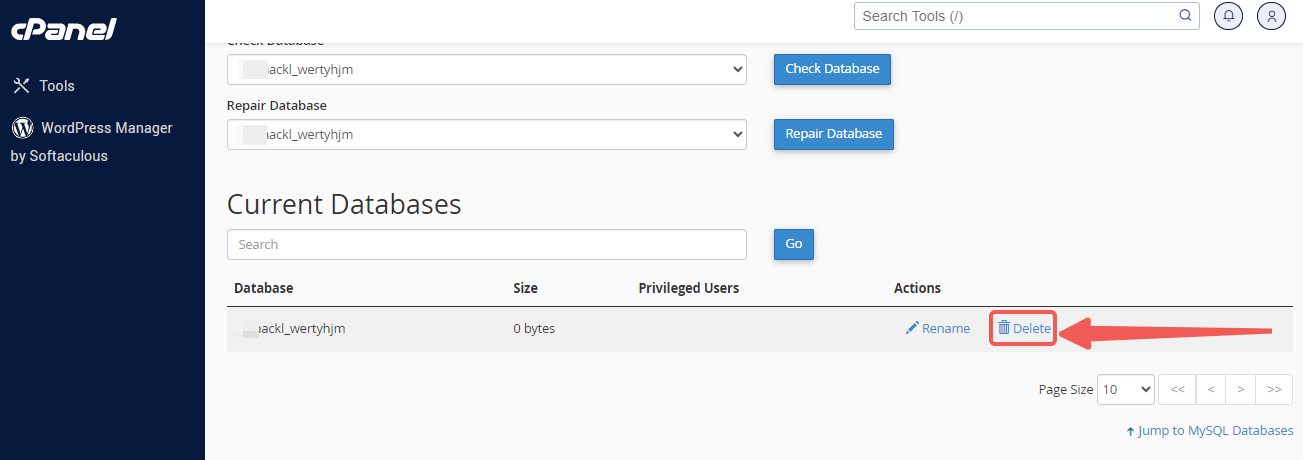
STEP 3: Confirm the deletion to remove the database permanently.

Create or Delete a Database User
What is a MySQL User, and Why is it Important?
A MySQL user is an account created within the MySQL server to authenticate access to the database. This is distinct from login usernames used for Windows or cPanel/WHM. Creating a MySQL user enhances the security of your website’s databases by allowing you to assign specific permissions to individual users. As the website owner, it’s crucial not to grant database access to just anyone.
After setting up the database, you must create a user and define their privileges. Remember that MySQL user accounts are separate from email and web administrator accounts.
How to Create a Database User
STEP 1: In cPanel, locate the Databases section and click MySQL Databases.
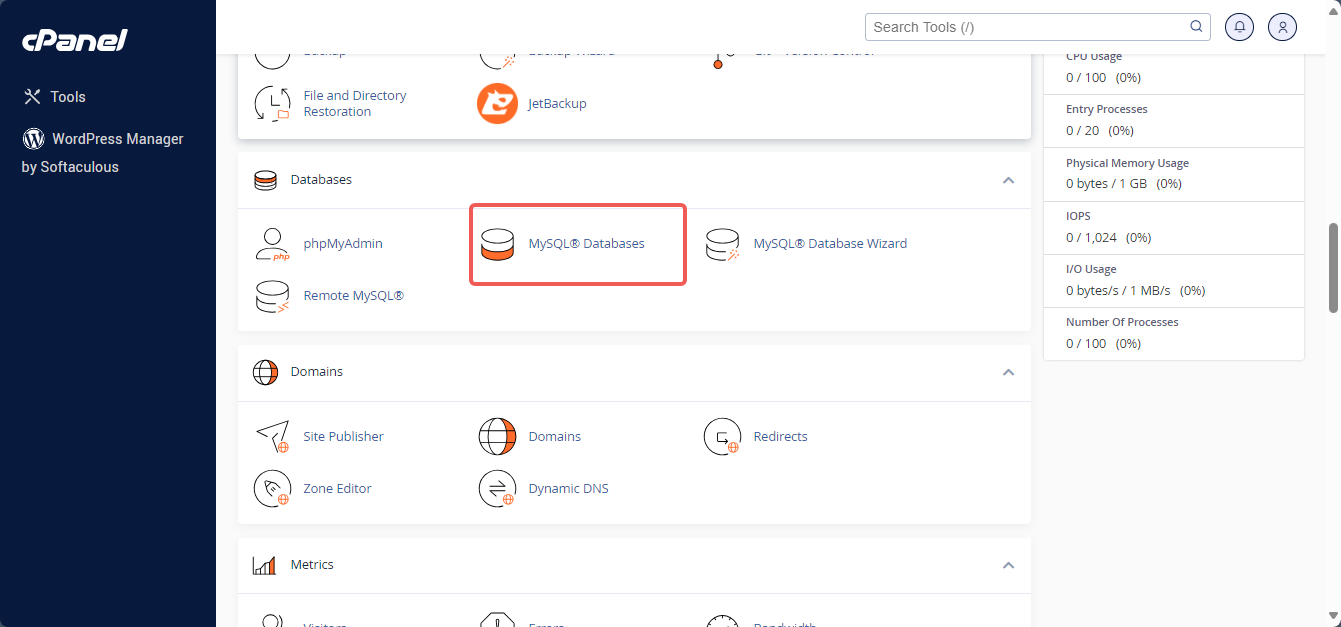
STEP 2: Click on the Jump to MySQL Users link at the top-right corner of the page, or scroll down to find the MySQL Users section.
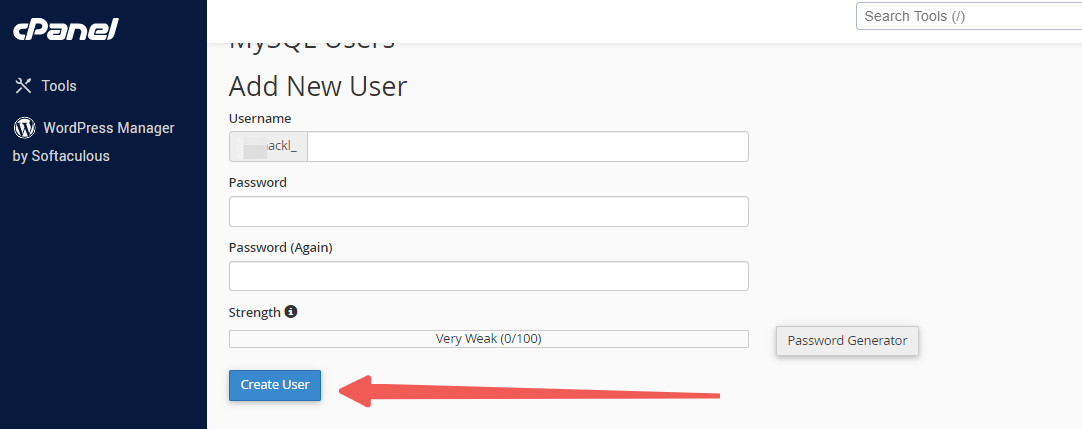
STEP 3: In the Add New User section, enter a username.
STEP 4: Enter a password in the Password field.
STEP 5: To create a strong password, click the Password Generator tab.
STEP 6: After confirming the password, click the Create User tab.
How to Delete a Database User
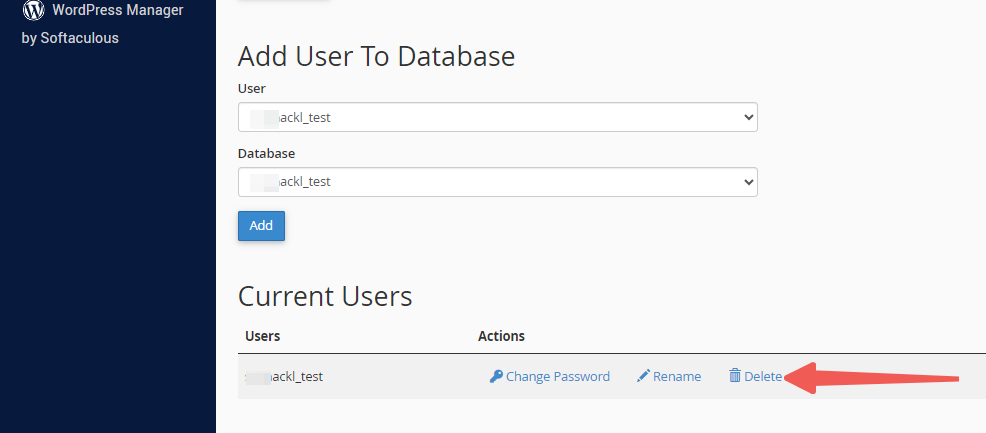
STEP 1: In cPanel, go to the Current Users section under MySQL Databases.
STEP 2: Find the database user you want to delete and click the Delete icon next to it.
Define and Modify User Privileges
What are User Privileges, and Why are They Important?
User privileges define the permissions granted to a user, allowing them to perform specific tasks on the website, such as running queries or modifying databases. These privileges determine how a user can interact with the database. For instance, privileges control whether a user is authorized to add or delete data. Managing these privileges ensures that users can only perform actions they are authorized to do, enhancing security and proper database management.
How to Assign Privileges to a Database User
STEP 1: In cPanel, under the Databases section, click MySQL Databases.
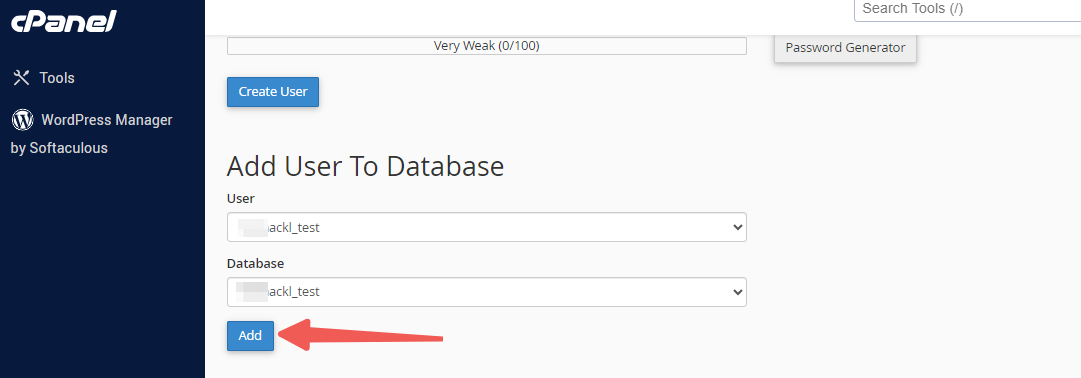
STEP 2: Under Add User to Database, choose a user from the User dropdown menu.
STEP 3: From the Database dropdown menu, select the database you want to grant the user access to.
STEP 4: Click Add.
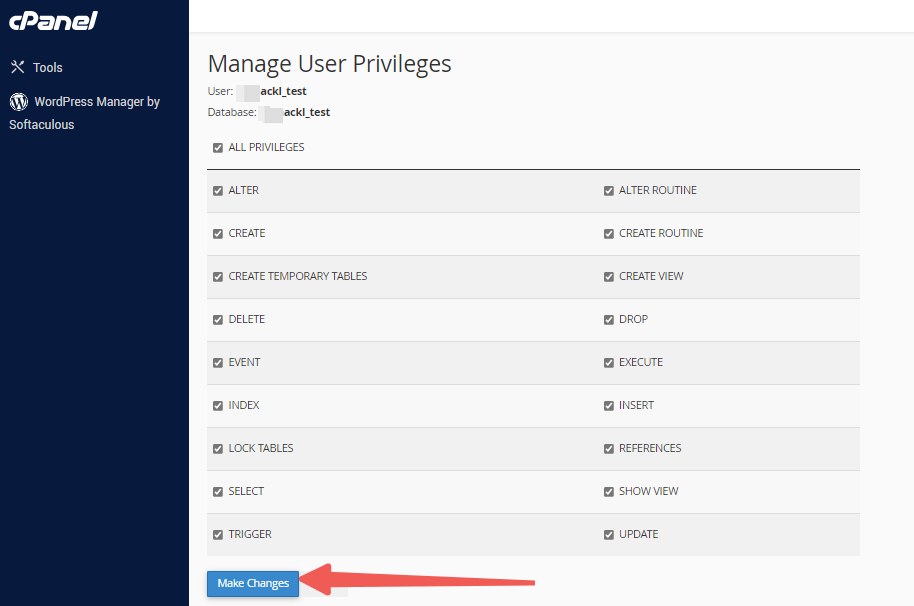
STEP 5: On the next page, choose the privileges you wish to assign to the user or select ALL PRIVILEGES.
STEP 6: Click Make Changes, then click Go Back.
How to Unassign a User from a Database
STEP 1: In cPanel, go to the Current Databases section under MySQL Databases.
STEP 2: Find the database you want to modify.
STEP 3: In the Privileged Users column for that database, click the trash icon.


