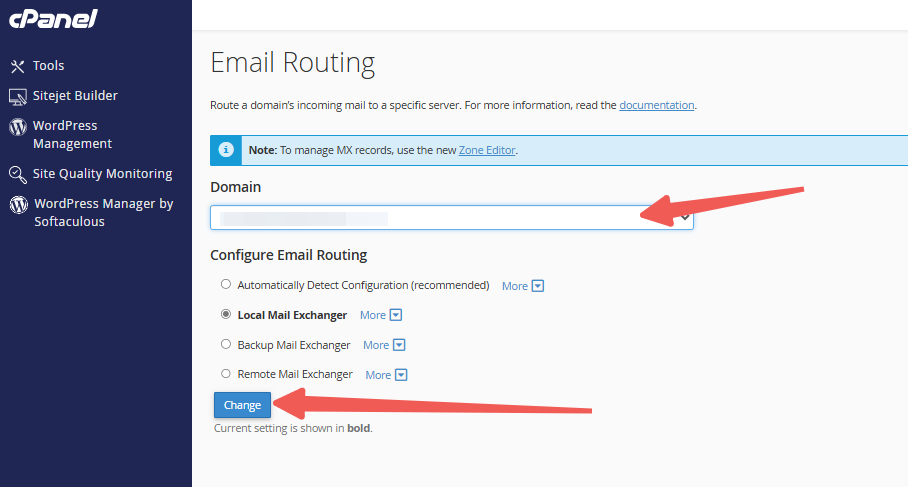
This setting instructs LyteHosting on how to manage your incoming emails. We recommend selecting the "Automatically Detect Configuration" option. However, there are situations where adjusting this setting can ensure all emails are delivered successfully.
Is your current email system helping you achieve your online goals? If not, consider optimizing your workflow with Google Workspace. It offers professional email, cloud storage, calendars, video conferencing, and much more. Google’s suite of tools simplifies collaboration, allowing you to share spreadsheets and documents, host video meetings with Google Meet, and communicate via instant messaging. You can even share calendars to streamline meeting planning.
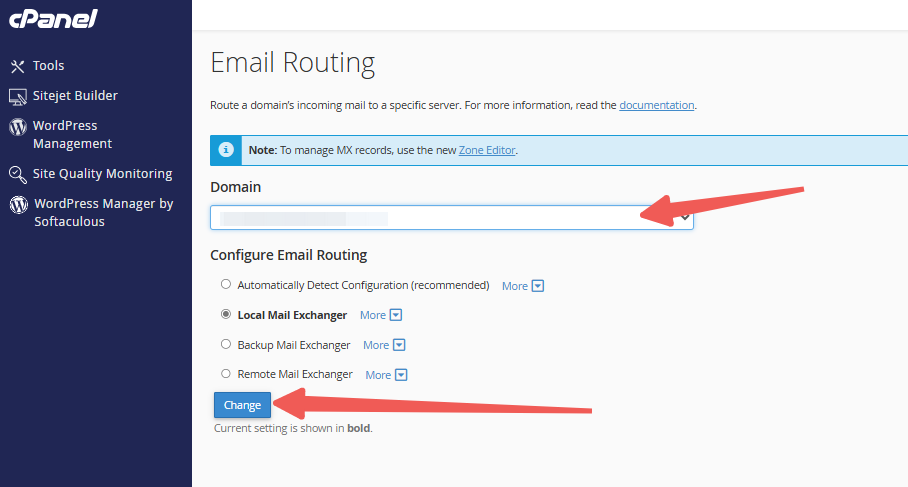
Whether you're configuring emails in cPanel or WHM, you'll encounter these email delivery (routing) options:
1. Local Mail Exchanger – This option directs your emails to your LyteHosting server.
2. Backup Mail Exchanger
- For Shared and Reseller Hosting: The Backup Mail Exchanger setting is not compatible with shared servers; we recommend using the "Automatically Detect Configuration" option instead.
- For VPS and Dedicated Servers: Configuring the Backup Mail Exchanger on a VPS or Dedicated Server requires specific cPanel adjustments. Remember that it may allow spam to bypass filters and offers limited support.
3. Remote Mail Exchanger – This option directs your emails to a different server or email service.
Important Notes:
- A Backup MX Exchanger without adequate Exim reconfiguration or the use of an external filtering service may act as an unfiltered and whitelisted relay, potentially enabling spam to reach your primary server.
- We can set up a relay for external mail filtering services or Backup MX services and provide a custom quote for cPanel plugin installations. However, we do not offer support for relay whitelisting, secondary MX configurations after the initial setup, or custom Exim configurations.
How to Configure the Email Delivery Method (Email Routing) in cPanel
Follow these steps to set up your email routing in cPanel:
STEP 1: Log in to cPanel.
There are three methods to log into your cPanel.
- Method 1: Log in to your cPanel directly.
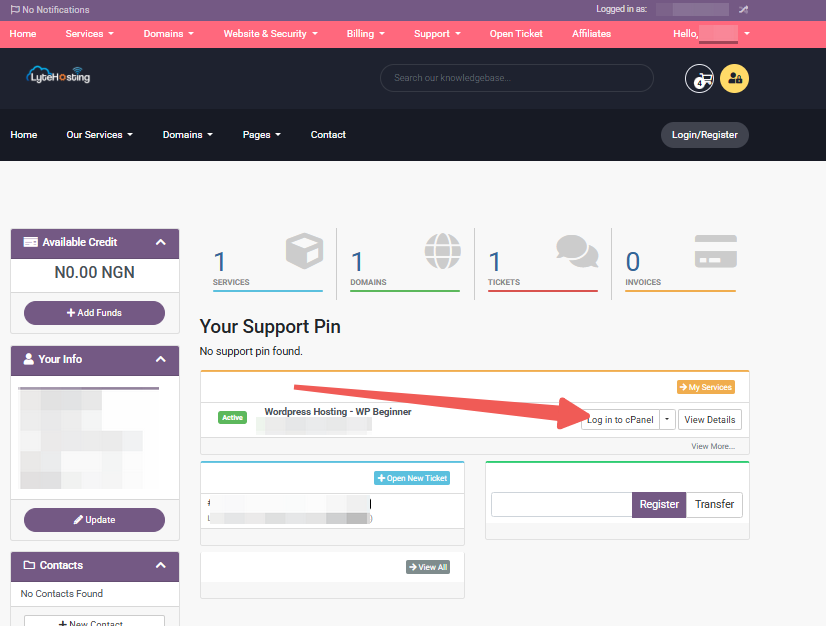
- Method 2: Log in to your cPanel through your Customer Portal.
Through your Customer Portal;
- Log in to your Customer Portal.
- Click on "Log in to cPanel".
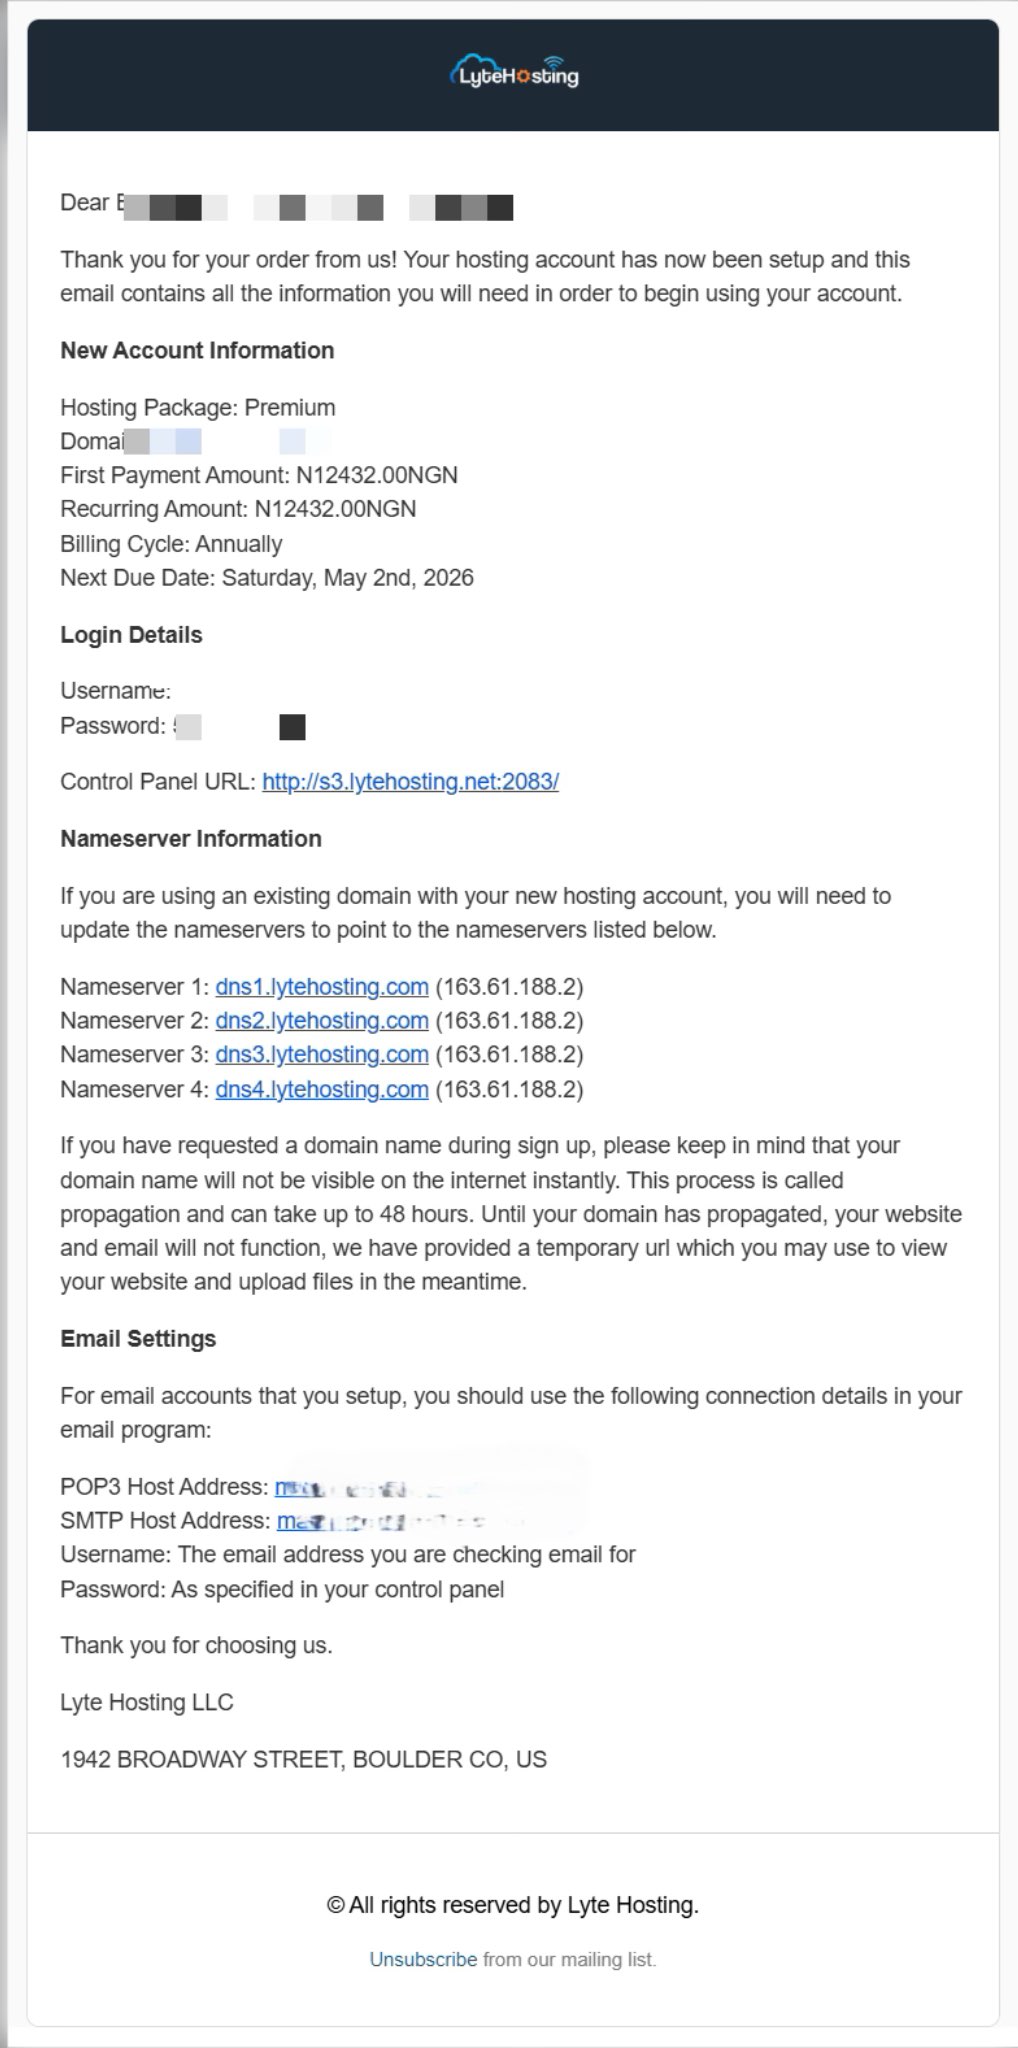
- Method 3: Log in using the details sent to your Email.
Through your Email;
- When you purchase a hosting plan, your cPanel login details (including username, password, and cPanel URL) are automatically sent to your registered email address. Simply check your inbox (or spam folder), locate the email, and use the provided credentials to access your cPanel.
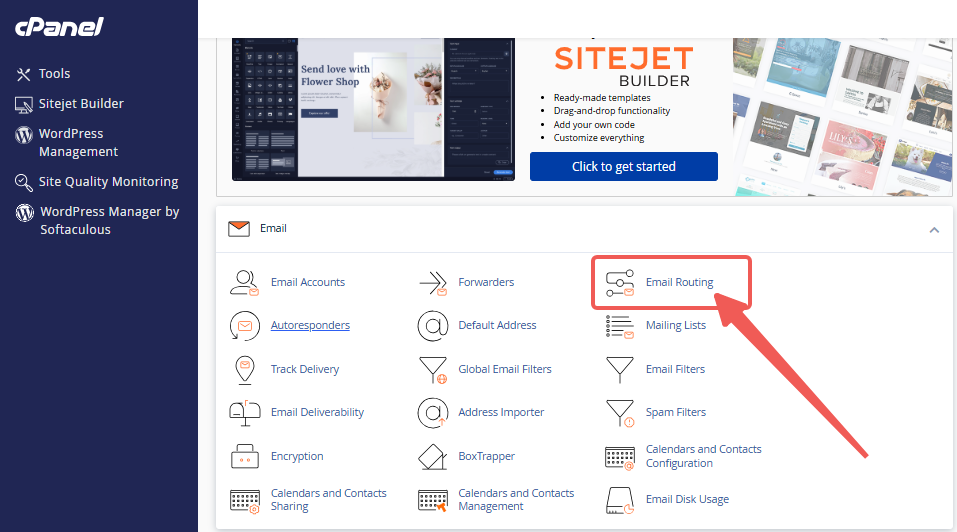
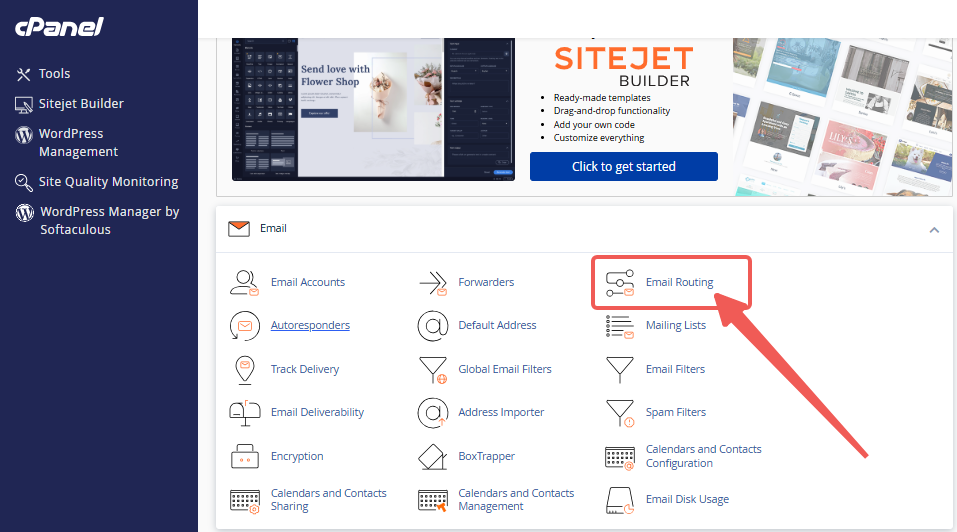
STEP 2: Locate the Email section and click on Email Routing.
STEP 3: From the drop-down menu, select your domain name.
STEP 4: Choose the appropriate email routing option for your setup.
STEP 5: Click Change, then test your email to ensure everything is functioning correctly.
How to Configure Email Delivery Method (Email Routing) in WHM
To set up email routing in WHM:
STEP 1: Log in to your WHM account.
STEP 2: Locate the Account Information section.
- You can quickly find it by typing a keyword, such as "Account," in the search bar on the left-side panel.
- Alternatively, use the search bar at the top of the page.
STEP 3: Select List Accounts from the options.
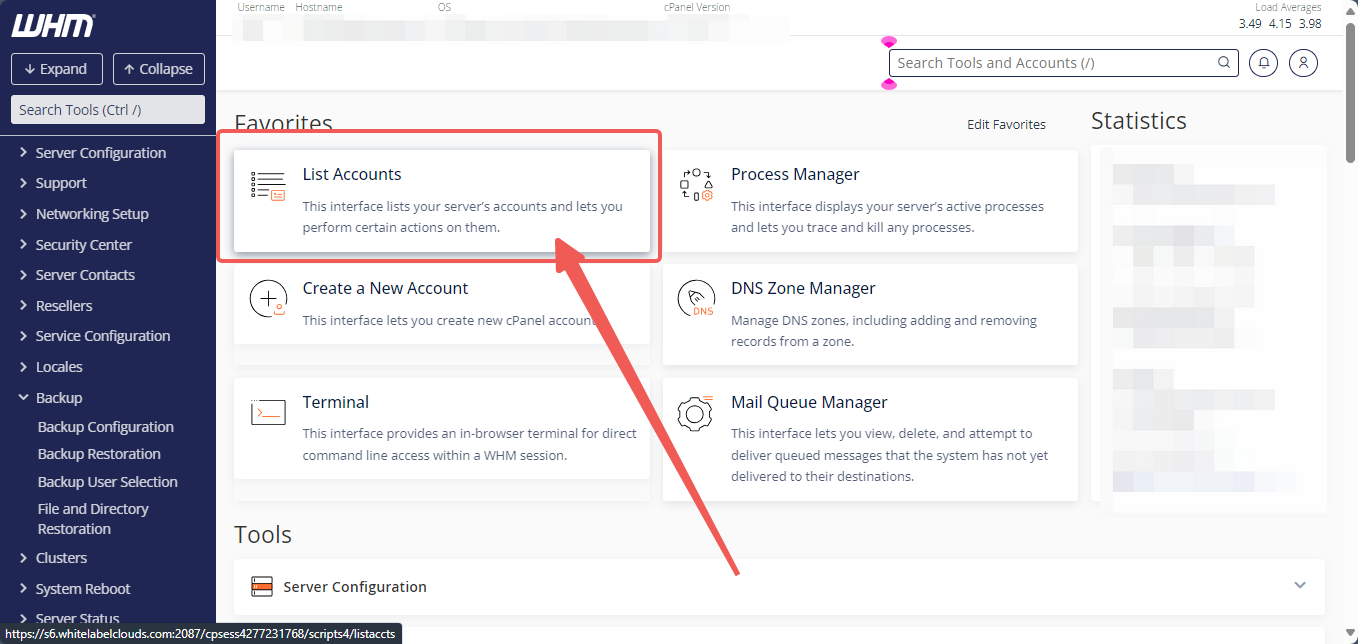
STEP 4: Click the cPanel icon next to the domain name you want to update.
![]()
STEP 5: In the Email section of cPanel, click on Email Routing.
STEP 6: Choose the appropriate email routing option for the domain.
STEP 7: Click Change to save your updates.
