An Autoresponder is a cPanel feature that enables you to automatically send pre-written response messages to anyone who emails a specific inbox.
How to Set Up an Autoresponder in cPanel
To set up an Autoresponder that sends automatic replies from an email address on your domain:
STEP 1: Log in to cPanel.
There are three methods to log into your cPanel.
- Method 1: Log in to your cPanel directly.
- Method 2: Log in to your cPanel through your Customer Portal.
Through your Customer Portal;
- Log in to your Customer Portal.
- Click on "Log in to cPanel".
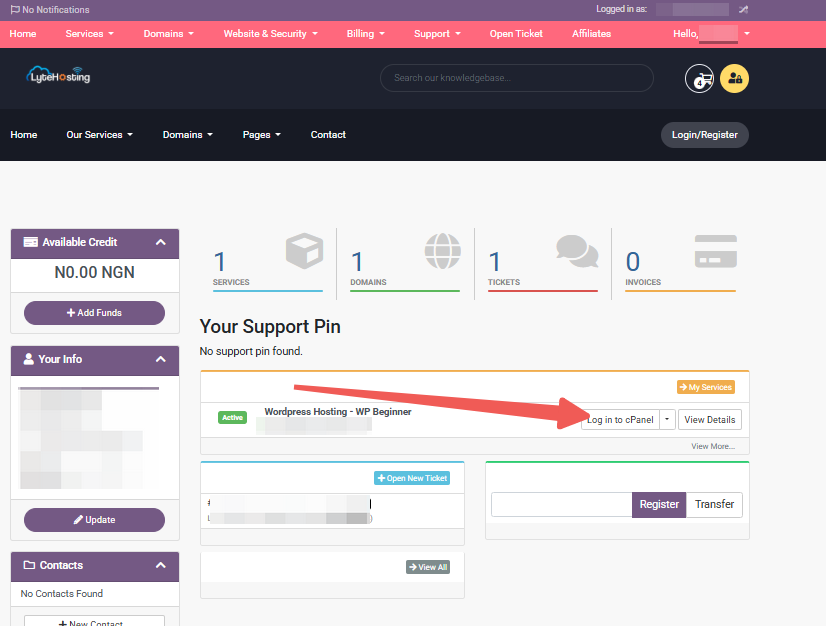
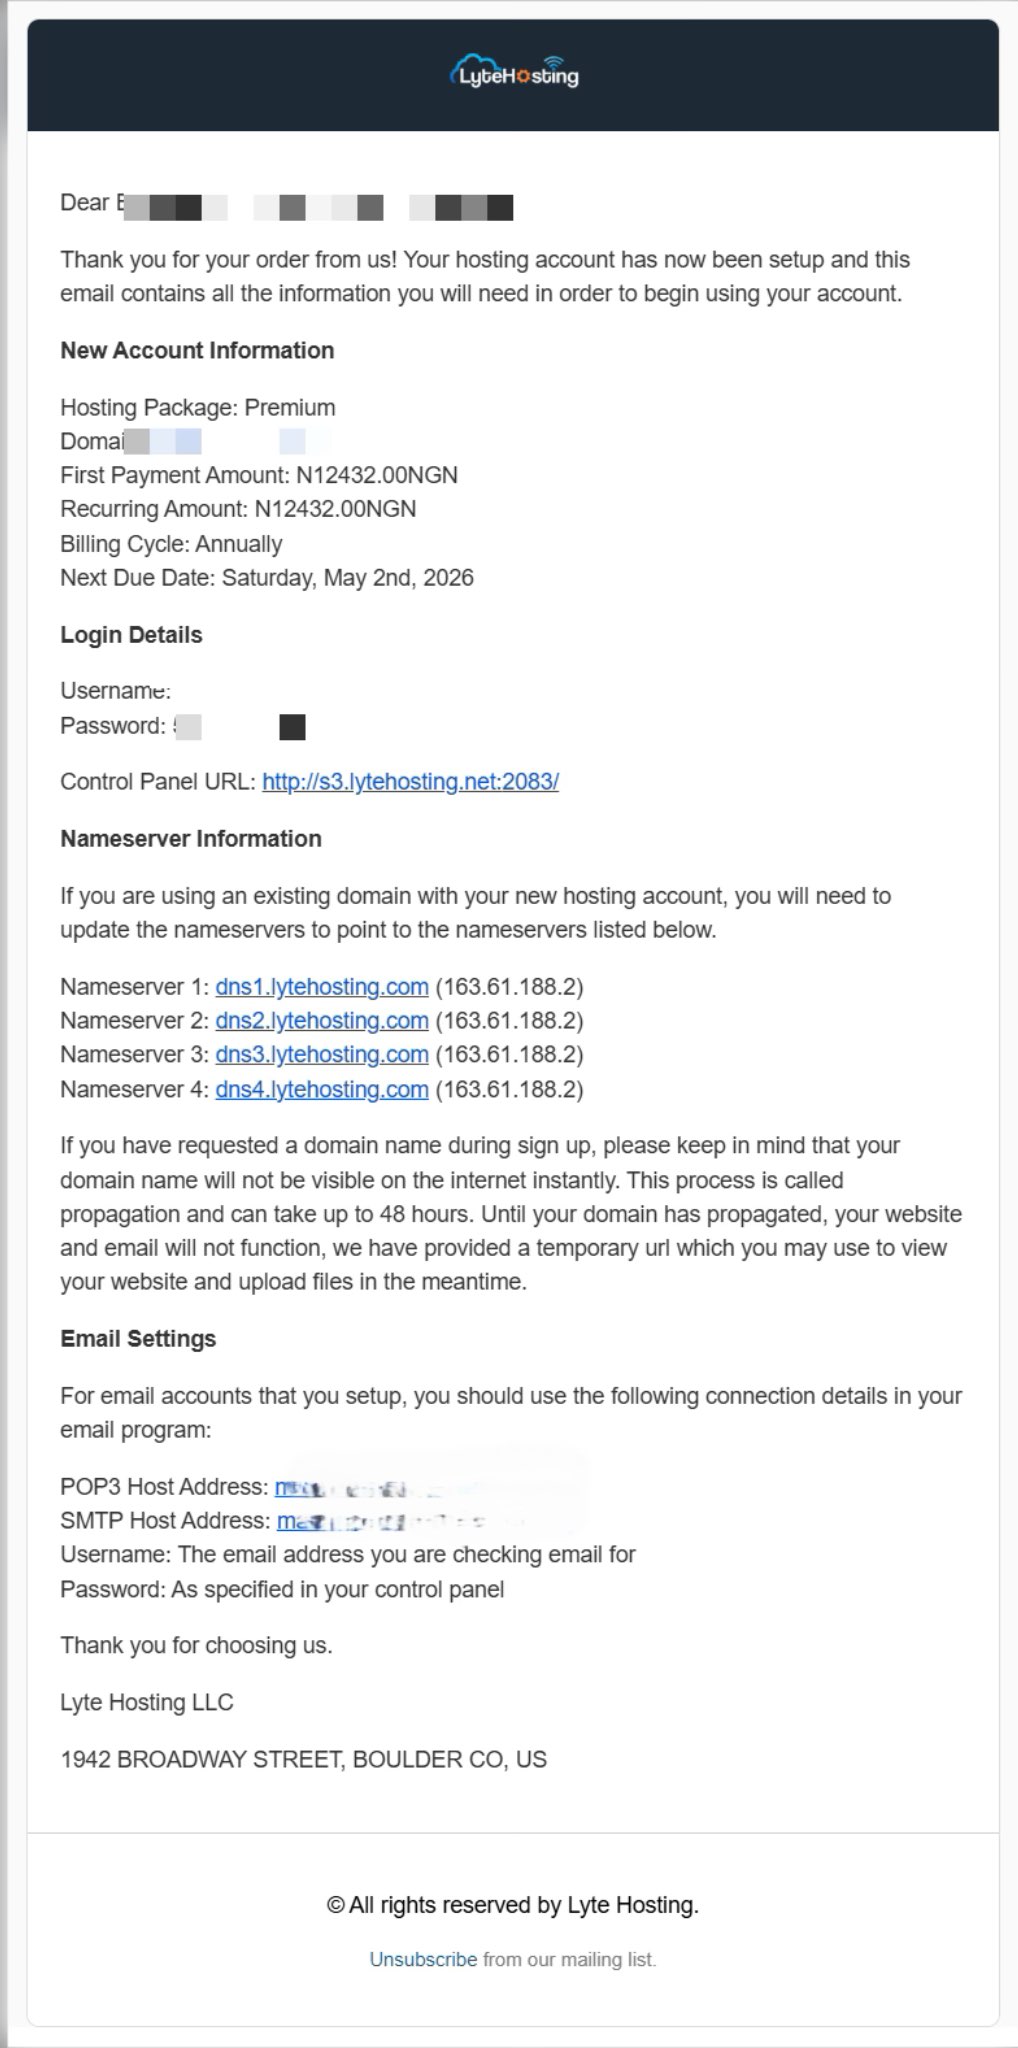
- Method 3: Log in using the details sent to your Email.
Through your Email;
- When you purchase a hosting plan, your cPanel login details (including username, password, and cPanel URL) are automatically sent to your registered email address. Simply check your inbox (or spam folder), locate the email, and use the provided credentials to access your cPanel.
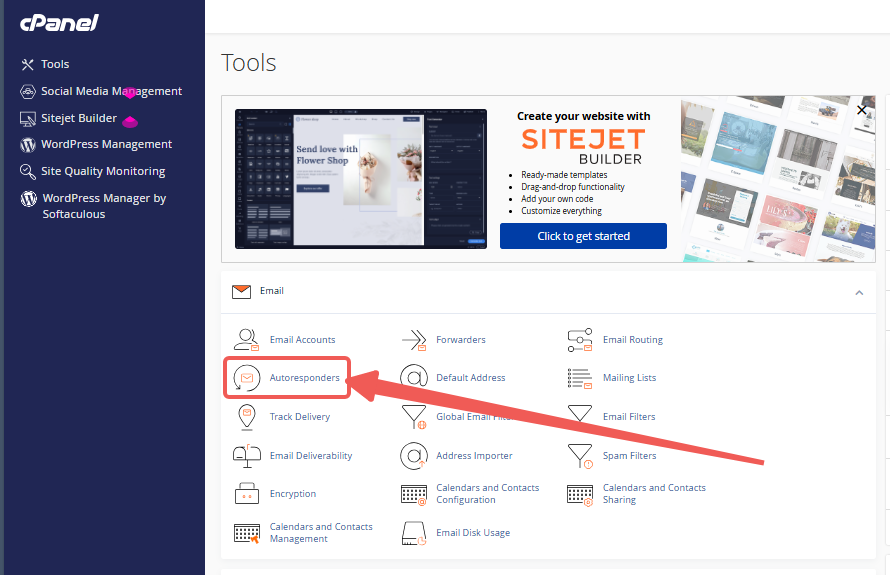
STEP 2: Locate the Email section and click on Autoresponders.
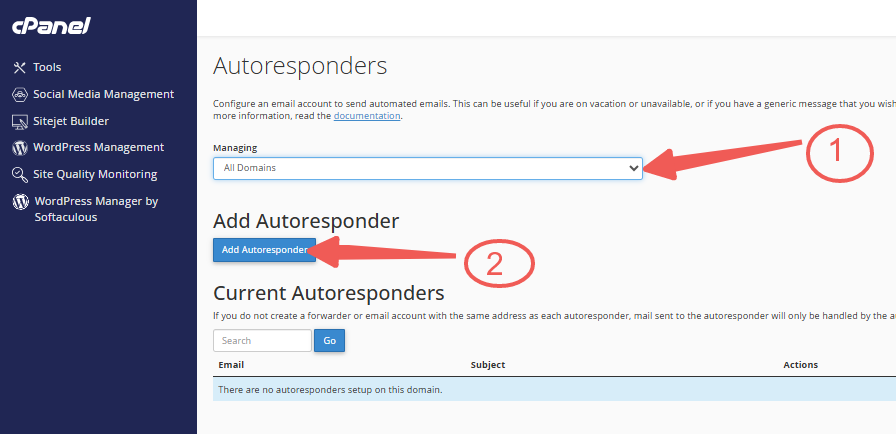
STEP 3: Under the Managing section, locate the domain where you want to set up the Autoresponder.
STEP 4: Click on Add Autoresponder.
STEP 5: From the Character Set dropdown, choose a character set for the email. (UTF-8 is the most widely used and recommended option.)
STEP 6: In the Interval field, enter the number of hours you want the Autoresponder to wait before sending another reply to the same email address. (This determines how long it waits before sending a second automatic reply to the same sender. This helps prevent multiple auto-replies if the same person emails you multiple times in a short period.)
STEP 7: In the Email field, enter the desired local part of the email address for which you want to set up the Autoresponder.
STEP 8: Next, select the appropriate Domain for the email address in the dropdown menu.
STEP 9: In the From field, enter the name that should appear as the sender of the auto-response.
STEP 10: In the Subject field, specify the subject line for the Autoresponder email.
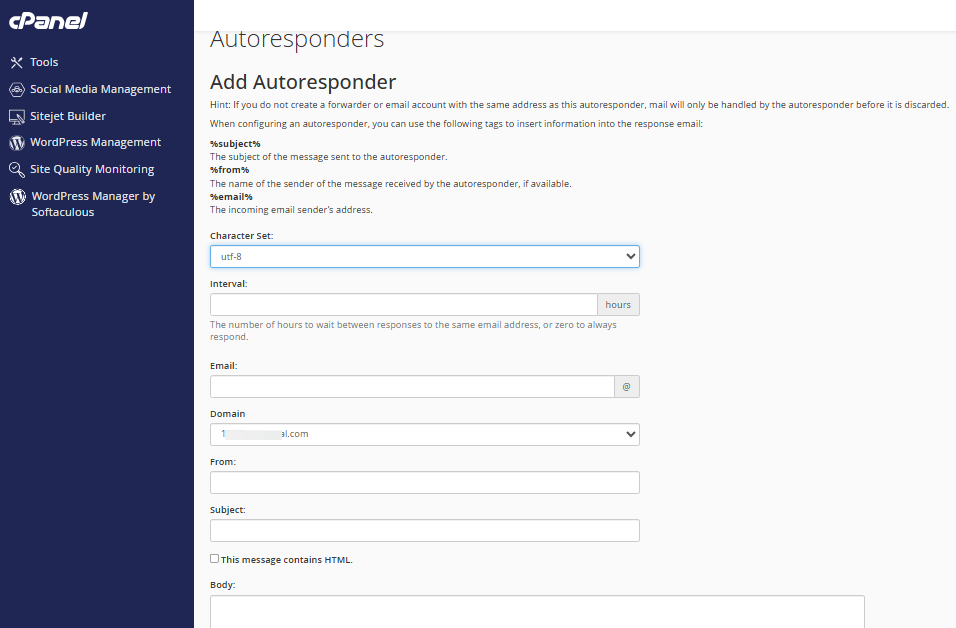
STEP 11: If the email body contains HTML, check the HTML box. Leaving it unchecked will display HTML tags as plain text in the response.
STEP 12: In the Body field, type the message you want the Autoresponder to send. You can use the following tags to insert dynamic information:
- %subject% – Displays the original email’s subject line.
- %from% – Shows the name of the sender to whom the Autoresponder is replying.
- %email% – Displays the sender’s email address.
STEP 13: Next, set the Start and Stop time for the Autoresponder.
STEP 14: Click Create to finalize the setup.
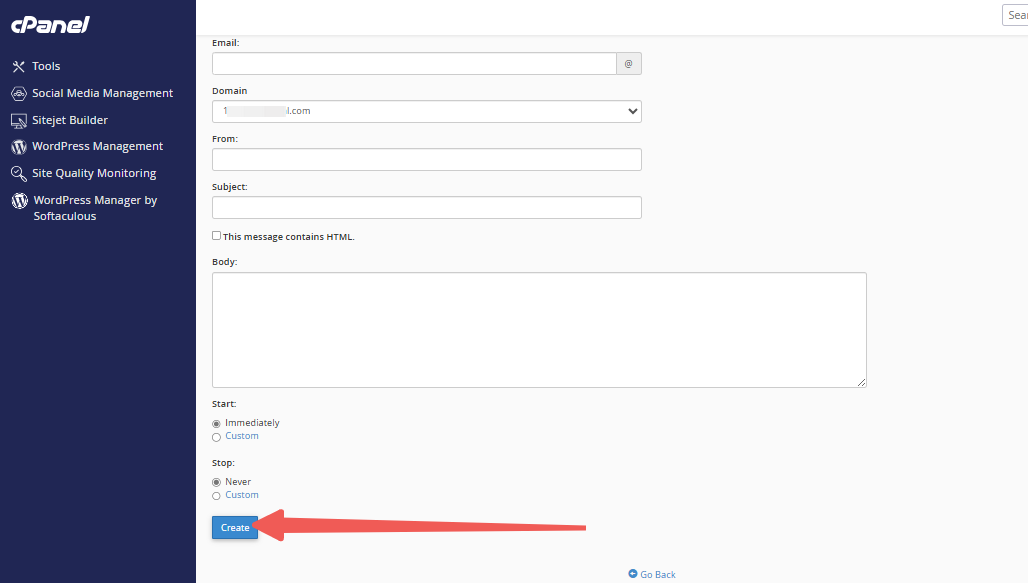
The Autoresponder will start sending automatic replies from the designated email address based on your chosen start time.


