If you’re moving your website from another server to LyteHosting, the Remote Import feature in Softaculous makes the process simple. This tool allows you to import existing installations (like WordPress, Joomla, or other supported scripts) from a remote server directly into your LyteHosting account.
This guide walks you through the steps of performing a remote import in Softaculous.
Steps to Perform a Remote Import
STEP 1: Log in to cPanel.
There are three methods to log into your cPanel.
- Method 1: Log in to your cPanel directly.
- Method 2: Log in to your cPanel through your Customer Portal.
Through your Customer Portal;
- Log in to your Customer Portal.
- Click on "Log in to cPanel".

- Method 3: Log in using the details sent to your Email.
Through your Email;
- When you purchase a hosting plan, your cPanel login details (including username, password, and cPanel URL) are automatically sent to your registered email address. Simply check your inbox (or spam folder), locate the email, and use the provided credentials to access your cPanel.

STEP 2: In the Software section, click on WordPress Manager by Softaculous.

STEP 3: Click on Remote Import from the WordPress Management page.

STEP 4: On the Remote Import page, click the Import From Remote Server tab.

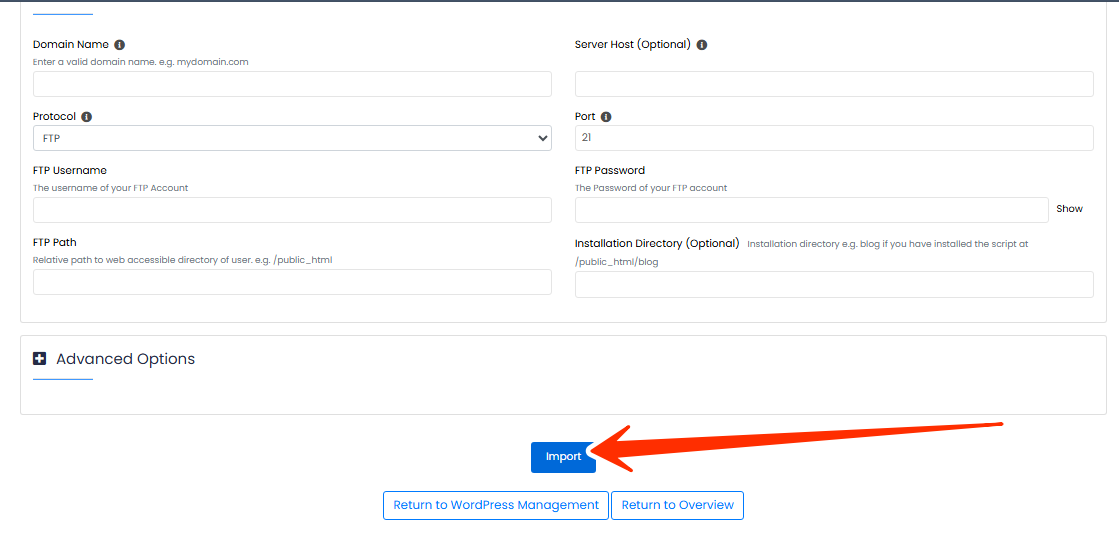
STEP 5: Fill in the details for both the source installation (the website you are moving from) and the destination (your LyteHosting server).
Source Details
- Domain Name: The domain of the site you want to import (e.g., mydomain.com). Do not include http:// or https://.
- Server Host (Optional): Specify if your server host is different from your domain (e.g., ftp.mydomain.com). Otherwise, leave it blank.
- Protocol: Select the protocol supported by your login (default is FTP).
- Port: Default FTP port is 21.
- FTP Username: Your FTP or cPanel username.
- FTP Password: The password for the FTP or cPanel user.
- FTP Path: The path to your web-accessible directory. Examples:
- /public_html, /htdocs, or /www if you see those directories after logging in.
- / if you land directly in the web root.
- Path to the addon or subdomain folder if applicable.
- Installation Directory (Optional): If the installation is in a specific subdirectory (e.g., wp856), enter it here. Leave blank if it’s in the root folder.
Destination Details
- Choose Protocol: Select the supported protocol for your LyteHosting server.
- Choose Domain: The domain on your LyteHosting account where the installation will be imported (e.g., destinationdomain.com).
- In Directory (Optional): Enter a directory name (e.g., wpdest) if you want the installation placed in a subfolder. Leave blank to install in /public_html.
- Database Name: Provide the database name where the imported site’s database will be stored.
STEP 6: Once all details are entered, click Import.
The process will run in the background. You’ll receive email notifications when the import starts and when it completes.
STEP 7: You can check the progress in the Task List tab of Softaculous.
STEP 8: Once the status reaches 100% and you see the message Import Completed, you can manage your newly imported site directly from Softaculous.
Frequently Asked Questions (FAQs)
Q: Can I import WordPress from another hosting provider to LyteHosting?
Yes, WordPress and many other scripts can be imported using the Remote Import feature.
Q: Do I need FTP access to use Remote Import?
Yes, valid FTP (or cPanel) credentials for the source server are required.
Q: How long does the import process take?
The time depends on the size of your website and the connection between servers. Smaller sites may take a few minutes, while larger ones may take longer.
Q: Will my database also be imported?
Yes, the Remote Import tool copies both your website files and database to your LyteHosting server.
Q: What happens if the import fails?
You can retry the process by double-checking your FTP credentials and paths. If issues persist, kindly reach out to LyteHosting support for assistance.


