Sometimes, when uploading files to your website, like images, videos, or backups, you may encounter errors such as:
- “File exceeds the upload_max_filesize directive in php.ini”
- “The uploaded file exceeds the post_max_size directive”
These errors occur because PHP limits the maximum file size and total request size by default. Adjusting these limits ensures your website can handle the files you need without causing server issues.
This article explains how to safely configure file upload limits in PHP on your hosting account.
Key PHP Settings for File Uploads
The main PHP settings that control uploads are:
- upload_max_filesize: Maximum size of a single uploaded file
- post_max_size: Maximum total size of POST data (including files)
- max_file_uploads: Maximum number of files uploaded at once
- memory_limit: Maximum memory PHP can use during upload
- max_execution_time: Maximum time a script can run to prevent timeouts during large uploads
Note: post_max_size should always be larger than upload_max_filesize.
STEP 1: Check Current PHP Limits
1. Create a file called info.php in your website root with the following content:
<?php
phpinfo();
?>
2. Open it in your browser: http://yourdomain.com/info.php
3. Look for upload_max_filesize, post_max_size, and other limits to know what needs increasing.
STEP 2: Update PHP Settings
There are several ways to increase upload limits depending on your hosting environment.
Option 1: Using php.ini (Recommended for VPS or Dedicated Hosting)
1. Locate php.ini in your hosting account
2. Add or update these lines:
upload_max_filesize = 64M
post_max_size = 128M
max_file_uploads = 20
memory_limit = 256M
max_execution_time = 300
3. Save the file and restart your web server if required
Adjust the values according to your website’s needs.
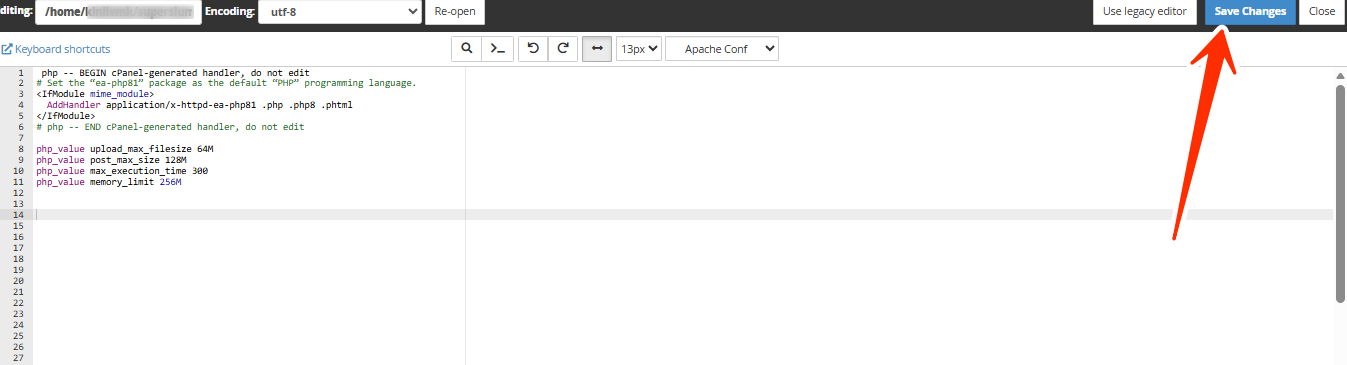
Option 2: Using .htaccess (Shared Hosting)
1. Open .htaccess in your website root (public_html)
2. Add:
php_value upload_max_filesize 64M
php_value post_max_size 128M
php_value max_execution_time 300
php_value memory_limit 256M
3. Save and test file uploads
Some hosts do not allow .htaccess overrides. Contact support if you get a server error.
Option 3: Using WordPress wp-config.php
1. Open wp-config.php in your WordPress root directory.
2. Add the following:
@ini_set('upload_max_size', '64M');
@ini_set('post_max_size', '128M');
@ini_set('max_execution_time', '300');
3. Save and test uploads.
This method works on most shared hosting accounts.
STEP 3: Verify New Limits
- Re-open info.php to confirm updated values
- Try uploading a file close to the new limit to ensure it works
NOTE:
- Avoid setting limits too high on shared hosting; it can cause server issues.
- Always make post_max_size larger than upload_max_filesize.
- Increase max_execution_time for very large uploads to prevent timeouts.
- Some themes or plugins may enforce their own limits; adjust them as needed.
Frequently Asked Questions (FAQs)
Q: What happens if I upload a file larger than the limit?
The upload will fail with an error like “exceeds upload_max_filesize.”
Q: Can I change upload limits on shared hosting?
Yes, using .htaccess or wp-config.php, but some hosts may require support intervention.
Q: Is there a risk in increasing limits?
High limits can use more server resources, especially on shared hosting. Adjust according to server capacity.
Q: How can I upload very large files safely?
Use FTP/SFTP, a backup plugin, or temporarily increase server limits for large uploads.
Q: Do I need to restart my server after changing php.ini?
Yes, changes in php.ini usually require a server or PHP restart to take effect.
If you need assistance adjusting upload limits on your hosting account, kindly reach out to our support team.


