Step 1: Log into cPanel.
There are three methods to log into your cPanel.
- Method 1: Log in to your cPanel directly.
- Method 2: Log in to your cPanel through your Customer Portal.
Through your Customer Portal;
- Log in to your Customer Portal.
- Click on "Log in to cPanel".
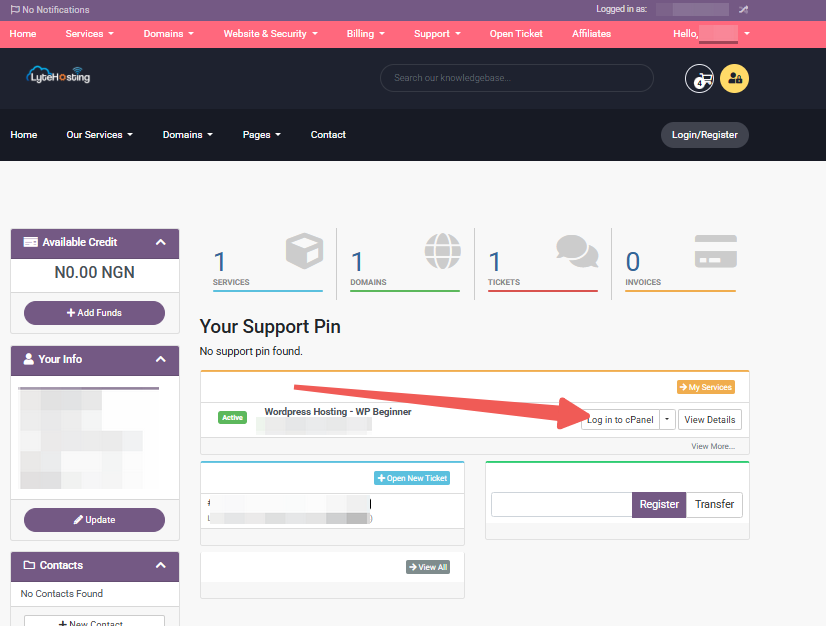
- Method 3: Log in using the details sent to your Email.
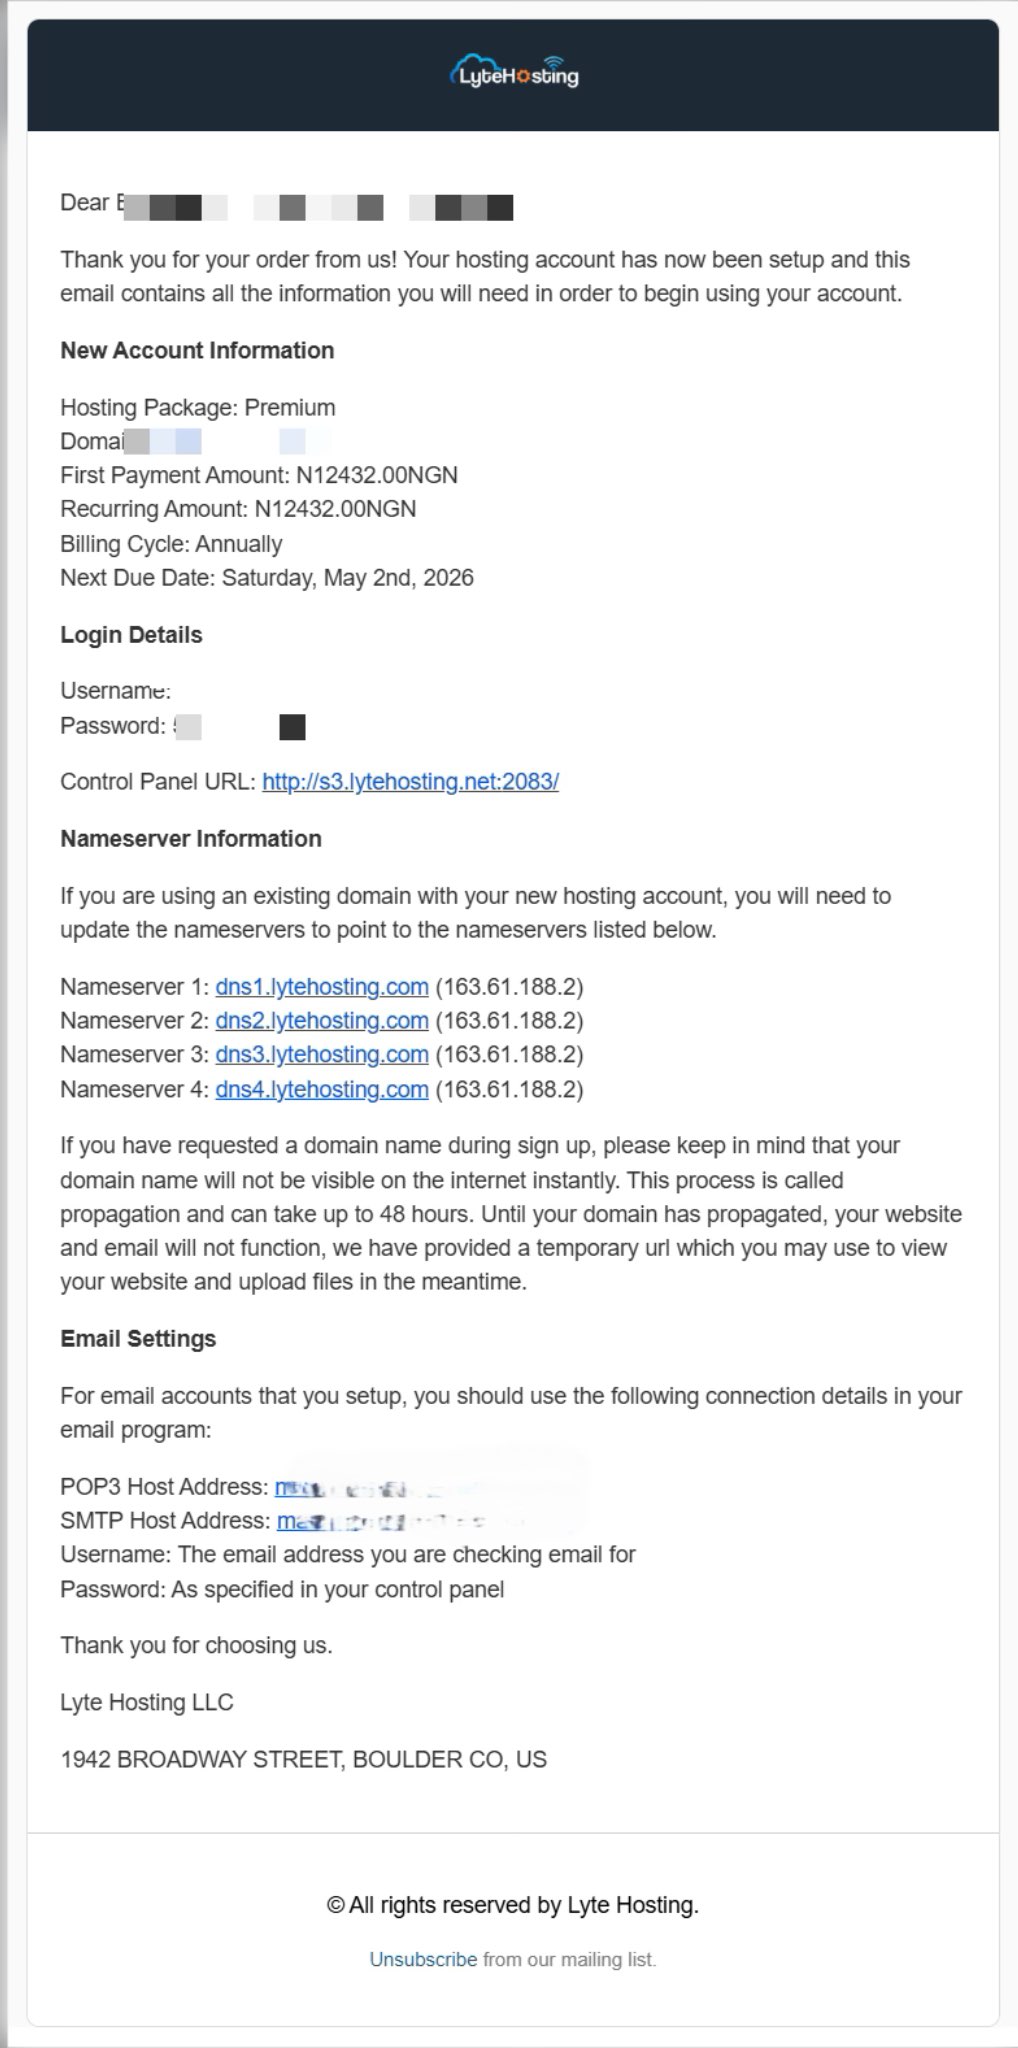
Through your Email;
- When you purchase a hosting plan, your cPanel login details (including username, password, and cPanel URL) are automatically sent to your registered email address. Simply check your inbox (or spam folder), locate the email, and use the provided credentials to access your cPanel.
Step 2: Access the Email Accounts section
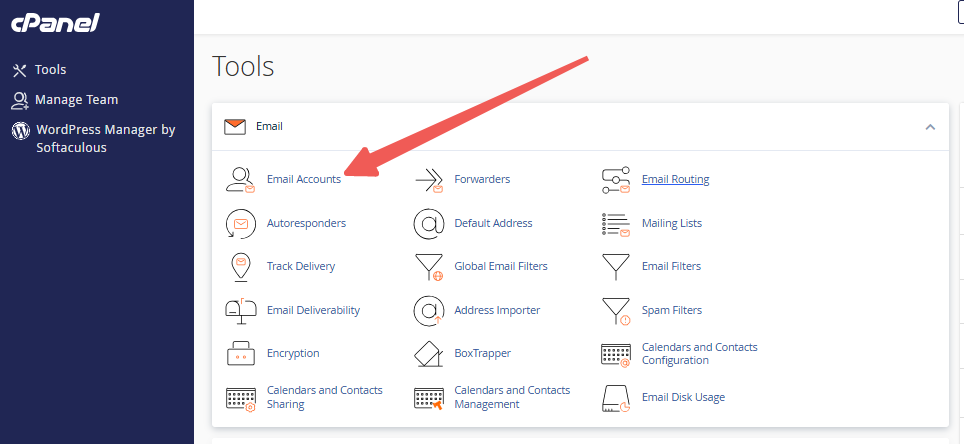
- Once logged into cPanel, locate the "Email" section on the main dashboard.
- Click on the Email Accounts icon. This will take you to the page where you can manage all your email accounts.
Step 3: Find the Email Account
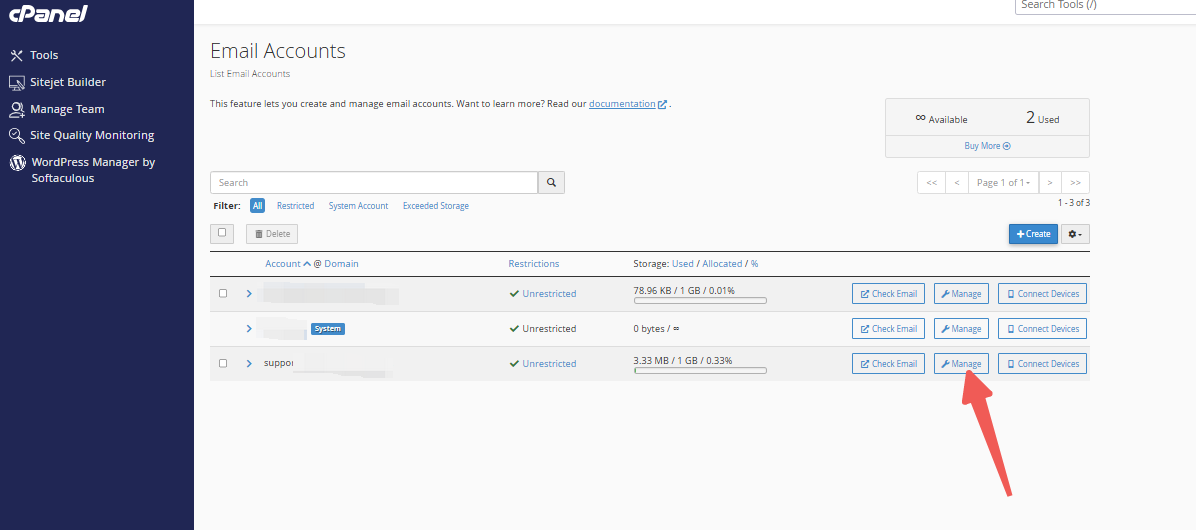
- On the Email Accounts page, you'll see a list of all the email accounts associated with your domain.
- Locate the email account for which you want to change the password. You can use the search bar to find it quickly if you have many accounts.
- Next to the email account you want to modify, click the Manage button.
STEP 4: On the Manage Email Account page, find the New Password section.
- Enter your new password in the New Password field. Make sure it’s strong and secure.
- Confirm your new password by entering it again in the Confirm New Password field.

Step 5: Save the Changes
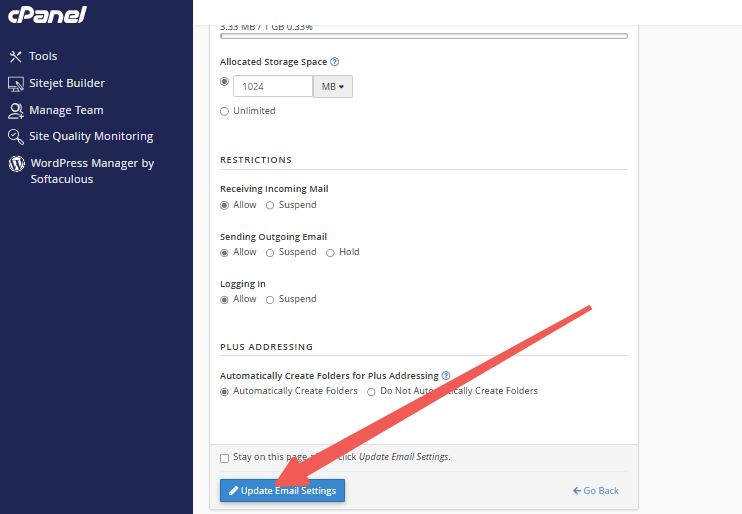
- Once you’ve entered the new password, scroll down and click the Update Email Settings button to save your changes.
Step 6: Confirmation
- You should see a confirmation message indicating that the password has been successfully changed.
- Make sure to update your email client (e.g., Outlook, Thunderbird, or your mobile email app) with the new password to avoid any connection issues.
Additional Tips:
- Use a combination of uppercase letters, lowercase letters, numbers, and special characters for a strong password.
- Avoid using easily guessable information such as birthdays or common words.
- Store your new password securely and do not share it with others.


