Forwarders enable you to automatically redirect a copy of an incoming email from one email address to another.
Outgoing email forwarding, which ensures a copy of all emails from the server is automatically sent to a specific email address, is exclusively available with Dedicated hosting. This feature is not supported on Shared hosting.
How to Create an Email Account Forwarder
Follow these steps to set up an email forwarder:
STEP 1: Log in to cPanel.
There are three methods to log into your cPanel.
- Method 1: Log in to your cPanel directly.
- Method 2: Log in to your cPanel through your Customer Portal.
Through your Customer Portal;
- Log in to your Customer Portal.
- Click on "Log in to cPanel".
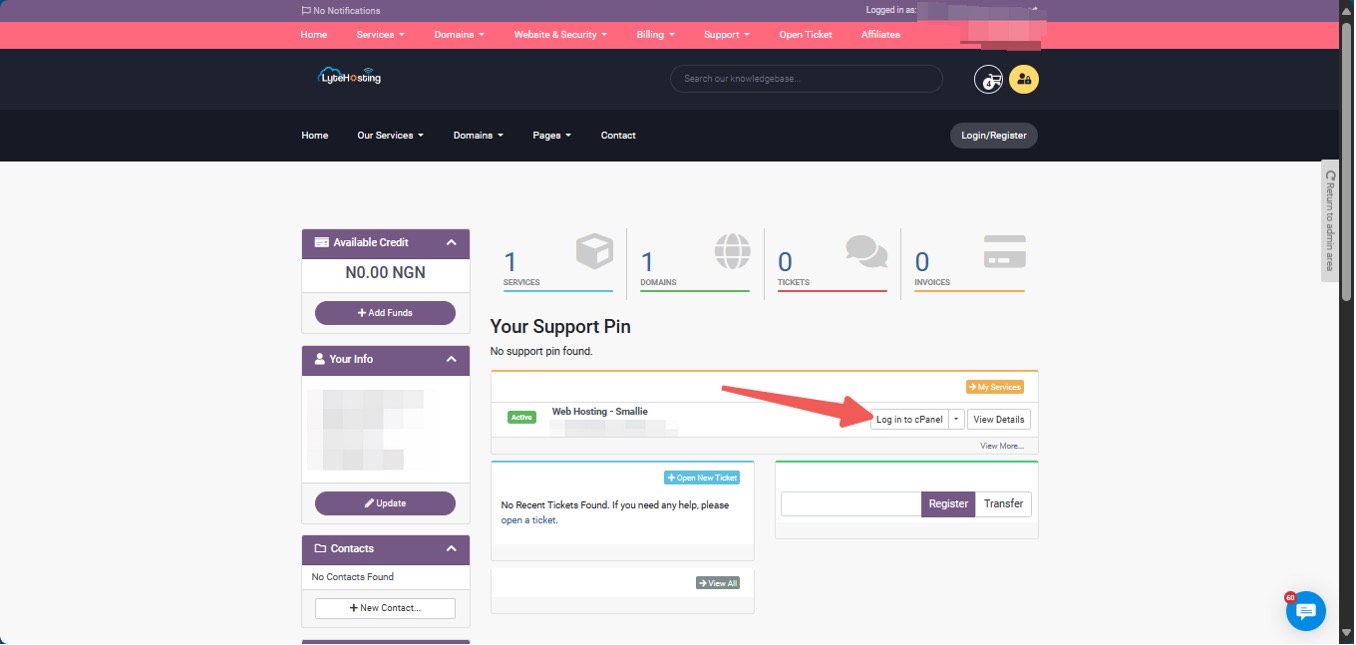
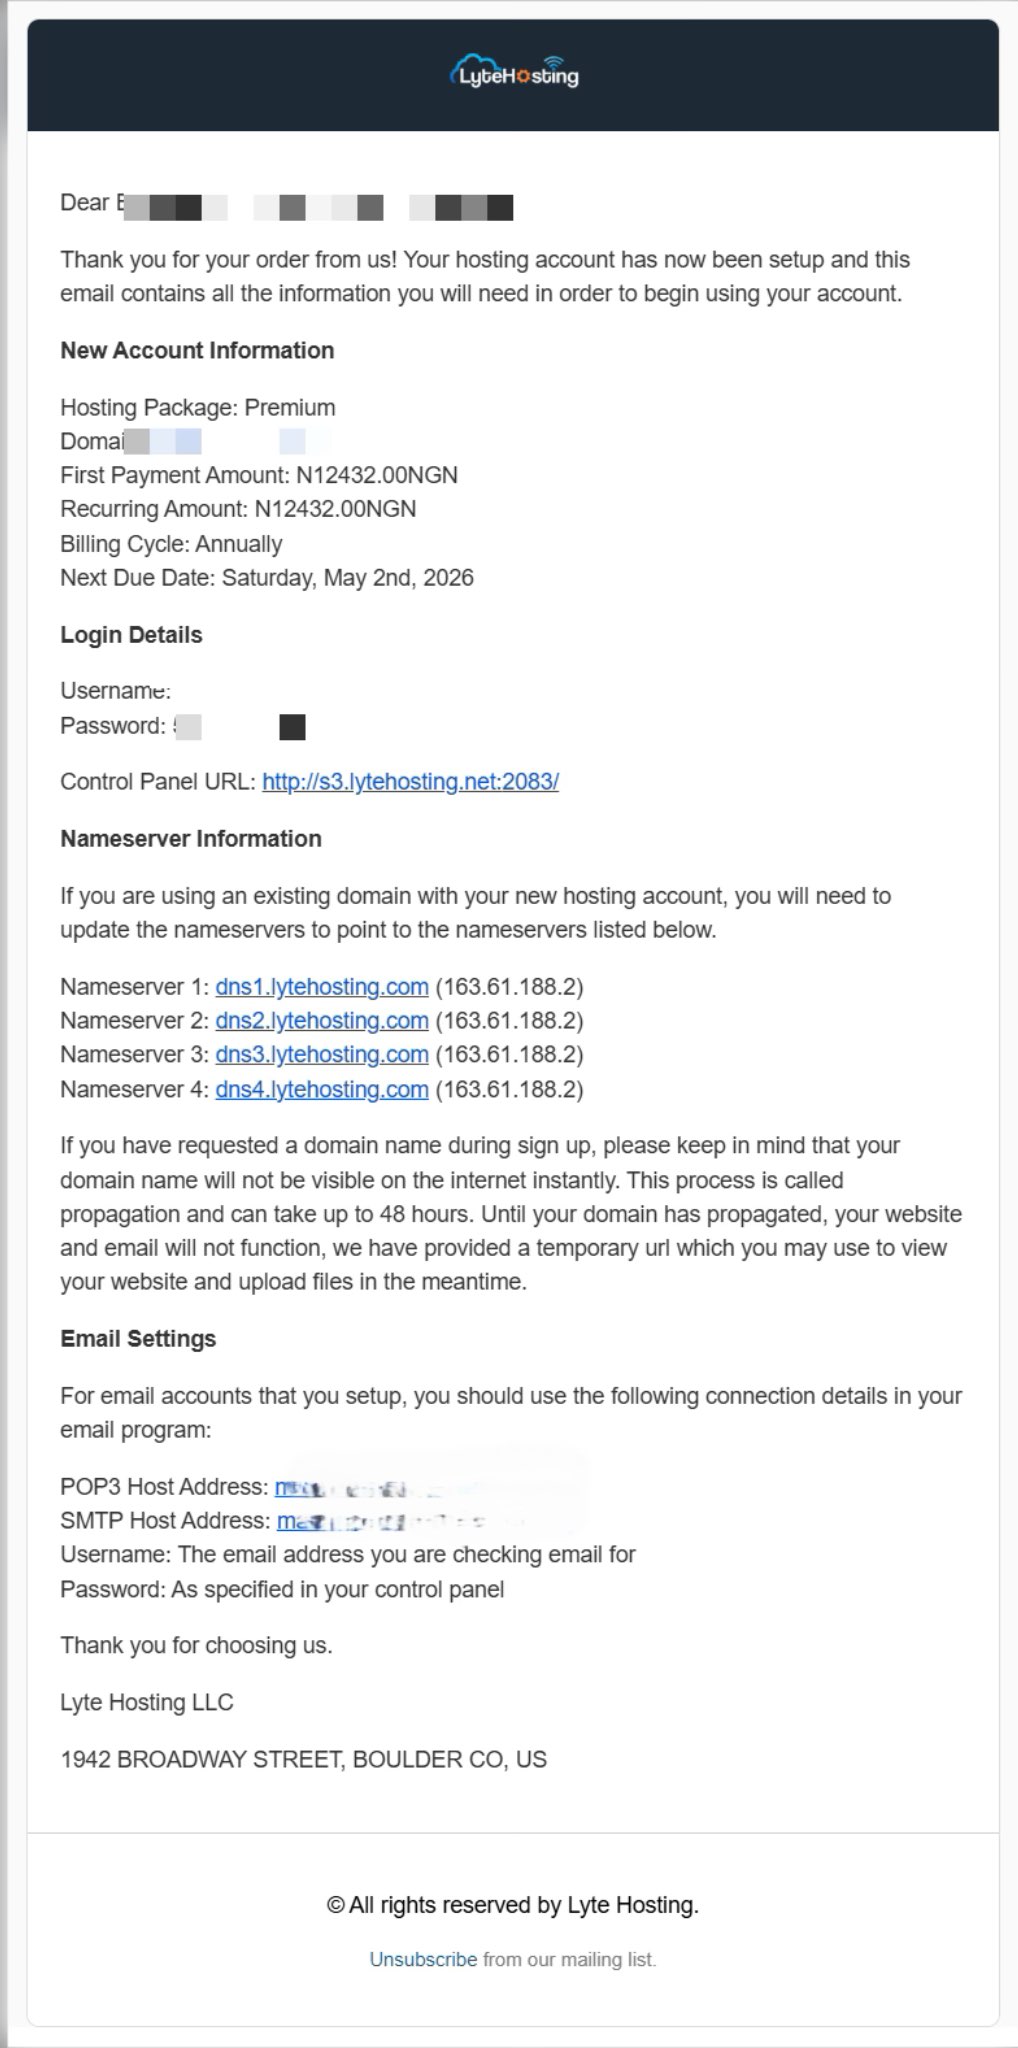
- Method 3: Log in using the details sent to your Email.
Through your Email;
- When you purchase a hosting plan, your cPanel login details (including username, password, and cPanel URL) are automatically sent to your registered email address. Simply check your inbox (or spam folder), locate the email, and use the provided credentials to access your cPanel.
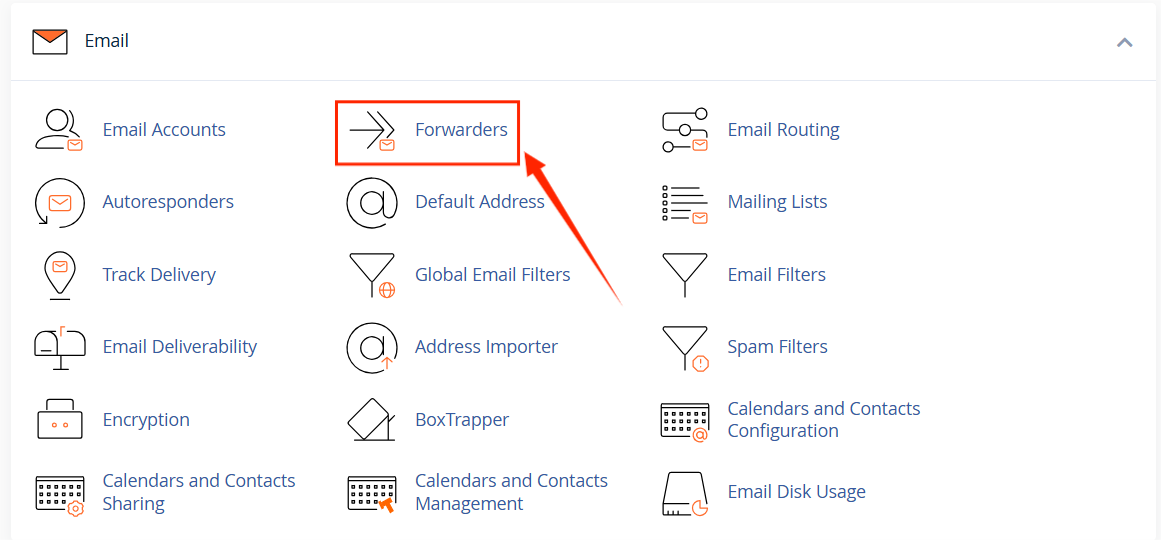
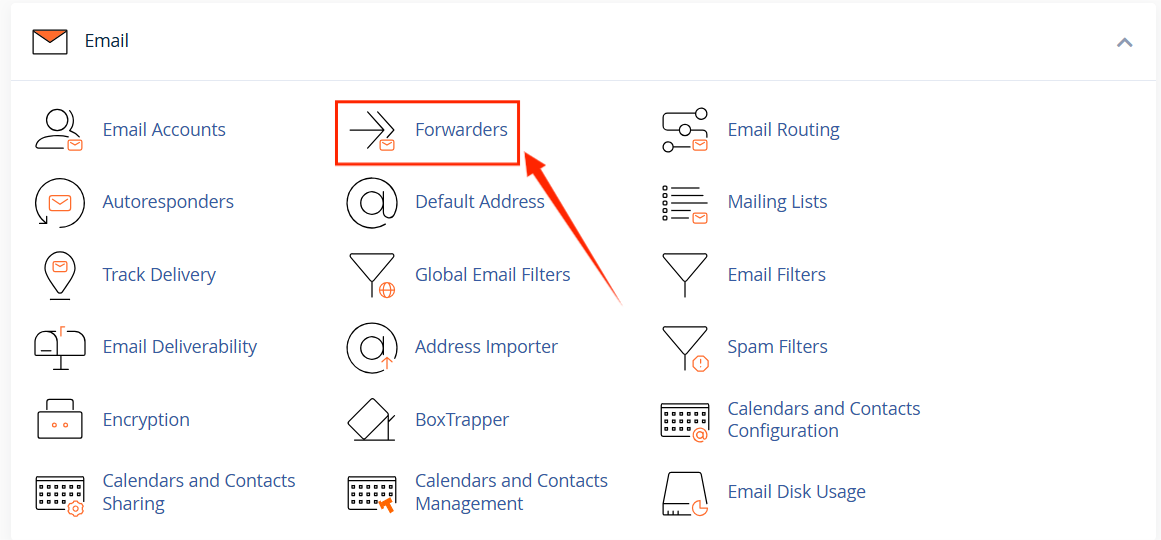
STEP 2: Locate the Email section and click on Forwarders.
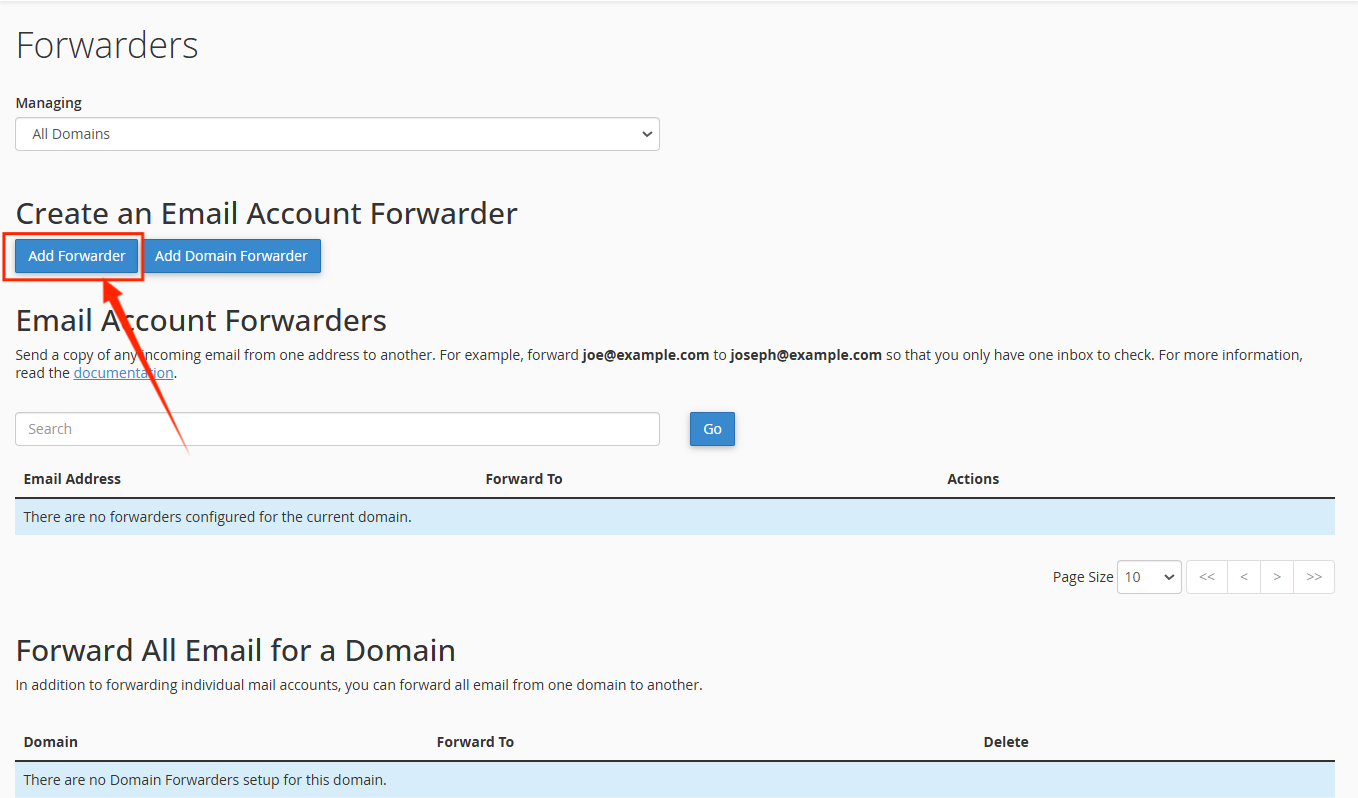
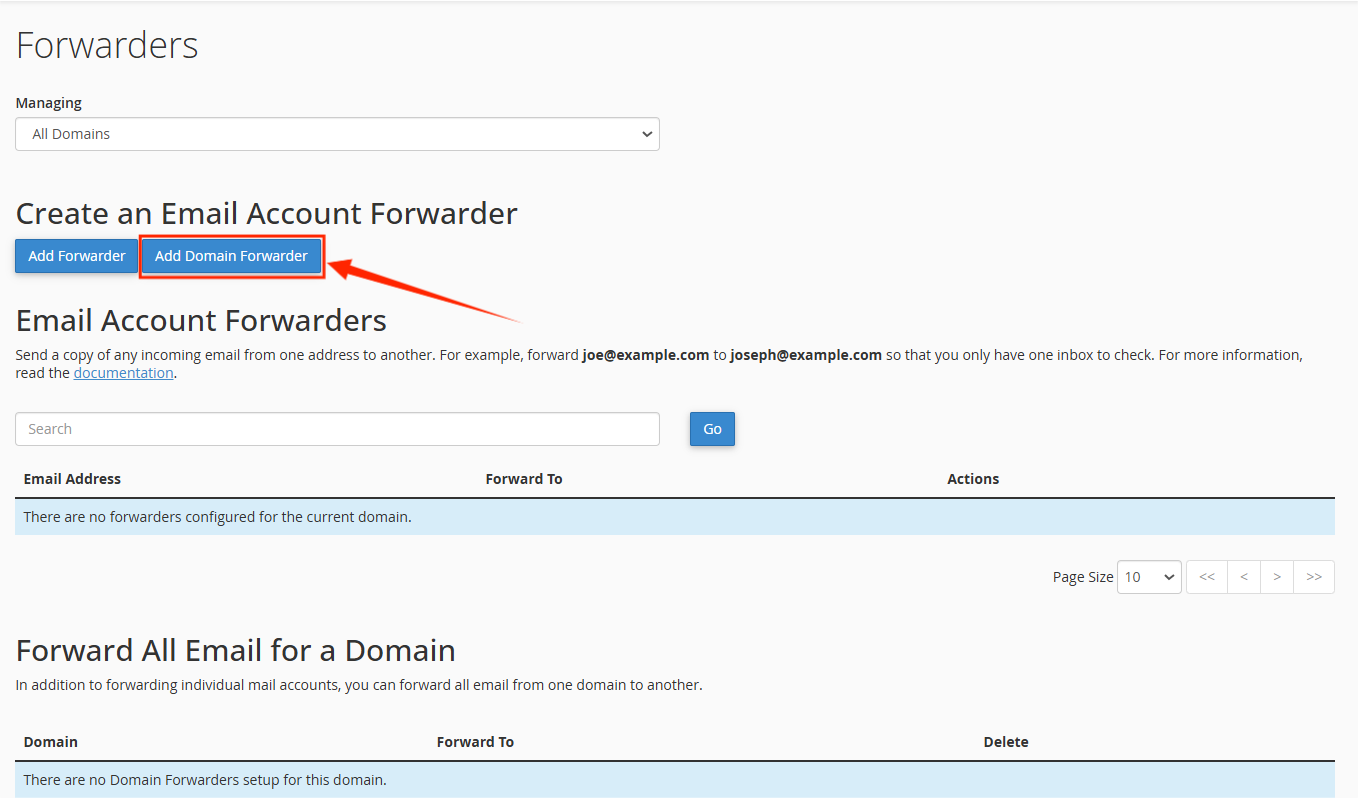
STEP 3: On the next page, click Add Forwarder.
STEP 4: Enter the email username you want to forward. Then, you can choose your email account's domain name from the Domain dropdown menu.
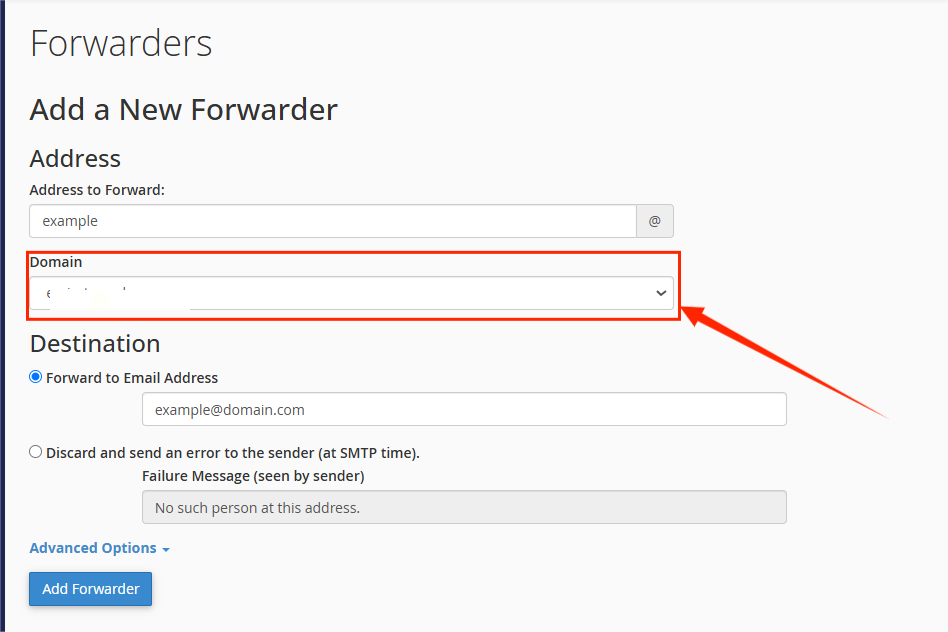
STEP 5: Configure the Destination by selecting one of the following options:
- Forward to email address: Enter the email address where you want incoming emails to be forwarded.
- Discard and send an error to the sender (at SMTP time): This option sends a notification back to the sender, indicating the email was not delivered. It helps them resend the message or verify the recipient's email address.
- Advanced Options:
- Forward to a system account
- Pipe to a program
- Discard (Not Recommended)
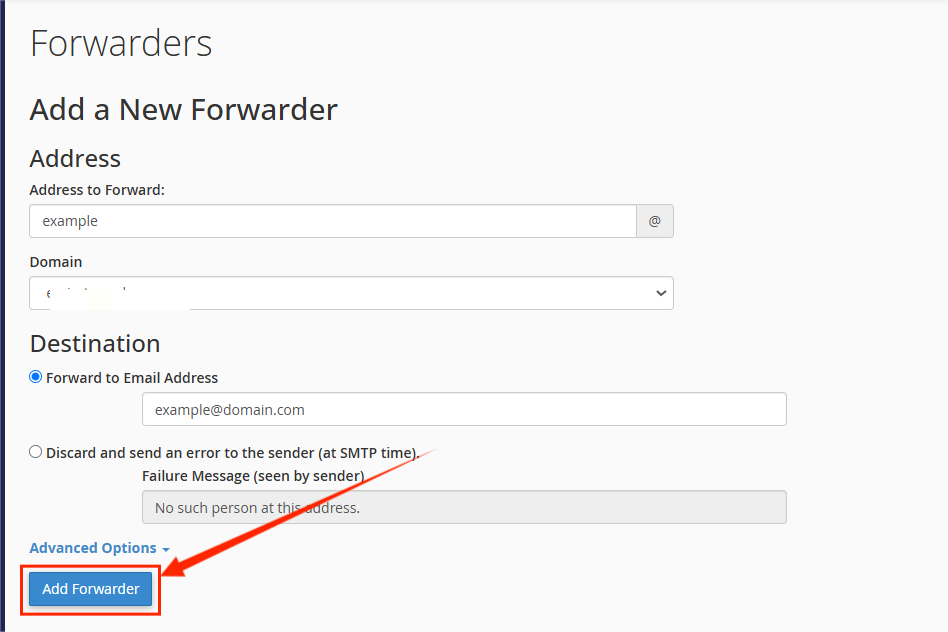
STEP 6: After setting up the destination, click Add Forwarder to finalize the process.
Notes:
- A copy of each forwarded email is stored on the server. Over time, this can lead to the email inbox reaching its storage capacity, causing forwarding to stop. To prevent this, consider creating a forwarder using a non-existent receiving email address at your domain. This ensures no copy of the email is stored on the server before it is forwarded.
- If spam is forwarded from your LyteHosting account to another email address, it could result in your LyteHosting account being blacklisted. To mitigate this risk, minimizing the number of forwarders in your account is advisable.
How to Forward an Email to Multiple Accounts
To ensure emails are copied and delivered to multiple recipients, you can create additional forwarders by following these steps:
- Repeat Steps 4–7 of the email forwarder creation process.
- Each time, use the same email address as the source (the address receiving the emails) but specify a different destination email address for each forwarder.
Example:
Let’s say you want emails sent to support@yourdomain.com to also go to manager@yourdomain.com and admin@anotherdomain.com:
- Create a forwarder for support@yourdomain.com to manager@yourdomain.com.
- Then, create another forwarder for support@yourdomain.com to admin@anotherdomain.com.
This setup ensures that all incoming emails to support@yourdomain.com are delivered to both manager@yourdomain.com and admin@anotherdomain.com.
How to Create an Email Domain Forwarder
Domain forwarders allow you to forward all emails sent from one domain to another. The emails are forwarded to matching usernames on the new domain.
Example:
Emails sent to info@oldcompany.com will be forwarded to info@newcompany.com. Similarly, emails sent to sales@oldcompany.com will be forwarded to sales@newcompany.com.
Steps to Create a Domain Forwarder:
STEP 1: In your cPanel, navigate to the Email section and click on Forwarders.
STEP 2: Click the Add Domain Forwarder tab.
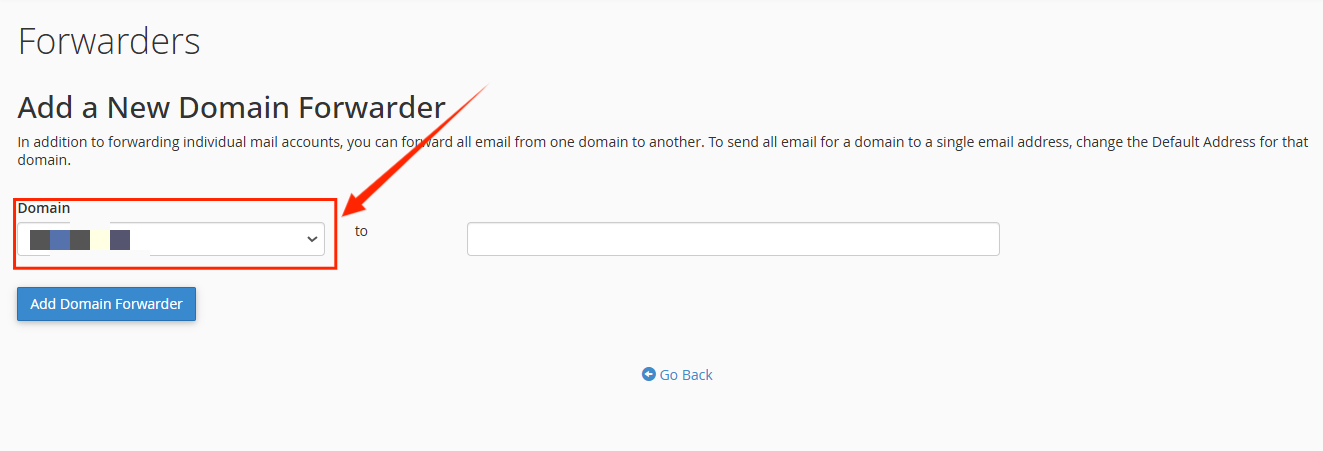
STEP 3: From the Domain dropdown menu, select the source domain (the domain you want to forward emails from).
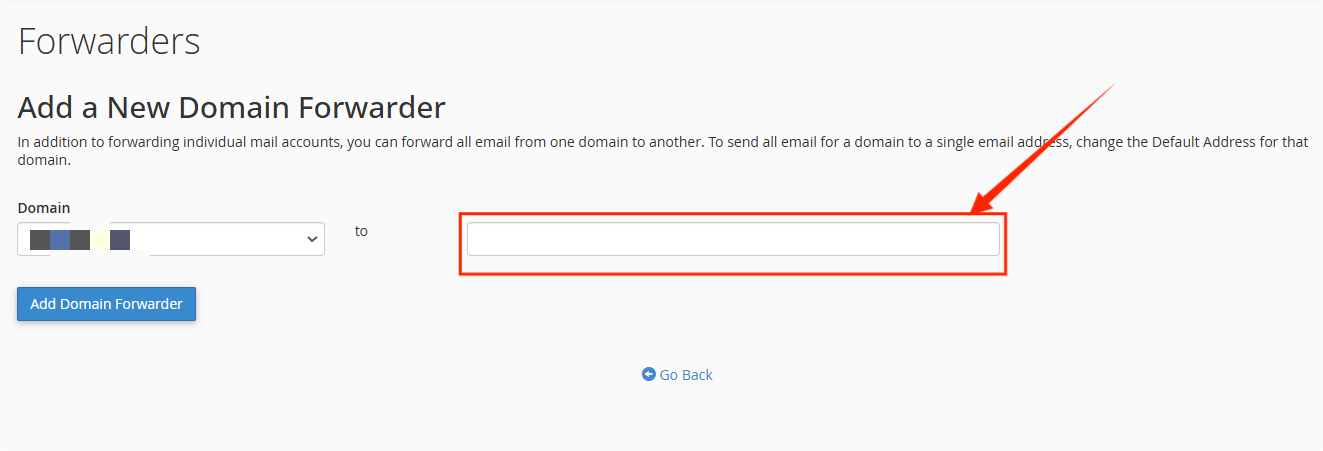
STEP 4: In the second box, enter the destination domain (the domain to which emails will be forwarded).
STEP 5: Click Add Domain Forwarder to complete the setup.
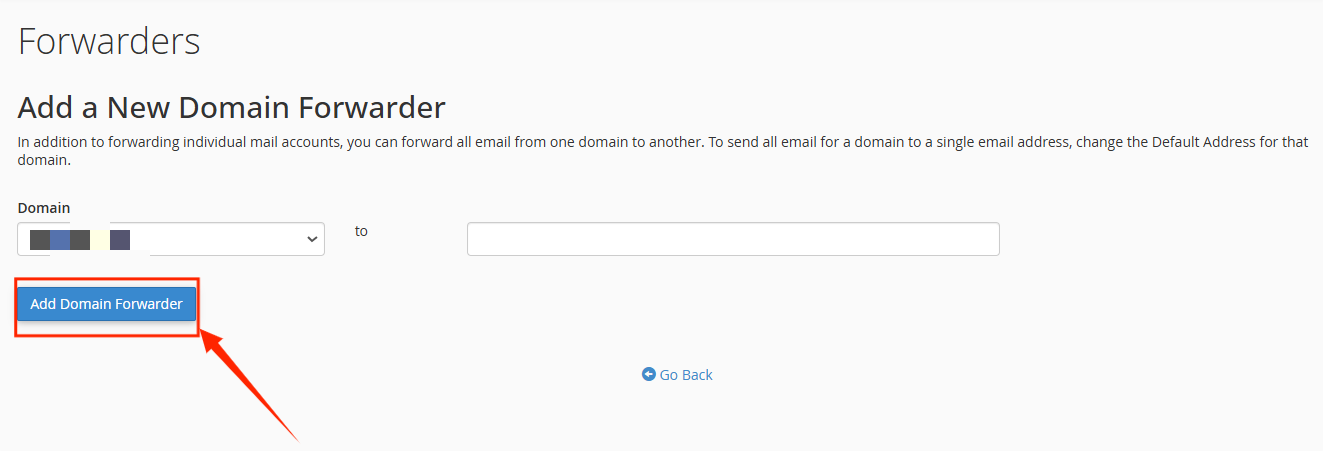
All emails sent to addresses at the source domain will be forwarded to matching addresses at the destination domain.
How to Delete a Forwarder
Follow these steps to remove an email account forwarder or domain forwarder:
STEP 1: In your cPanel, navigate to the Email section and click on Forwarders.
STEP 2: Locate the email or domain forwarder you wish to delete from the list of forwarders.
STEP 3: Click the Delete icon next to the forwarder you want to remove.
This will delete the forwarder, and emails will no longer be forwarded according to the deleted rule.


