Softaculous enables you to associate additional files or folders with your script installation. These associated items will be included during backups and cloning operations.
This feature is only available if the installation resides in the document root of your domain.
STEP 1: Log in to cPanel.
There are three methods to log into your cPanel.
- Method 1: Log in to your cPanel directly.
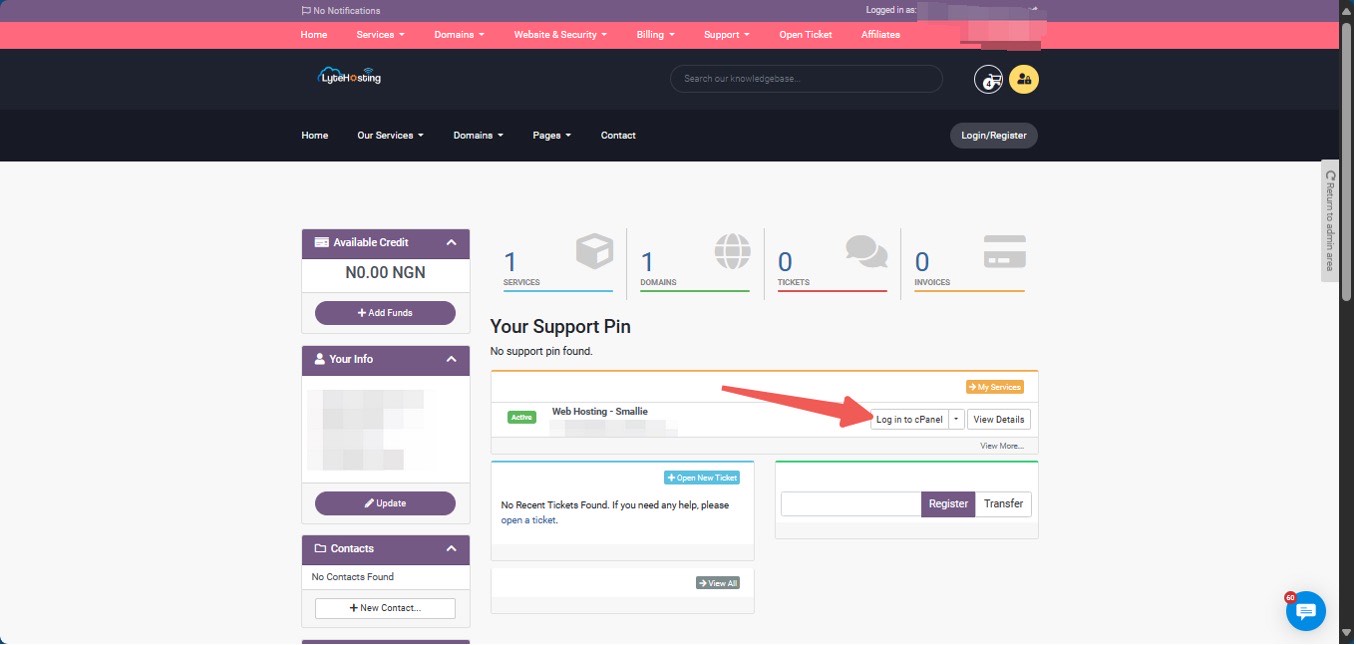
- Method 2: Log in to your cPanel through your Customer Portal.
Through your Customer Portal;
- Log in to your Customer Portal.
- Click on "Log in to cPanel".
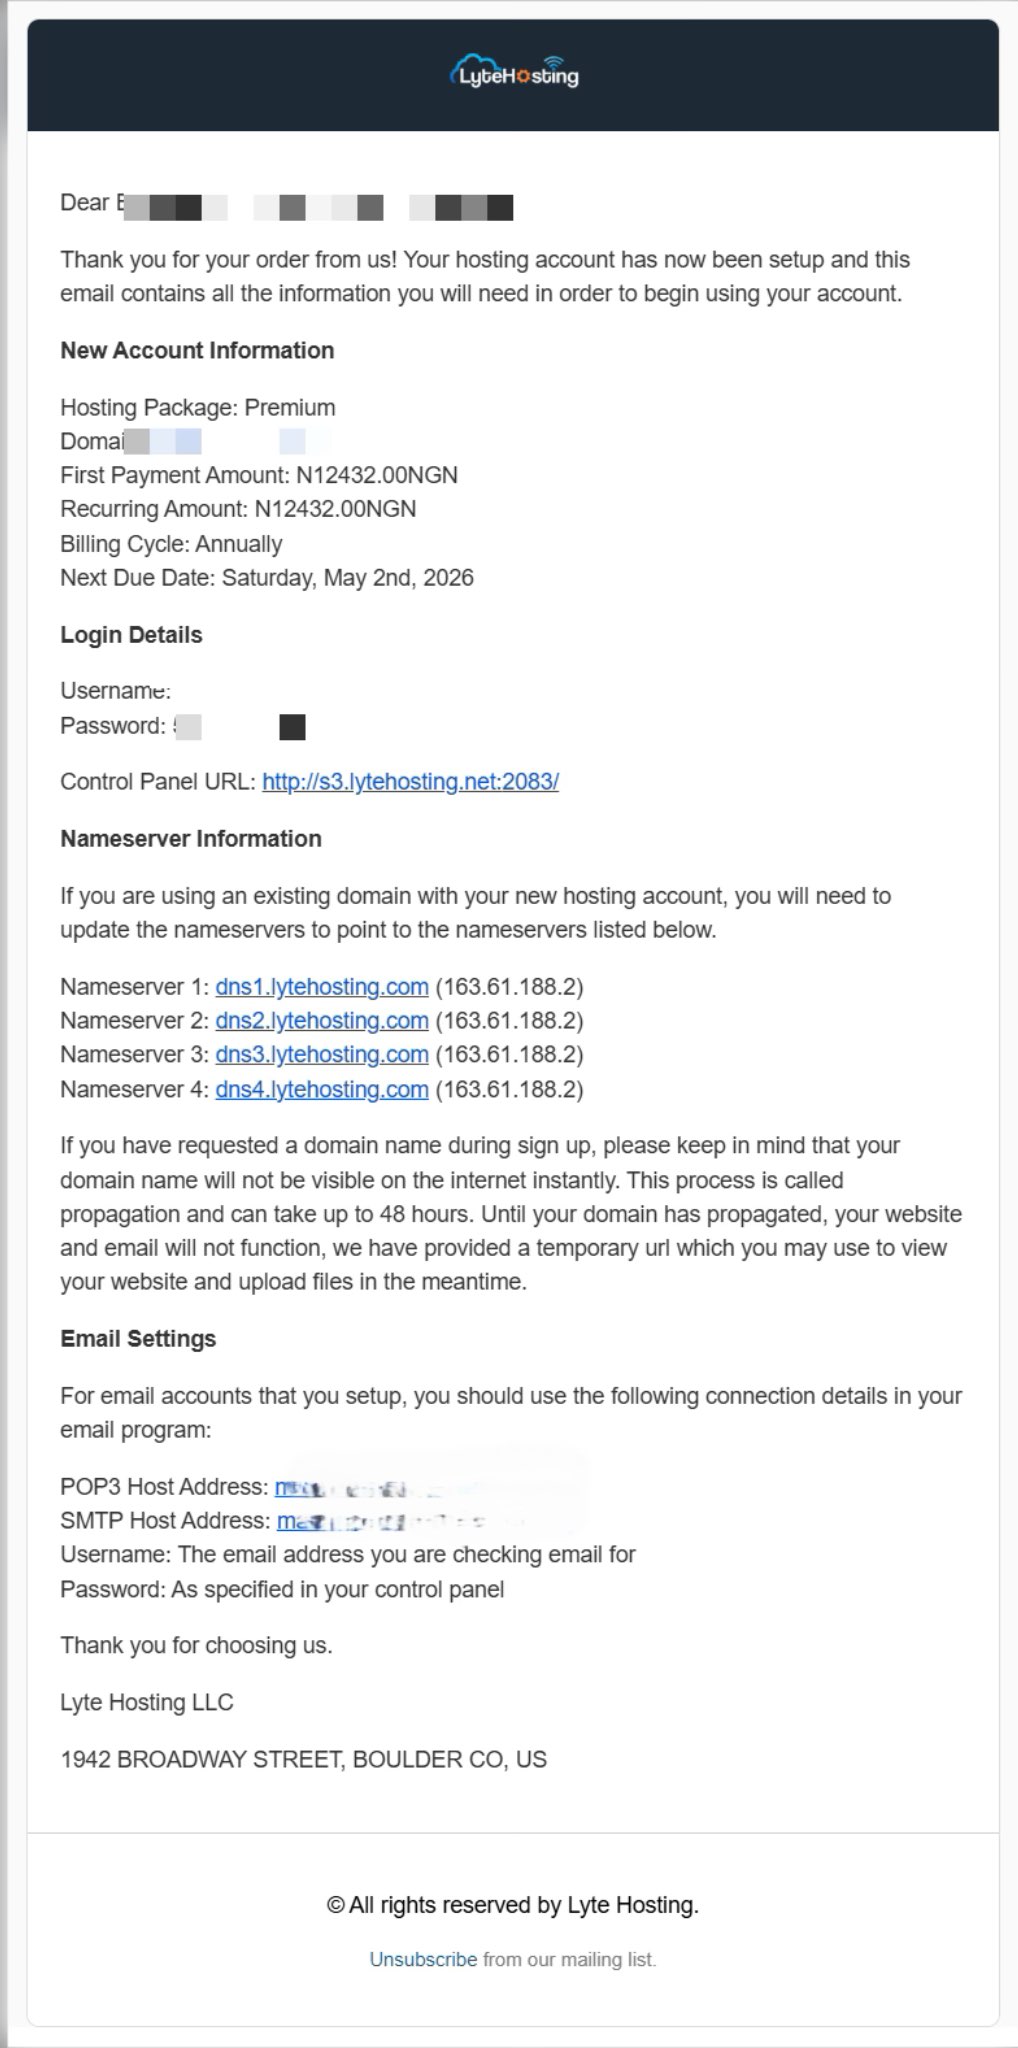
- Method 3: Log in using the details sent to your Email.
Through your Email;
- When you purchase a hosting plan, your cPanel login details (including username, password, and cPanel URL) are automatically sent to your registered email address. Simply check your inbox (or spam folder), locate the email, and use the provided credentials to access your cPanel.
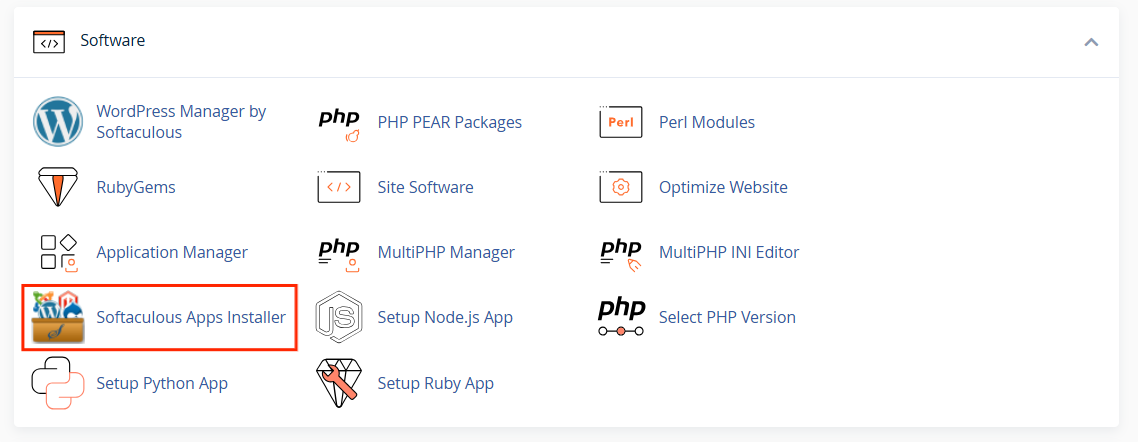
STEP 2: Locate the Software section and click Softaculous Apps Installer.
STEP 3: Click the "Installation" box on the dashboard.
Alternatively, you can select the "All Installations" icon in the top-right corner.
![]()
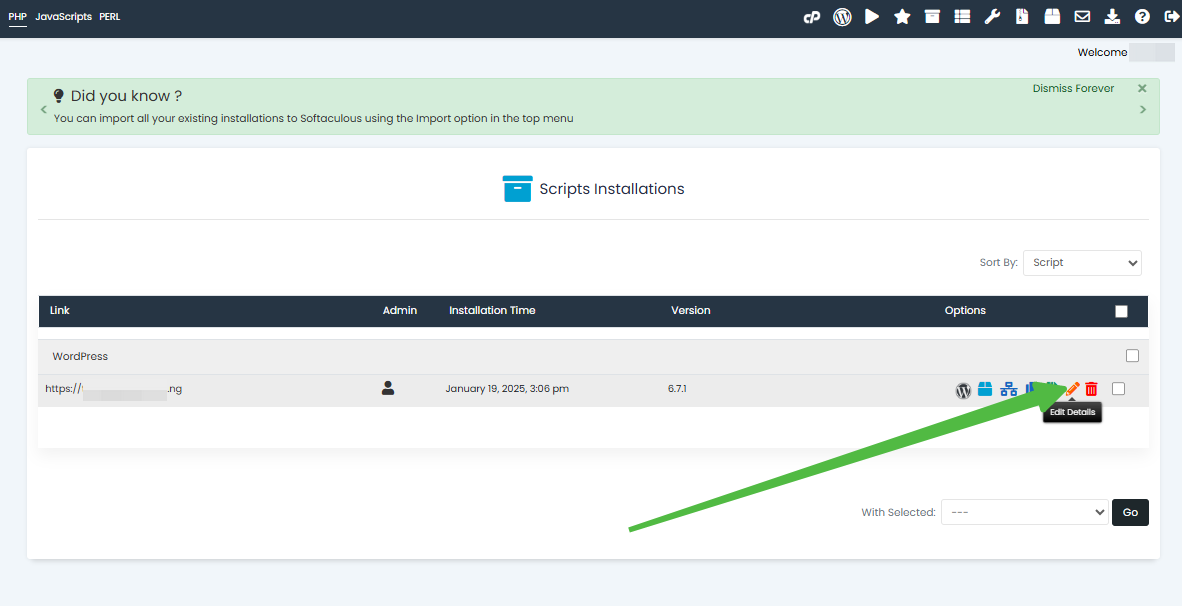
STEP 4: On the "Scripts Installations" page, locate your website and click the "Edit Details" icon.
STEP 5: You’ll be redirected to the "Edit Installation Details" page. Here, you can customize your installation settings.
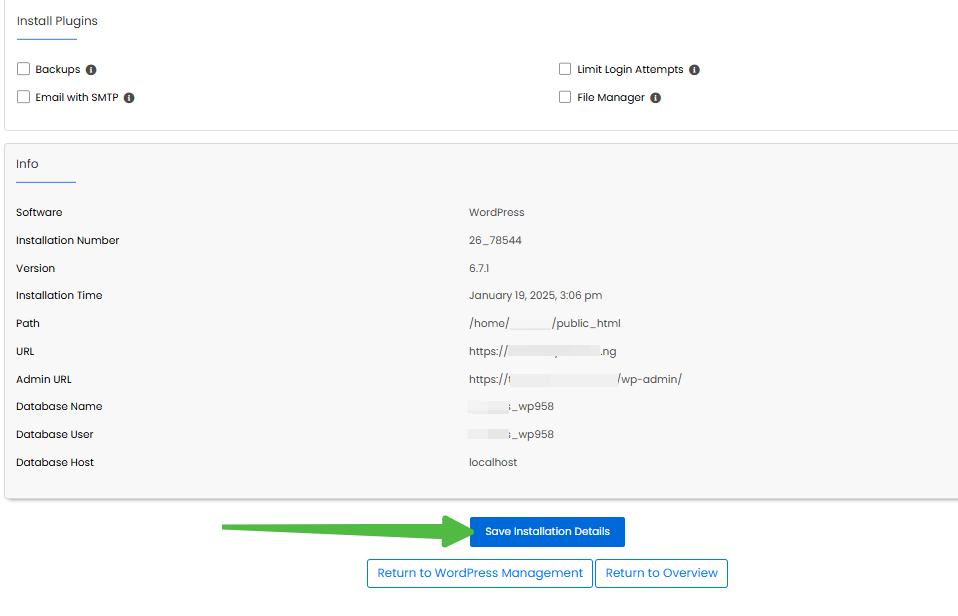
STEP 6: Scroll down to find the section labeled "Additional files/folders associated with your installation."
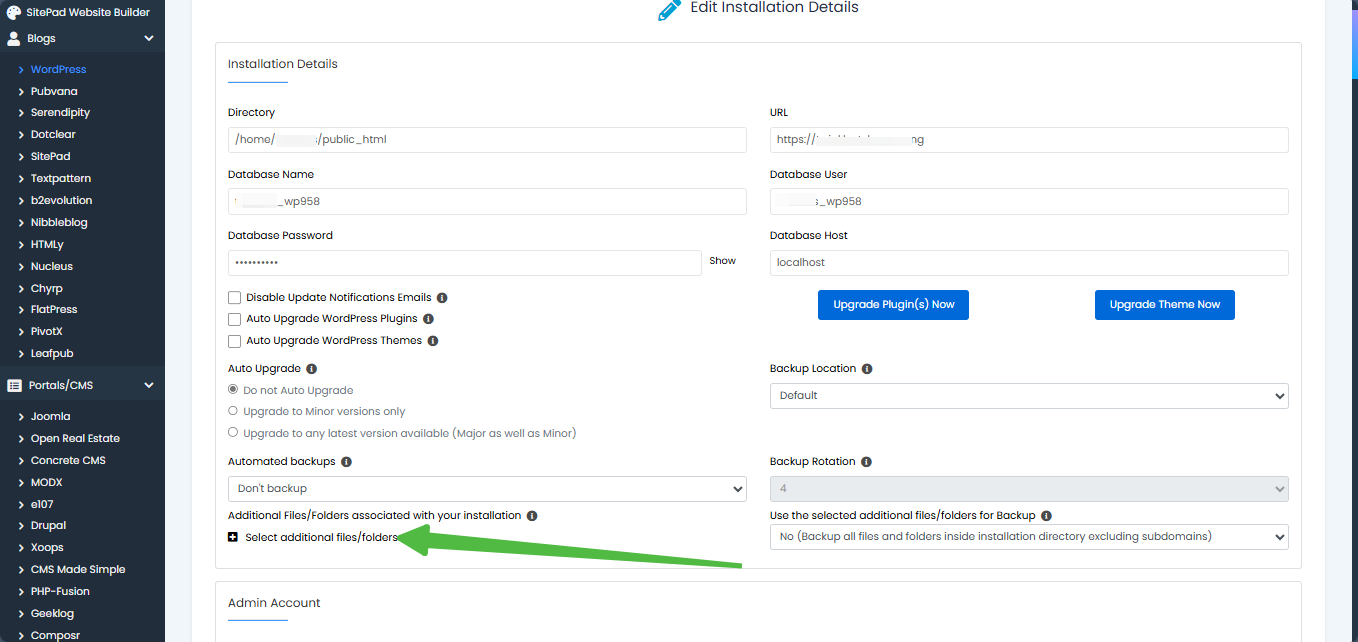
STEP 7: Click the "+" icon next to "Select additional files/folders" to expand the menu.
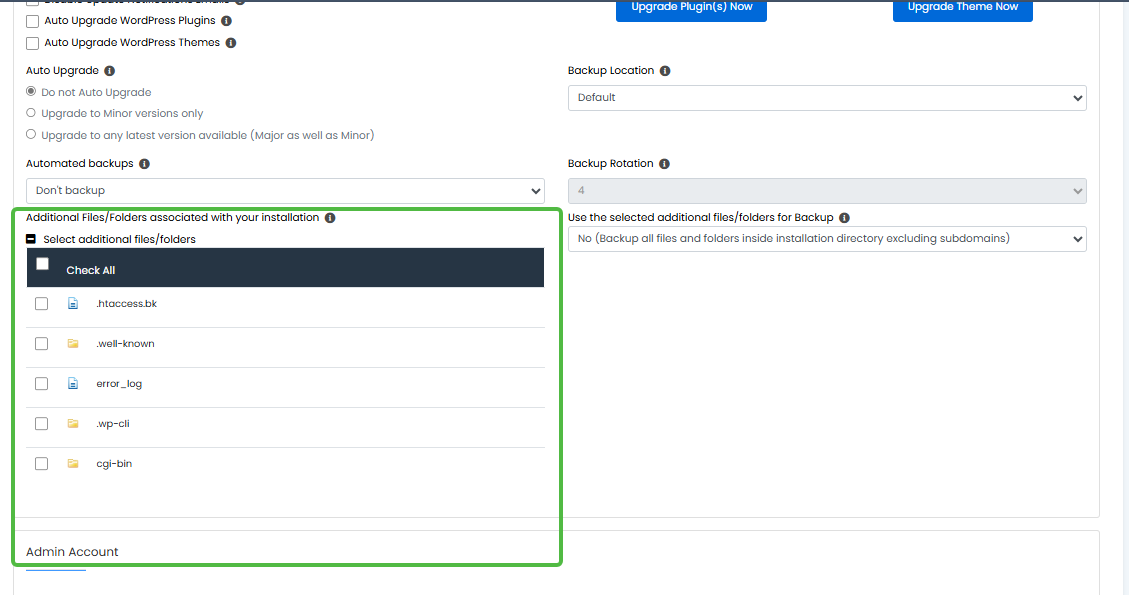
STEP 8: Choose the files and/or folders you wish to associate with your installation from the displayed list.
STEP 9: Scroll down and click the "Save Installation Details" tab to finalize your updates.