The .htaccess file is a powerful tool that contains directives (or instructions) that guide your server’s behavior in specific scenarios, directly impacting how your website functions. It is commonly used for tasks like URL redirection and rewriting. Many popular content management systems, including WordPress, Drupal, Joomla, and Magento, automatically add directives to the .htaccess file to ensure seamless functionality.
At some point, you may need to edit the .htaccess file for various reasons. While this guide explains the steps to modify the file, it does not provide details on specific changes. For that, you may need to refer to other resources. For most users, the fastest and easiest way to edit the .htaccess file is through the File Manager in cPanel. This method is especially relevant for Linux-based hosting platforms such as LyteHosting Shared, Reseller, VPS, and Linux Dedicated Servers.
How to Edit .htaccess through cPanel's File Manager
It’s highly recommended that you back up your website before making any changes. This precaution ensures that you can restore your site to a previous version if anything goes wrong during the editing process.
Steps to Access the .htaccess File:
STEP 1: Log in to cPanel.
There are three methods to log into your cPanel.
- Method 1: Log in to your cPanel directly.
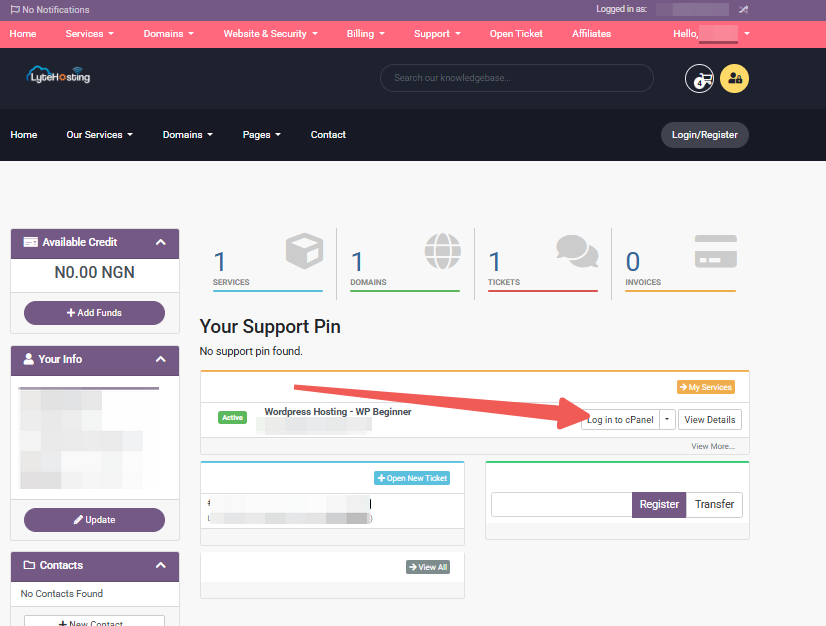
- Method 2: Log in to your cPanel through your Customer Portal.
Through your Customer Portal;
- Log in to your Customer Portal.
- Click on "Log in to cPanel".
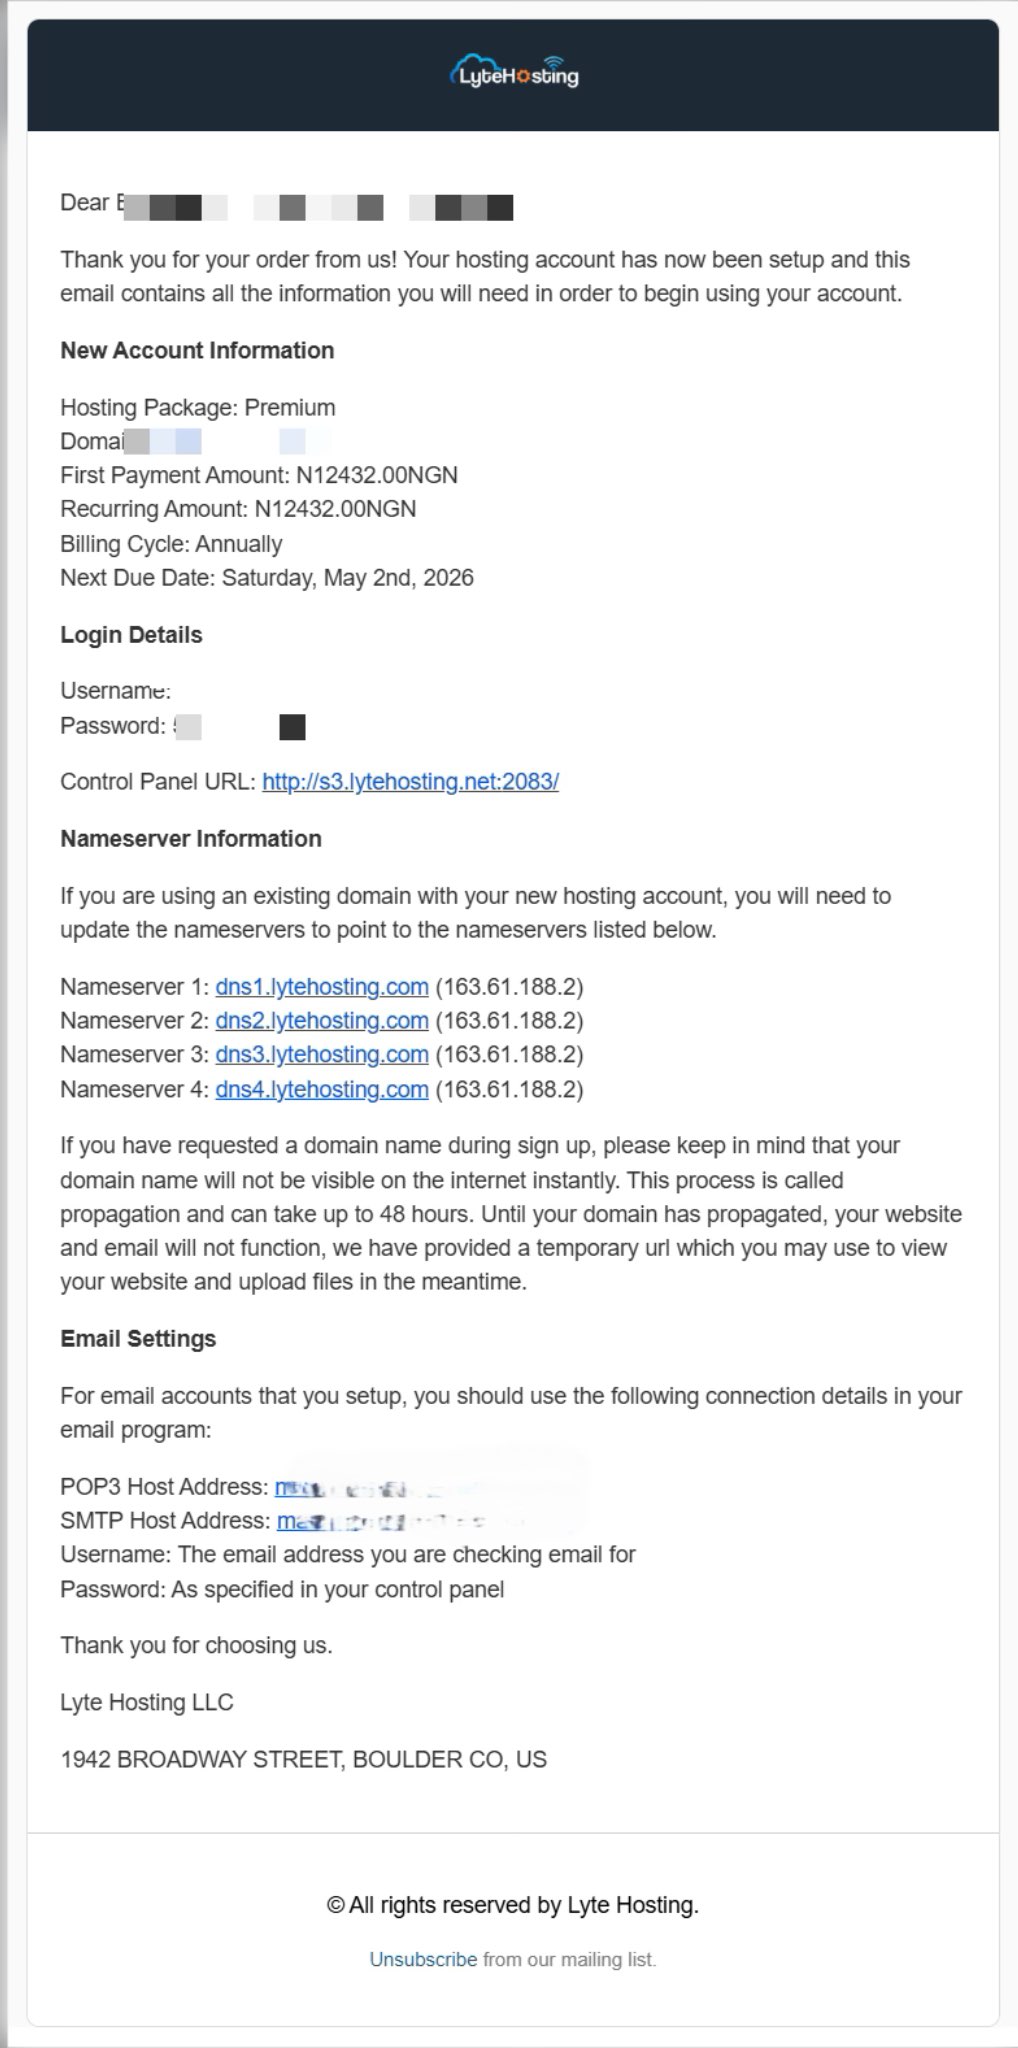
- Method 3: Log in using the details sent to your Email.
Through your Email;
- When you purchase a hosting plan, your cPanel login details (including username, password, and cPanel URL) are automatically sent to your registered email address. Simply check your inbox (or spam folder), locate the email, and use the provided credentials to access your cPanel.
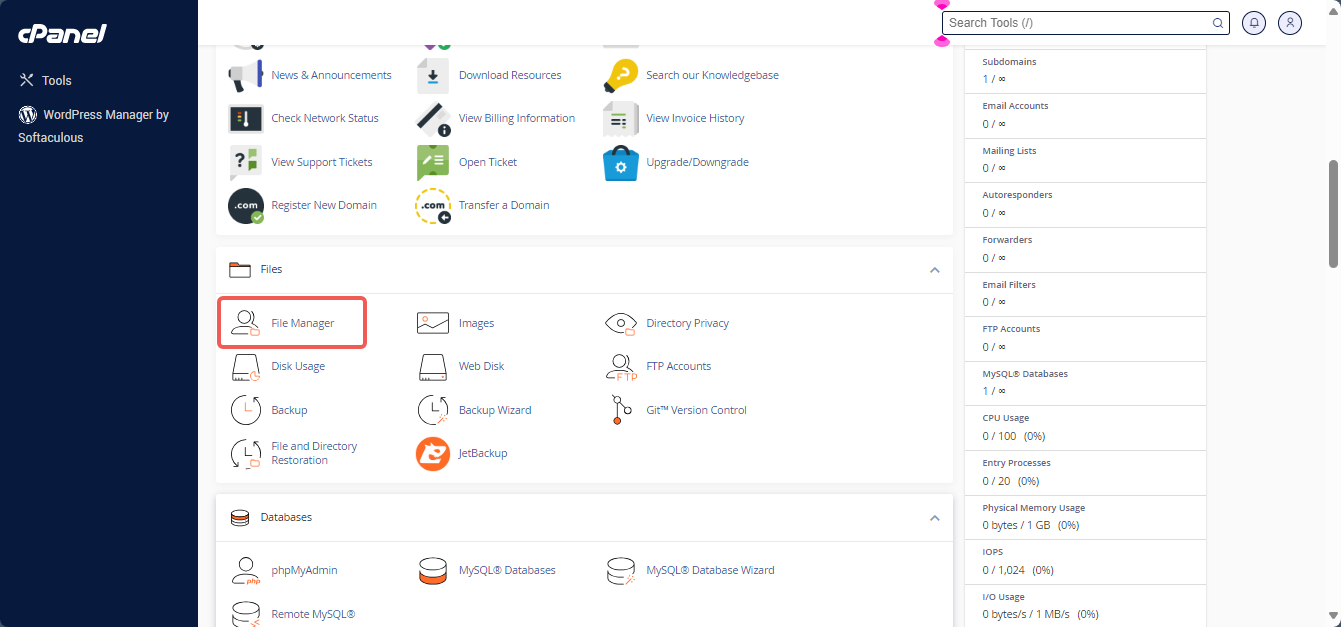
STEP 2: Locate the Files section and click on File Manager.

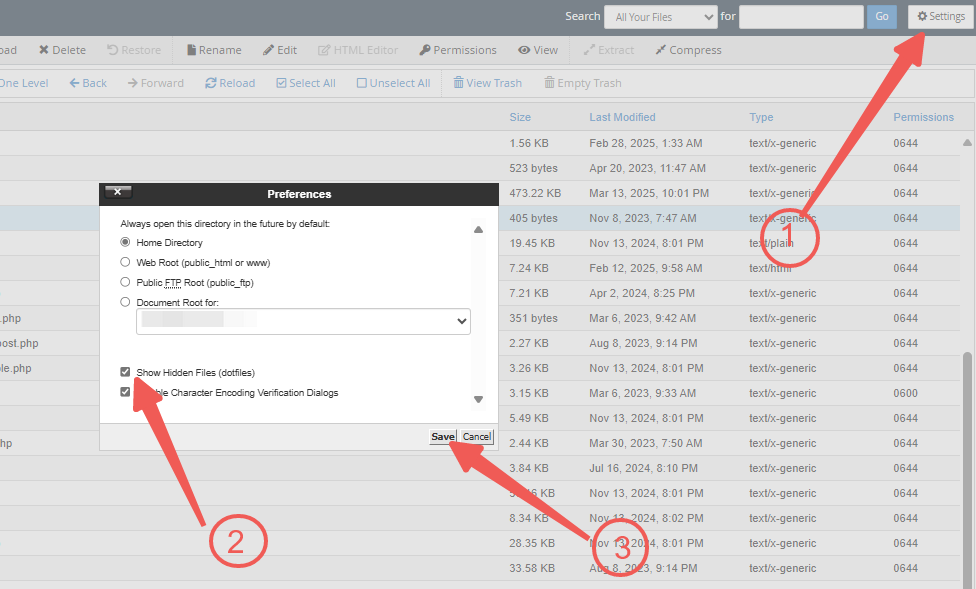
STEP 3: To view hidden files like the .htaccess file, click on Settings in the upper-right corner of the File Manager.
STEP 4: Check the box labeled Show Hidden Files (dotfiles) in thepop-up. This will refresh the File Manager to display all files starting with a dot (.).
STEP 5: Click Save to apply the changes.
STEP 6: Scroll through the file list to locate the .htaccess file. If it isn’t immediately visible, you may need to scroll further down.
Steps to Edit the .htaccess File:
STEP 1: Log in to cPanel (Refer to the steps above if you need guidance on accessing your cPanel.)
STEP 2: Locate the Files section and click on File Manager.
STEP 3: If your website has a single domain, navigate to the public_html directory to find the .htaccess file.
STEP 4: For websites with multiple domains, go to the document root directory of the specific domain you wish to edit.
STEP 5: Locate the .htaccess file in the selected directory.
STEP 6: Right-click on the .htaccess file and select Edit from the menu.
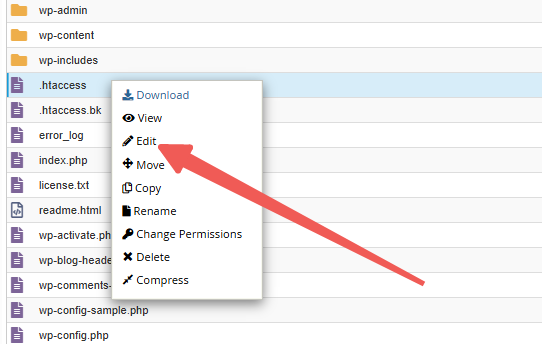
STEP 7: A dialogue box will appear asking about encoding. Simply click Edit to proceed.
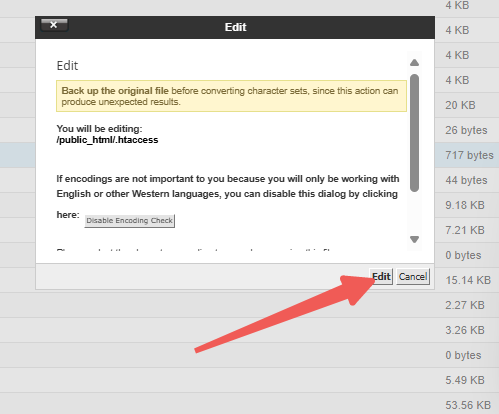
STEP 8: The file will open in a new window, allowing you to make the necessary changes.
STEP 9: When adding new code, such as for redirects or rewrites, you can paste the entire code from the second line in the .htaccess file.
STEP 10: To add more code, ensure there is an extra line before entering the new code to maintain proper formatting.
STEP 11: Once you’ve made the necessary changes, click Save Changes in the upper-right corner to save your edits.

STEP 12: Test your website to ensure the changes have been applied successfully. If something isn’t working, troubleshoot the issue or revert to the previous version until the site functions correctly.
STEP 13: After you’ve finished, click Close to exit the File Manager window.


