A temporary page often referred to as a “coming soon” or “under construction” page, it’s a single-page placeholder that informs visitors that your full website will be launching soon. It's a great way to display essential information like contact details, order instructions, or other key messages in the meantime.
Creating a Temporary Page
The easiest method to build a temporary page is by using the File Manager in your control panel. These instructions primarily cover Shared and Reseller hosting plans, but you can follow similar steps on other hosting packages offered by LyteHosting.
Step-by-Step Instructions:
STEP 1: Log in to cPanel.
There are three methods to log into your cPanel.
- Method 1: Log in to your cPanel directly.
- Method 2: Log in to your cPanel through your Customer Portal.
Through your Customer Portal;
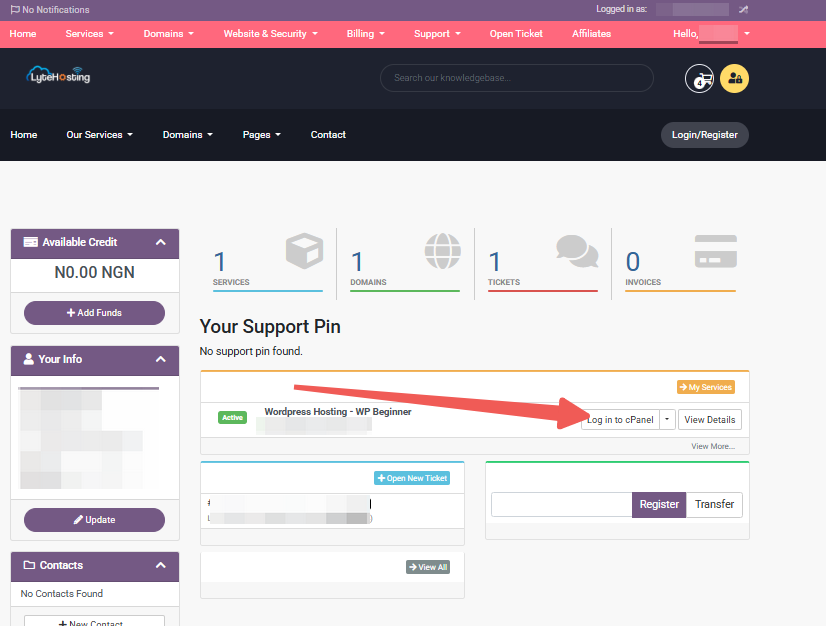
- Log in to your Customer Portal.
- Click on "Log in to cPanel".
- Method 3: Log in using the details sent to your Email.
Through your Email;
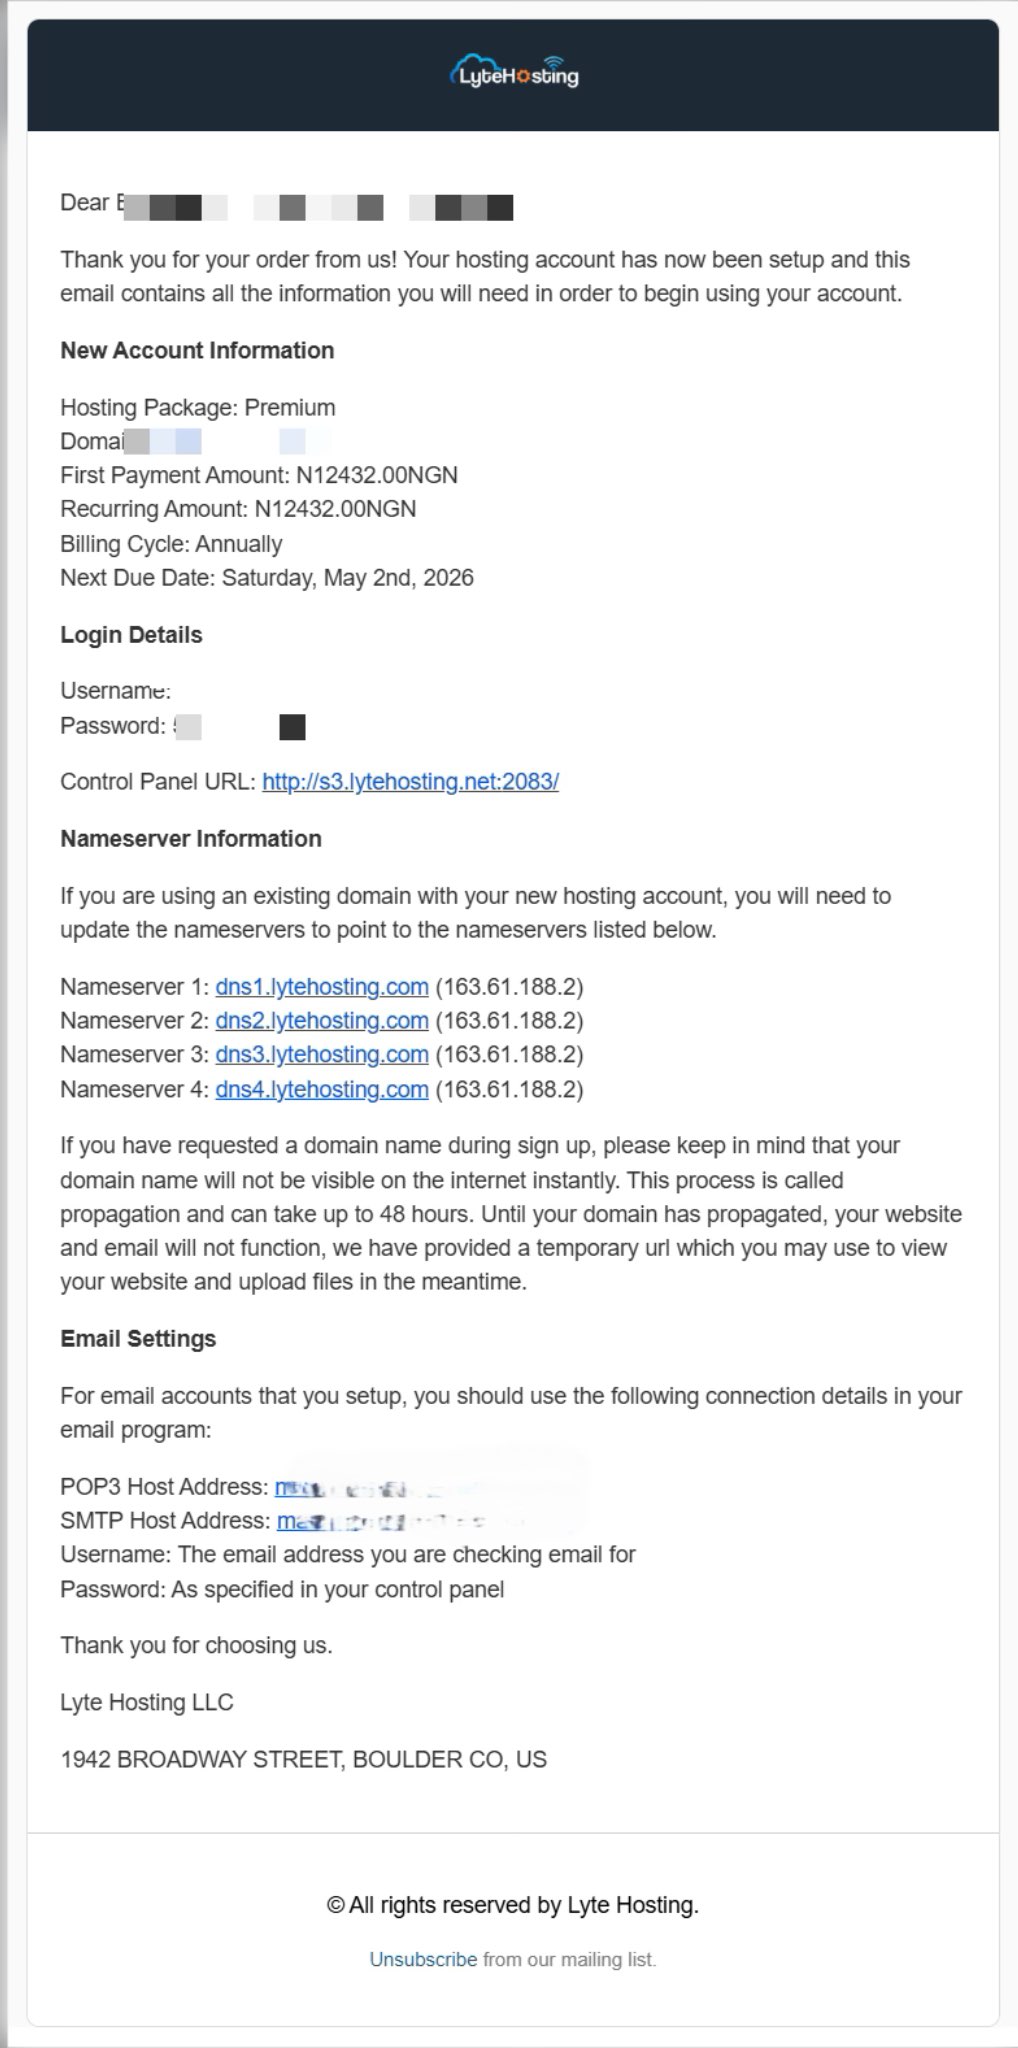
- When you purchase a hosting plan, your cPanel login details (including username, password, and cPanel URL) are automatically sent to your registered email address. Simply check your inbox (or spam folder), locate the email, and use the provided credentials to access your cPanel.
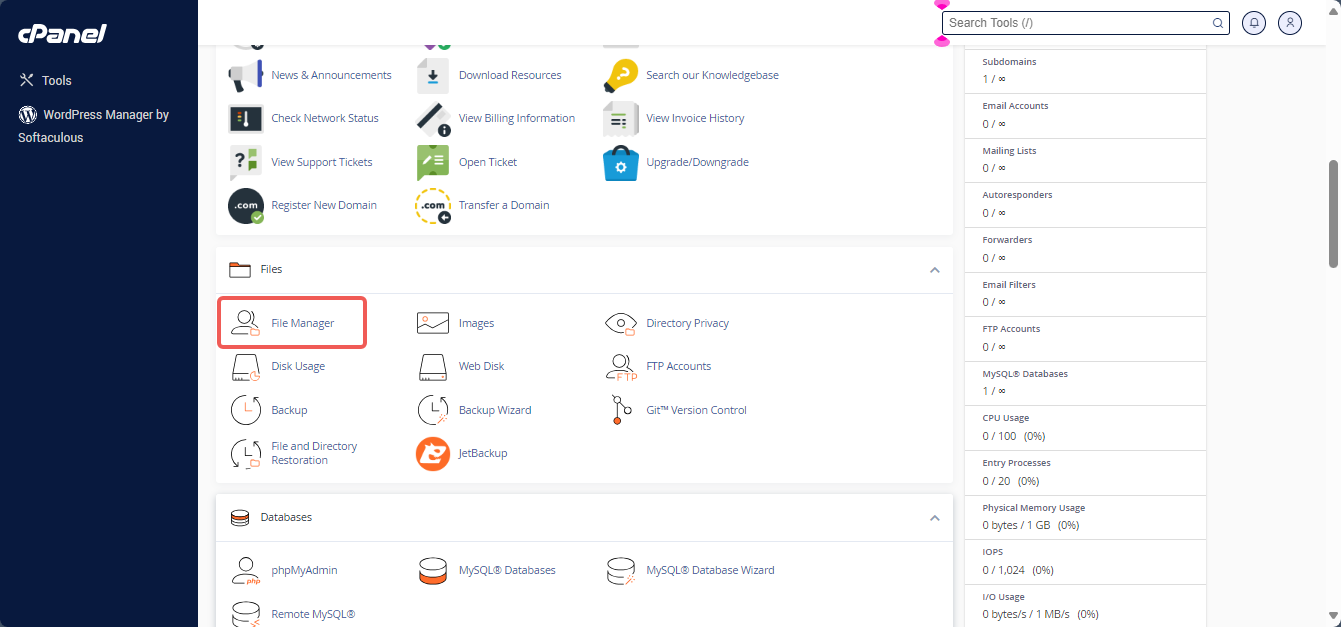
STEP 2: Locate the Files section, and click on File Manager.
STEP 3: In the File Manager, click on the public_html folder in the left-hand pane.
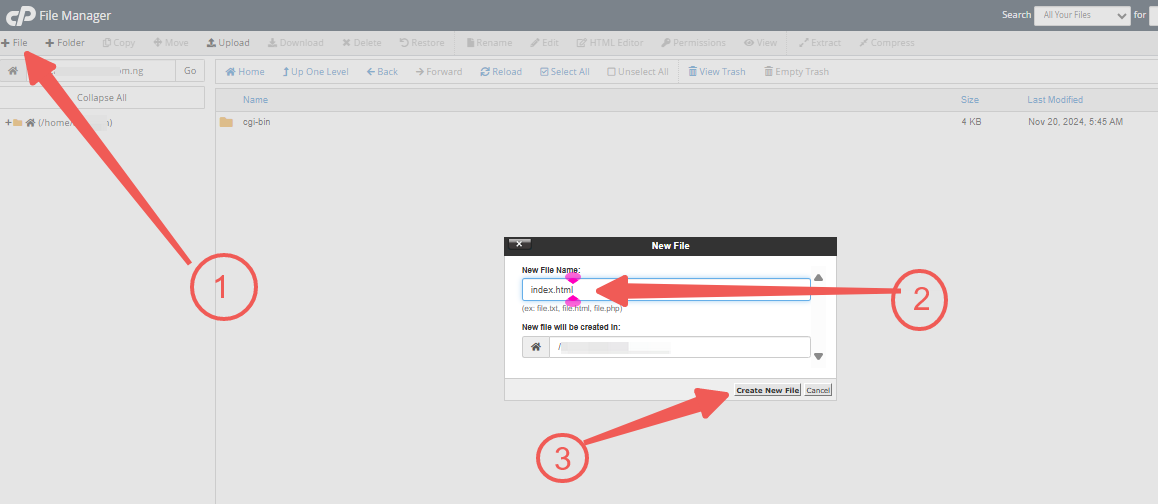
STEP 4: At the top of the screen, click the + File button.
STEP 5: Name the file index.html (without quotation marks) and hit Create New File.
STEP 6: Find the newly created file in the list.
STEP 7: Right-click on index.html and choose HTML Edit.

A pop-up box will show the URL of your temporary page. You’ll then enter a WYSIWYG (What You See Is What You Get) editor that simplifies the web design process.
To Remove or Update the Temporary Page:
You can delete the index.html file or replace it with a new file using the same name to update the content.
Adding Images to Your Temporary Page
Tip: Before inserting images, upload them to your public_html directory.
Here’s how:
STEP 1: Log in to cPanel (Refer to the steps above if you need guidance on accessing your cPanel.)
STEP 2: Open the File Manager and click the public_html folder.
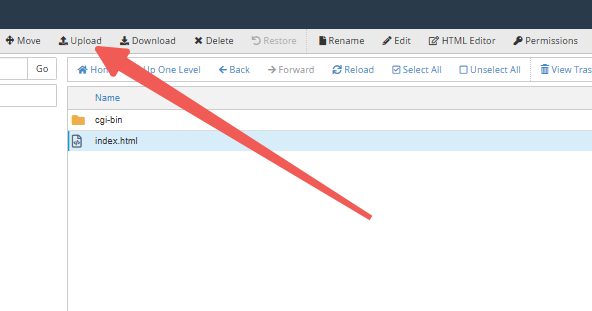
STEP 3: Click the Upload icon on the top menu.
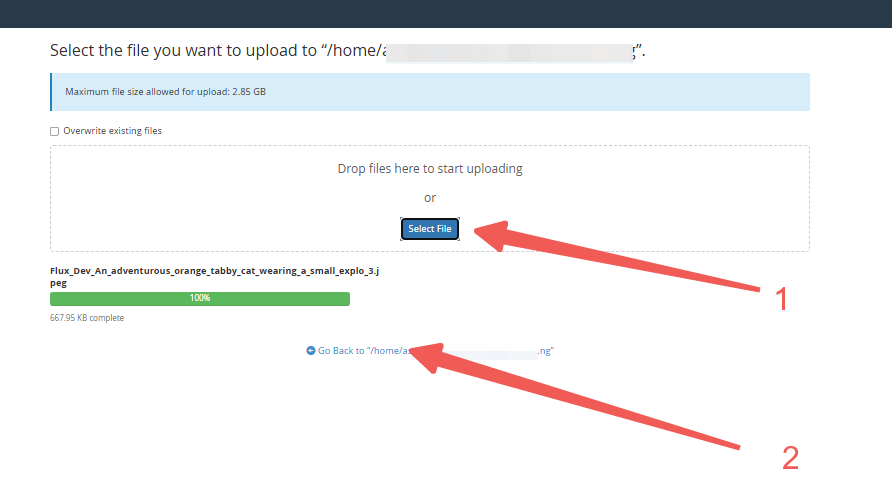
STEP 4: In the new window, click Select File, choose the image from your local device, and upload it.
STEP 5: Wait for the progress bar to show 100% complete.
STEP 6: Click Go Back to /home/your-username/public_html. You’ll now see the image alongside your index.html file.
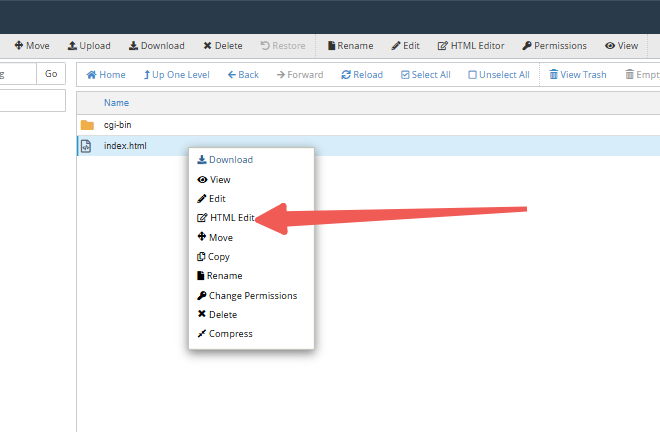
STEP 7: Right-click on index.html and select HTML Edit.
STEP 8: In the editor, click the Image icon.
STEP 9: When the image management box appears, click Browse Server.
STEP 10: A new window will open. Navigate to the uploaded image location and double-click the file.
STEP 11: Back in the editor, adjust settings like image dimensions, then click OK.
![]()
STEP 12: Don’t forget to Save your changes by clicking the save icon at the top left corner of the editor.
STEP 13: Preview your temporary site by visiting the domain's URL. Make edits as needed.
Note: For your temporary page to display correctly, your domain must point to LyteHosting’s name servers. You can find these details in the welcome email sent when your hosting account was created. After updating your name servers, it may take up to 48 hours for the changes to propagate globally.


