The File Manager provides a simple and convenient way to manage your files within your LyteHosting hosting account. It allows you to perform actions such as uploading, downloading, and deleting files directly from the interface.
Steps to Access the File Manager
STEP 1: Log in to cPanel.
There are three methods to log into your cPanel.
- Method 1: Log in to your cPanel directly.
- Method 2: Log in to your cPanel through your Customer Portal.
Through your Customer Portal;
- Log in to your Customer Portal.
- Click on "Log in to cPanel".
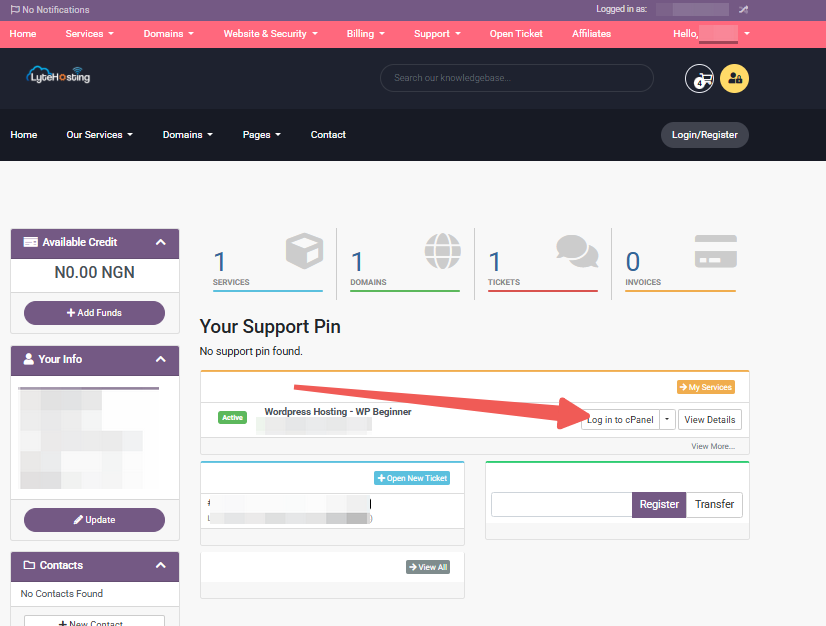
- Method 3: Log in using the details sent to your Email.
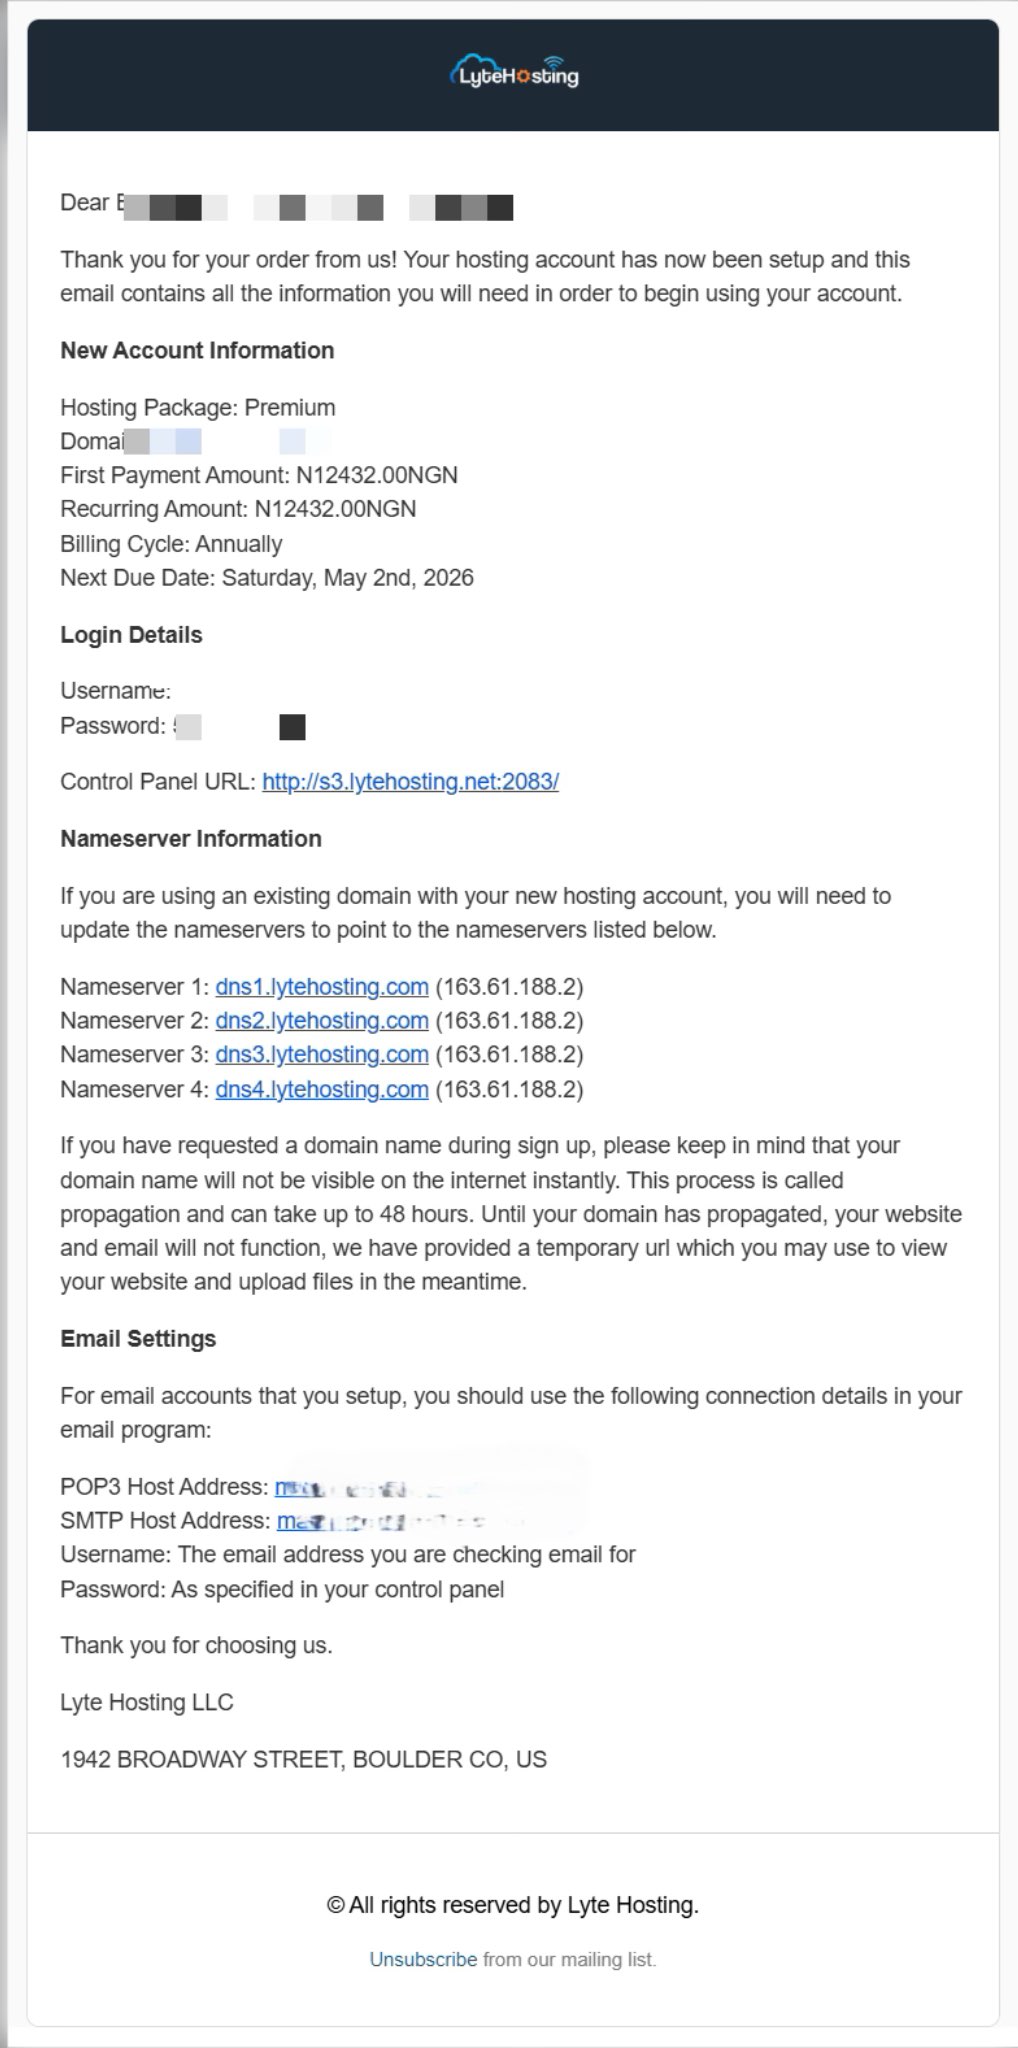
Through your Email;
- When you purchase a hosting plan, your cPanel login details (including username, password, and cPanel URL) are automatically sent to your registered email address. Simply check your inbox (or spam folder), locate the email, and use the provided credentials to access your cPanel.
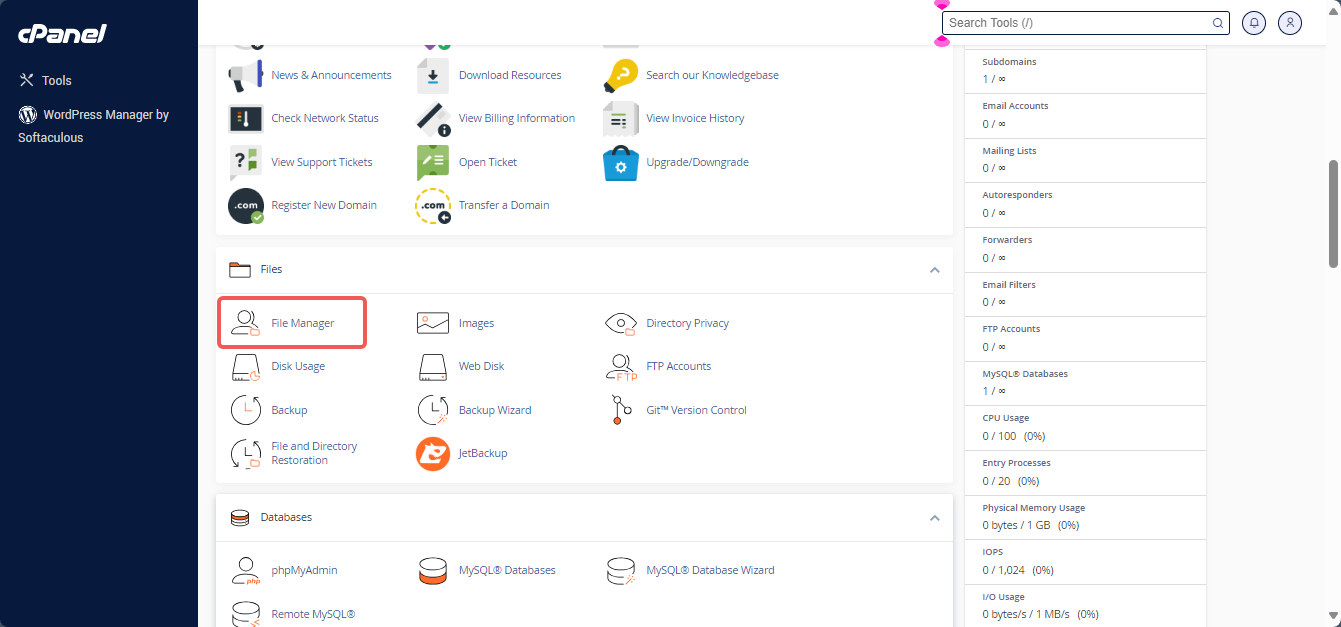
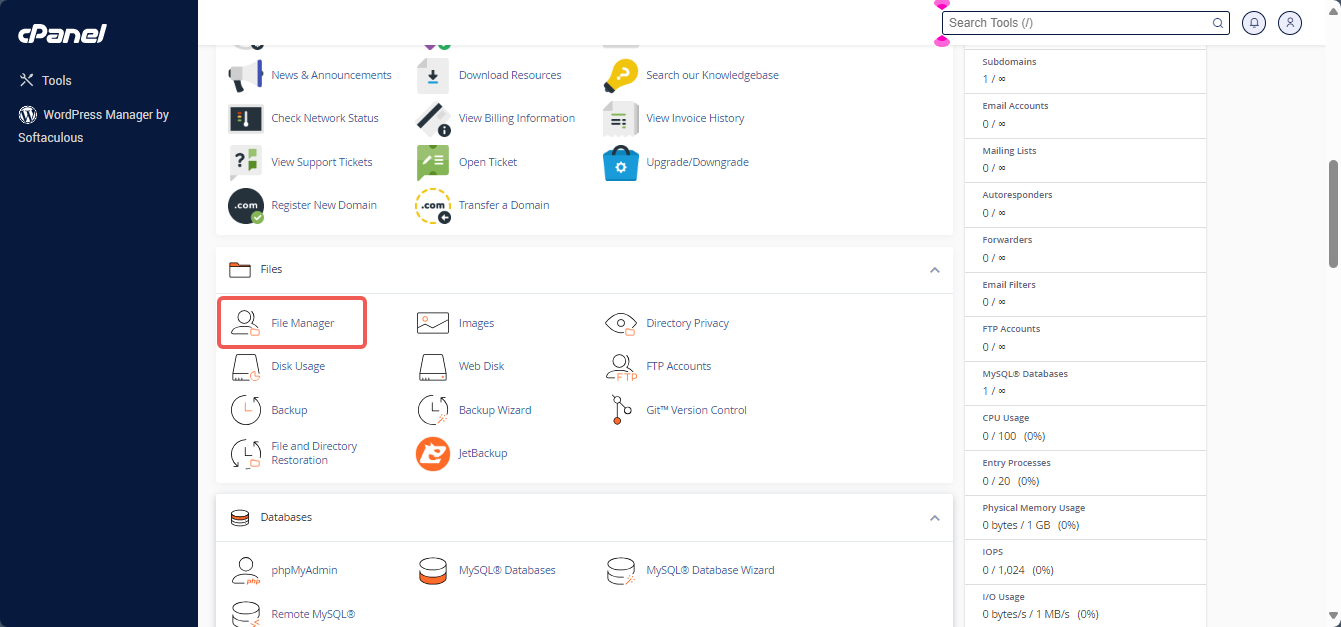
STEP 2: Click on File Manager in the Files section of cPanel.
STEP 3: This will take you straight to the File Manager of your hosting account.
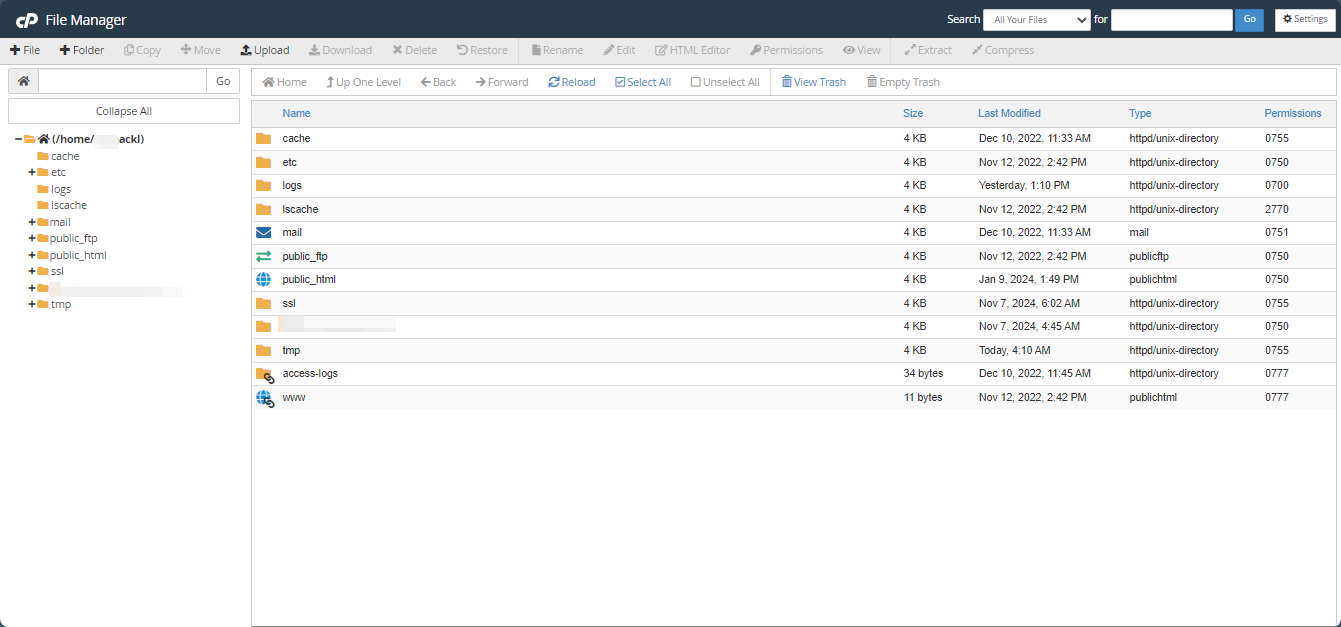
Steps to Navigate Within the File Manager
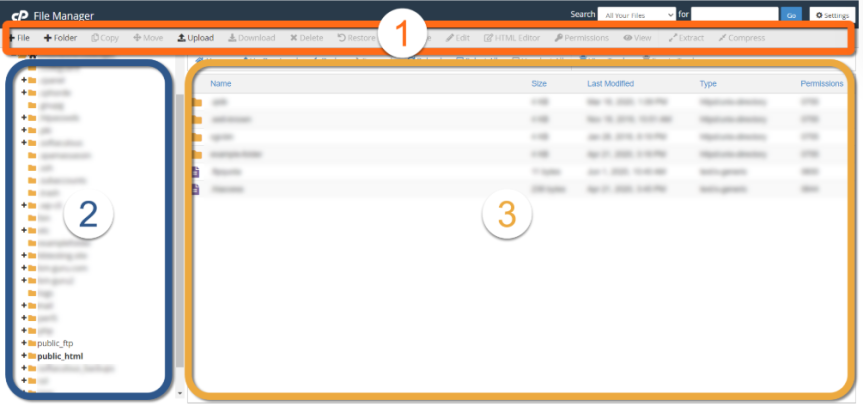
In the illustration above, three key sections of the File Manager are highlighted:
- Toolbar: Located at the top, the Toolbar serves as the main navigation bar. It provides access to essential functions for managing files and folders.
- Directory Listing: Found on the left side, this section displays all the directories (folders) in your File Manager.
- File Listing: Positioned on the right side, this area shows the files and subdirectories within the selected directory (folder).
How to Open a Directory (Folder):
- Option 1: Double-click the folder icon next to the directory name in the File Listing (Section 3).
- Option 2: Click the directory name in the Directory Listing (Section 2).
Note: Clicking the "+" or the folder icon in the Directory Listing section will only expand the directory to reveal its subdirectories within that section, without opening it in the File Listing.
How to Exit a Directory (Folder):
- Option 1: Click the ⮥ Up One Level button at the top of the File Listing section. This will navigate you to the parent or preceding directory.
- Option 2: Select the desired directory name directly in the Directory Listing to view that specific folder.
Steps to Access the Web Root Directory
The Web Root Directory is the publicly accessible folder where you should upload files and images for your website. It is typically named public_html or www in your File Manager. Follow these steps to navigate directly to the Web Root Directory:
STEP 1: Log in to cPanel (Refer to the steps above if you need guidance on accessing your cPanel.)
STEP 2: Click on File Manager in the Files section of cPanel.
STEP 3: In the top-right corner of the File Manager, click on Settings.

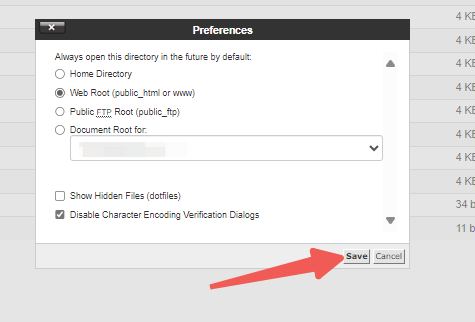
STEP 4: Select Web Root (public_html or www) and click Save. After this, when you open your File Manager, it will automatically direct you to the web root folder, public_html.
How to View Hidden Files in File Manager
Certain files and folders, such as the .htaccess file, may be hidden in your File Manager. To make these hidden files visible, follow the steps below to enable the option to Show Hidden Files in your LyteHosting File Manager.
STEP 1: Log in to cPanel (Refer to the steps above if you need guidance on accessing your cPanel.)
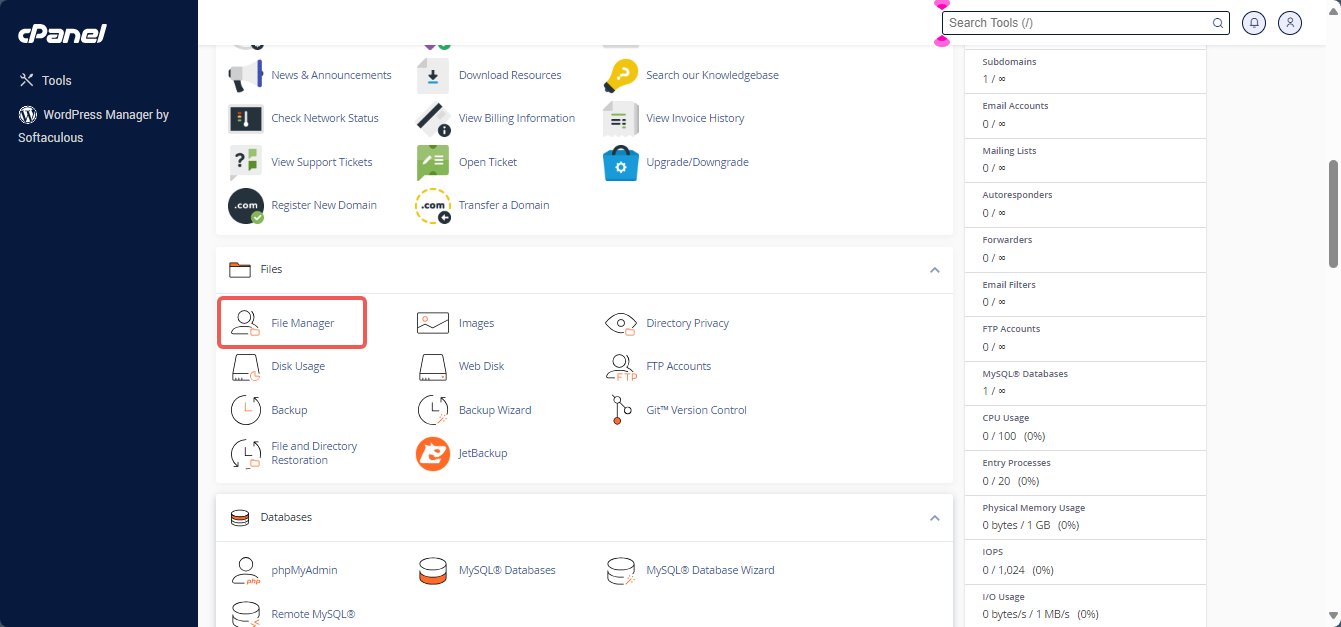
STEP 2: Click on File Manager in the Files section of cPanel.
STEP 3: In the top-right corner of the File Manager, click on Settings.

STEP 4: In the pop-up window, check the box for Show Hidden Files (dotfiles), then click Save. This will allow you to view hidden files in your File Manager.
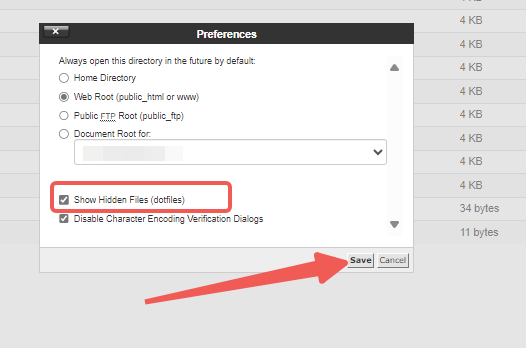
You should now be able to see all the folders and files in your File Manager, including the hidden ones.


