You might face a common problem when your local DNS resolvers store a domain name to IP address mapping. When attempting to access the domain, it retrieves an outdated IP address (cached on your device) instead of querying for a fresh one and finding the correct record.
What is DNS Caching?
Before understanding how to flush DNS, it's important to grasp what DNS caching is. The DNS cache is the memory of recent websites visited by your computer’s operating system, browser, or router. Think of it as a temporary storage of information (DNS records, IP addresses, and hostnames) that helps your computer or browser quickly access websites. This means your device doesn’t have to repeatedly request data from the site's original host server each time you visit. DNS caching helps the browser load websites faster on subsequent visits.
What Does DNS Flushing Do?
Although DNS caching can be helpful for faster website access and reducing traffic, it comes with drawbacks, such as security risks and incorrect website content display. Regularly clearing or flushing your DNS can help mitigate these issues.
This article will guide you through the steps to clear or flush your cached DNS.
How to Flush DNS on Different Operating Systems
Microsoft Windows
1. Close any active applications, such as your internet browser or email client.
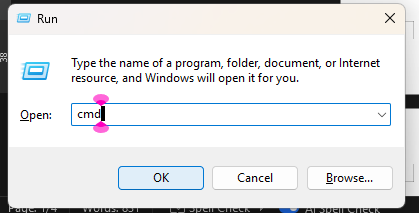
2. Press the Windows Logo + R keys at the same time to open the Run dialogue window.
3. Type cmd in the text box and click OK.

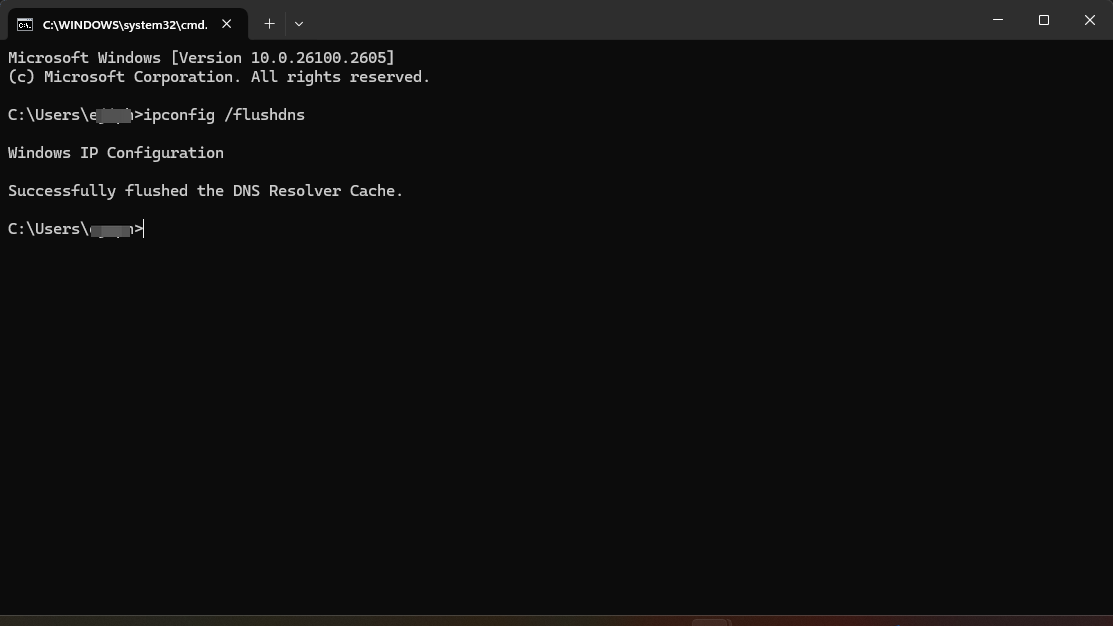
4. In the command prompt window that appears, type the following command and press Enter:
ipconfig /flushdns

5. Restart your application (browser or email client).
Mac OS X
Before following these instructions, it's important to note that the command in step 4 is specific to Mac OS X 10.10 Yosemite and later. For older versions, the command may vary. Be sure to check Apple's instructions to find the correct command for your version.
1. Close any active applications, such as your internet browser or email client.
2. Navigate to the Applications folder.
3. Open Utilities and double-click on Terminal.
4. Type the following command and press Enter:
sudo discoveryutil mdnsflushcache;sudo discoveryutil udnsflushcaches;say flushed
5. Enter the admin username and password when prompted.
6. Restart your application (browser or email client).
Don’t worry if either command shows a message like "Not found." Simply restart your application. For older Mac OS X versions, you can find specific commands on OSX Daily:
- OSX 10.10 - 10.10.3
- OSX 10.9 and older
Linux
Note: Different Linux distributions and versions may have slightly different commands due to variations in configuration. One of the following commands should work:
1. Open a root terminal window (Ctrl+T in Gnome).
2. Type the following command and press Enter:
/etc/init.d/nscd restart
- If you need to use sudo depending on your installation, try:
sudo /etc/init.d/nscd restart - Alternatively, you may try:
sudo /etc/init.d/dns-clean start - Or this command may work:
sudo service nscd restart
If the installation has NSCD located in another directory, such as /etc/rc.d/init.d/nscd restart, you will need to find the correct path to execute the command.
3. Restart your application (browser or email client).
What Happens When You Change Your DNS Settings to Point Somewhere Else?
There are times when you point your DNS to third-party providers to improve your website's speed or for optimization purposes. To do this, you would set up an account with the provider and update your DNS records to point to their servers. However, please keep in mind that any changes to DNS records will require some time to synchronize, a process known as Propagation.


