You can manage DNS zones in the DNS Functions section of WHM (Web Host Manager). This area is designed for advanced users. If you're unsure or need assistance with DNS zone changes, feel free to reach out to us via support or live chat, and we’ll be happy to help.
Where is the DNS Zone Manager?
To access the DNS Zone Manager in WHM, follow these steps:
STEP 1: Log in to your WHM account.
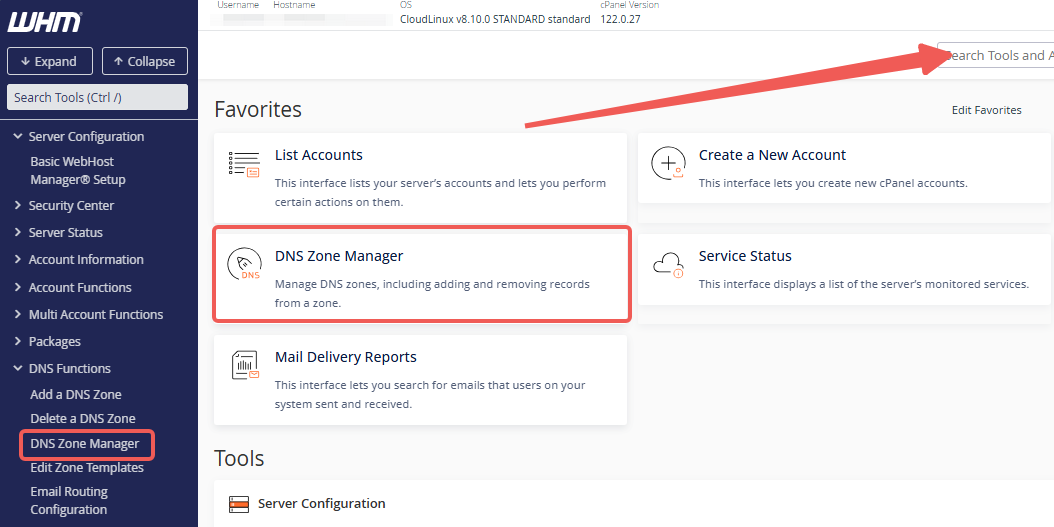
STEP 2: Use the search box located on the left-side panel or at the top of the page to search for DNS Zone Manager.
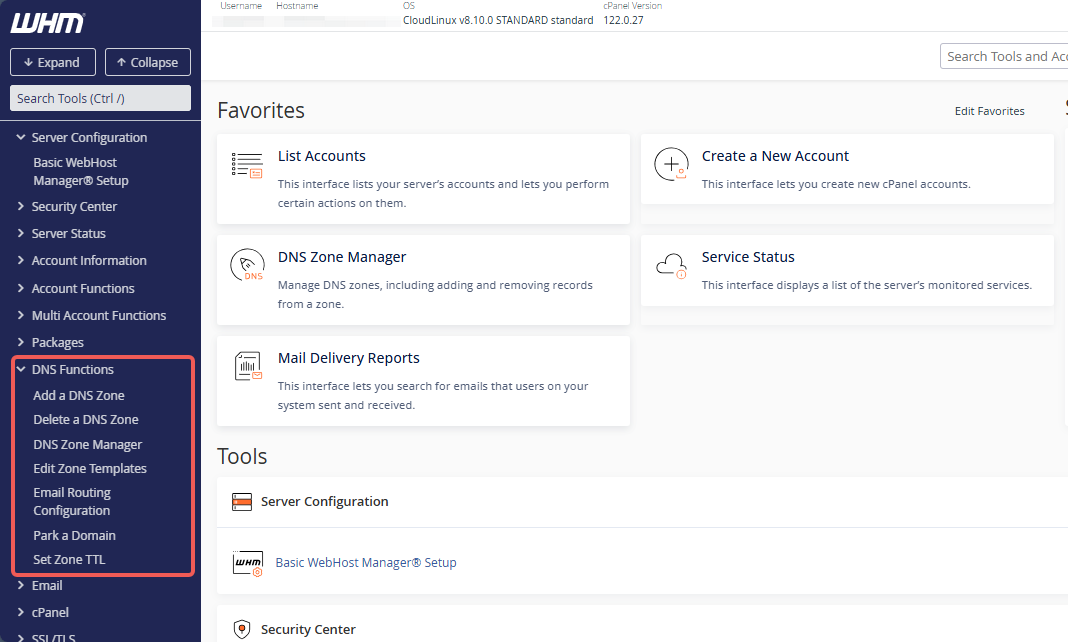
Alternatively, you can access the DNS Zone Manager by expanding the DNS Functions section in the left-side menu of WHM and selecting DNS Zone Manager from the list of options.
STEP 3: In the DNS Zone Manager, you can easily filter your domains by entering the domain name in the search box. This helps you quickly locate the domain you want to manage.
Understanding DNS Zones
The DNS Zone Manager in WHM allows you to manage and configure DNS records for your domains. Below are the key actions you can perform:
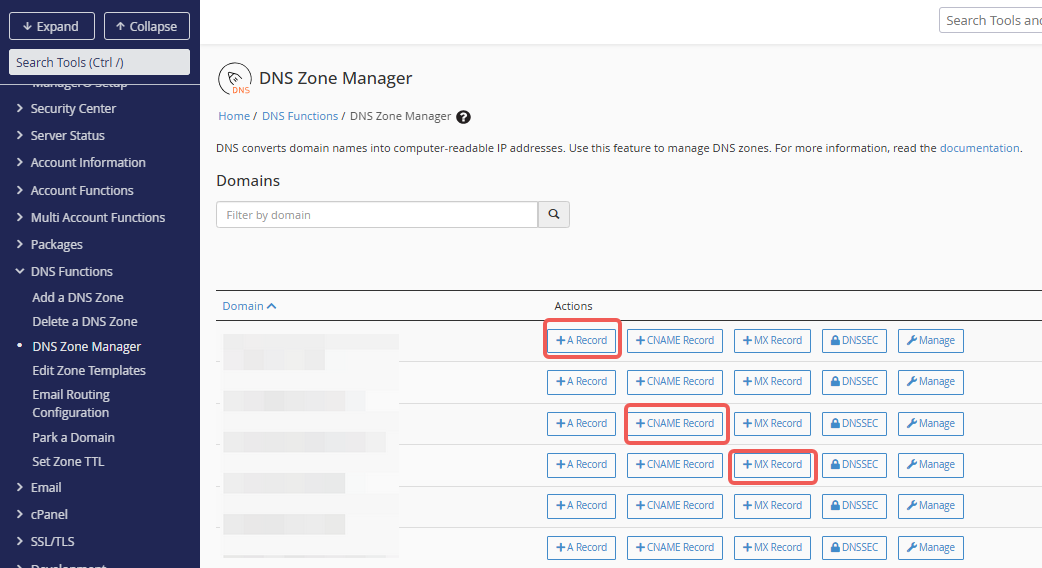
Add an A Record (+ A Record)
An A record maps your domain or subdomain to an IP address. This is commonly used to point your domain to a web server.
Example:
mydomain.com -> 123.456.78.9
Steps:
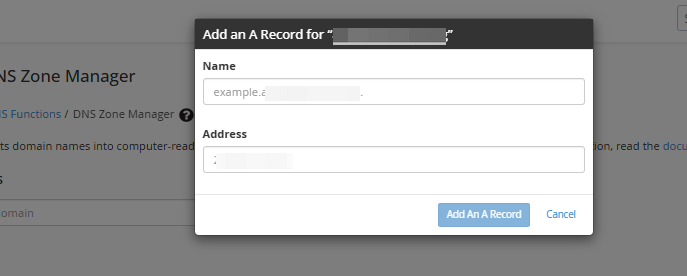
1. Click + A Record.
2. Enter the valid domain name in the Name field.
3. Input the corresponding IP address in the Address field.
4. Save your changes.
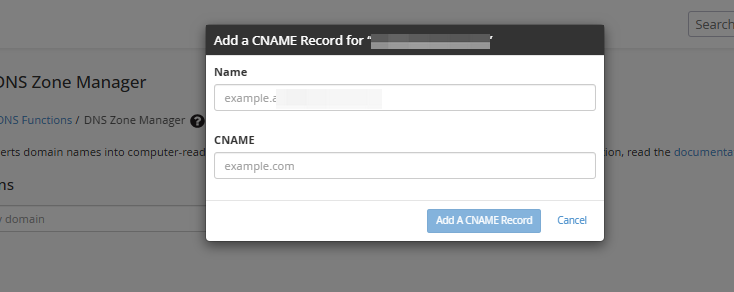
Add a CNAME Record (+ CNAME Record)
A CNAME record redirects your domain or subdomain to another domain name. It is useful for aliasing one domain to another.
Example:
www.mydomain.com -> mydomain.com
Steps:
1. Click + CNAME Record.
2. In the pop-up window, enter the valid domain name in the Name field.
3. Input the Fully-Qualified Domain Name (FQDN) in the Destination box.
4. Save your changes.
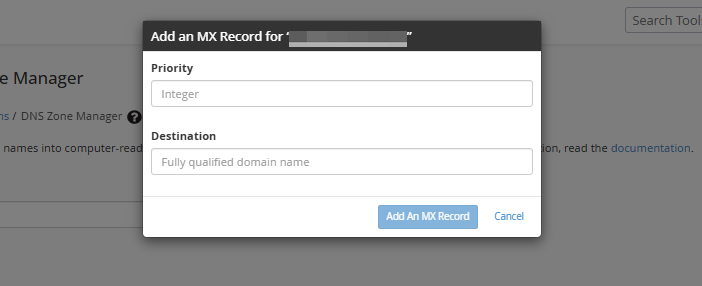
Add an MX Record (+ MX Record)
MX (Mail Exchange) records determine where your email is received. If your email is hosted on another server, you’ll need to update these records accordingly.
Steps:
1. Click + MX Record.
2. In the pop-up window:
- Enter the Priority value (lower numbers indicate higher priority).
- Provide the Fully Qualified Domain Name (FQDN) for the mail server in the Destination
3. Save your changes.
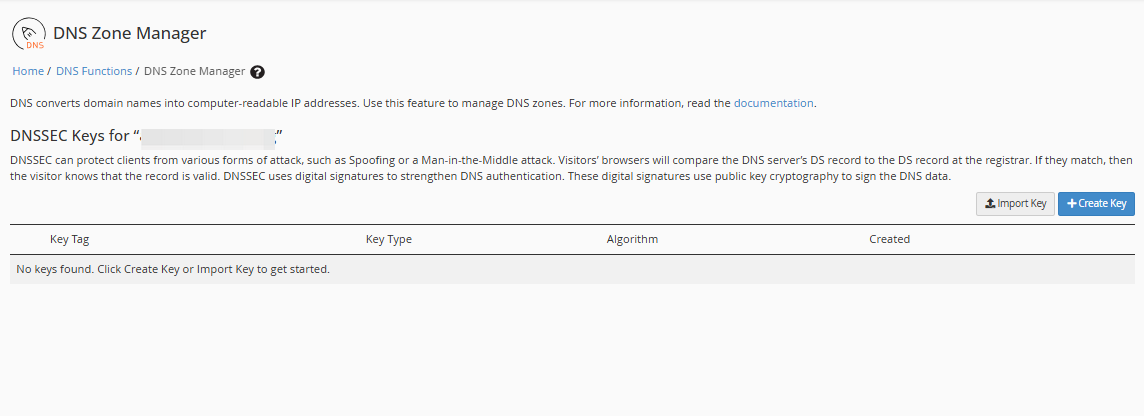
DNSSEC
DNSSEC (Domain Name System Security Extensions) enhances your domain’s security by adding cryptographic signatures to DNS records.
Key Features:
- Manage DNSSEC records in the DNSSEC Keys
- Add, view, or modify DNSSEC keys to secure your domain.
DNSSEC Keys Interface:
This interface provides tools for creating, managing, and deploying DNSSEC keys for your domains.
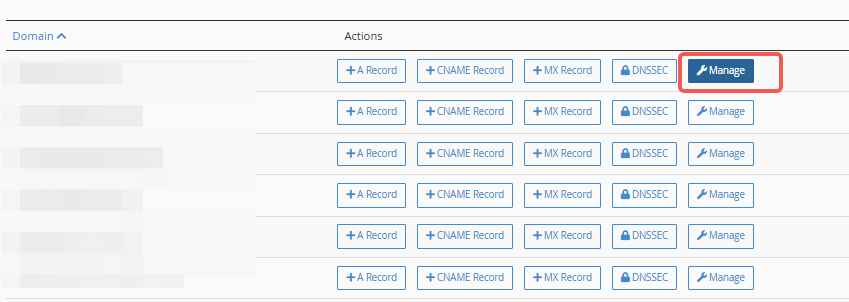
Manage DNS Records
The Manage button redirects you to the Manage DNS Zone Records section.

Here, you can:
- Search: Locate specific DNS records.
- Add: Create new DNS records, such as A, CNAME, TXT, or SRV.
- Edit: Modify existing DNS records.
- Delete: Remove unwanted or outdated DNS records.
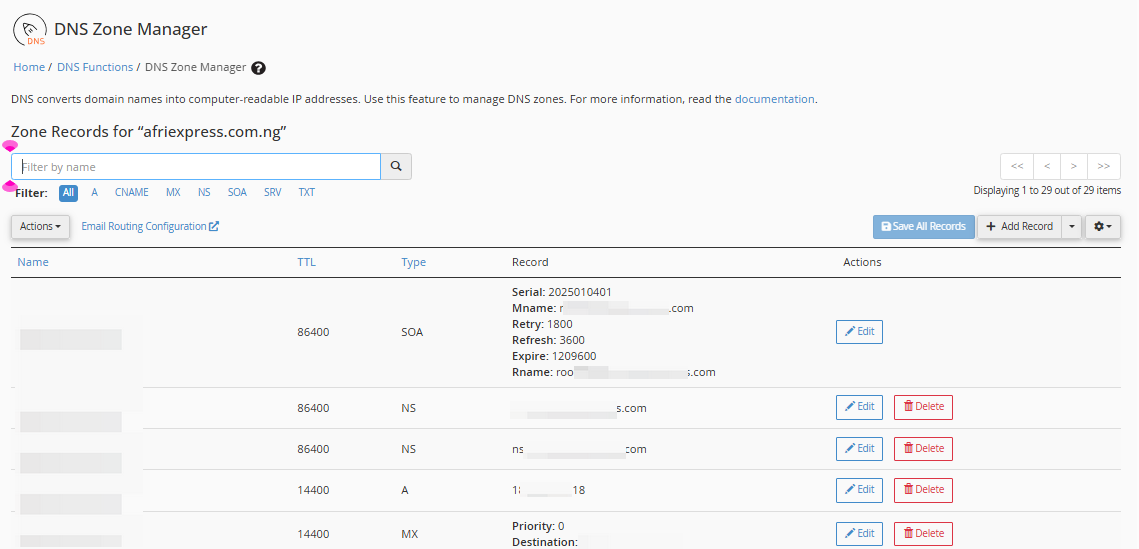
DNS Zone Manager within WHM
The DNS Zone Manager in WHM is a centralized area for managing DNS records for all domains hosted on your server. It includes tools for searching and filtering records, as well as editing and adding new ones.
Actions You Can Perform in the DNS Zone Manager;
Add a DNS Zone Record
To add a DNS record in WHM:
STEP 1: Within WHM's DNS Zone Manager, locate the domain you want to modify, then click its Manage button.
STEP 2: On the next page, click the + Add Record button on the right side.
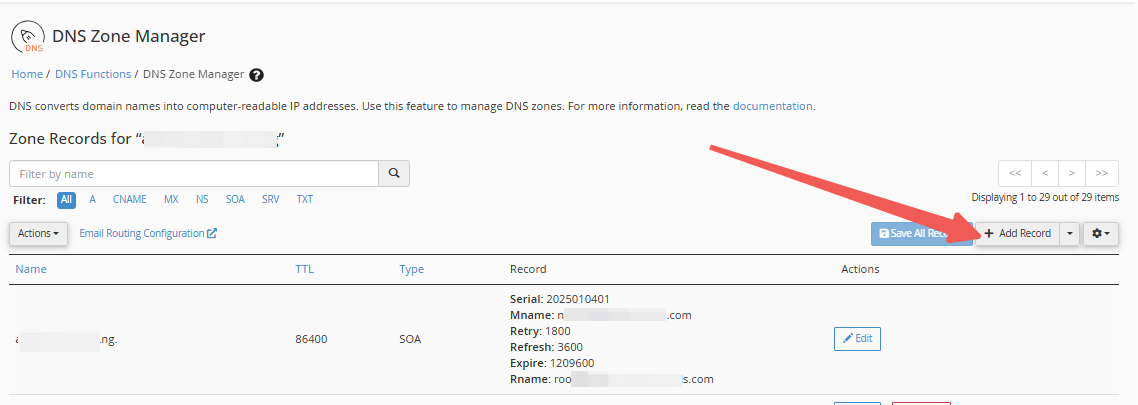
STEP 3: Use the dropdown arrow to select the type of record you want to add to the domain.
Alternatively, in the pop-up text boxes, select the record type from the Type dropdown.
STEP 4: Enter the necessary record information.
STEP 5: Once done, click the Save Record button.
Edit a DNS Zone Record
To edit a DNS record in WHM:
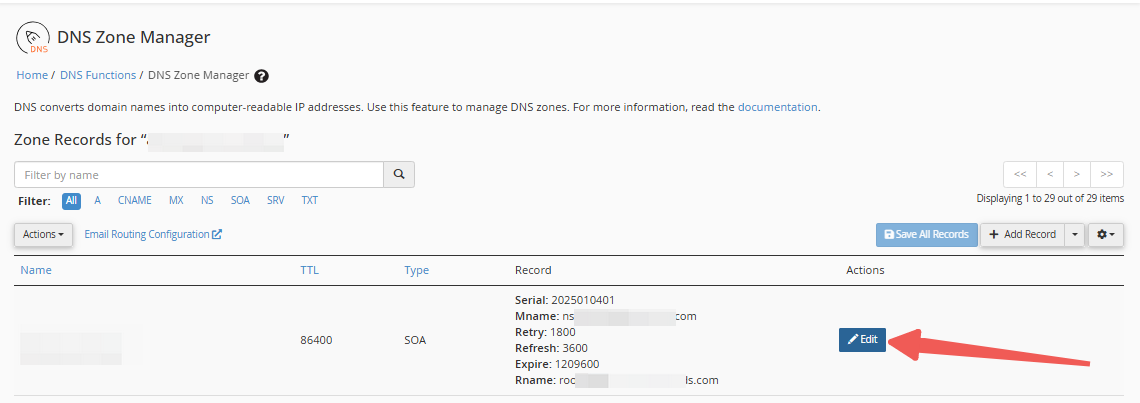
STEP 1: Within WHM's DNS Zone Manager, locate the domain you need to Manage.

STEP 2: Click the Edit button on the right.
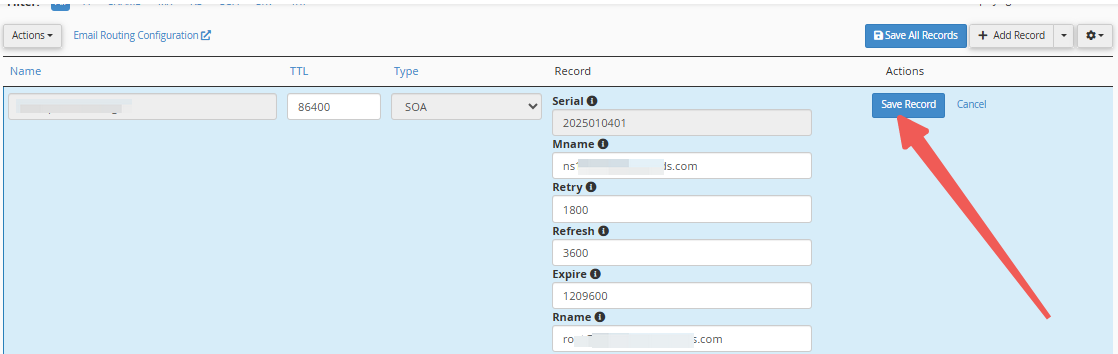
STEP 3: Make the necessary changes.
STEP 4: Once done, click Save Record.
View Raw DNS Zone File
To view the DNS zone in raw format:
STEP 1: Within WHM's DNS Zone Manager section, click the Actions dropdown below the search box.
STEP 2: Select View Raw DNS Zone File.
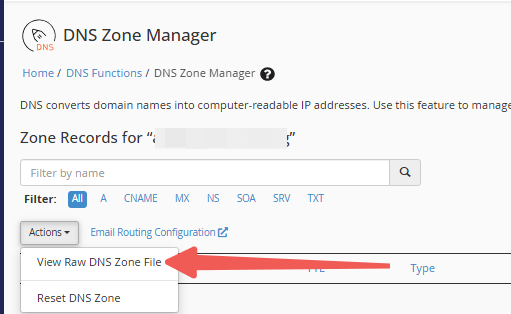
STEP 3: On the next page, the DNS records will be displayed in their raw format.
STEP 4: You can click the Copy link at the bottom left to copy the raw DNS records or the Return to Editor link to go back to the DNS Zone Manager section.
Reset DNS Record
To reset the DNS zone file:
STEP 1: Please note that resetting your DNS zone file will erase any custom DNS records you made on the domain.
STEP 2: Within WHM's DNS Zone Manager section, click the Actions dropdown below the search box.
STEP 3: Select Reset DNS Zone.
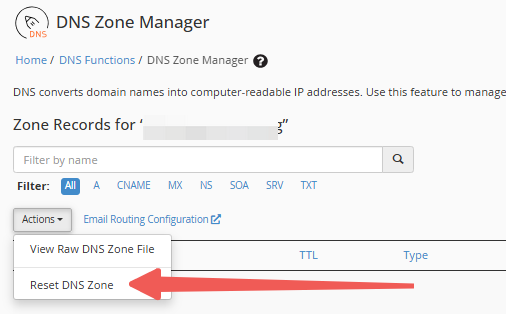
STEP 4: On the pop-up window, click Continue to reset the selected domain's DNS zone file.


