You cannot add extra users with full cPanel access, as cPanel is designed for single-user administration. However, if you want to give others limited access to specific features like email, FTP, or Web Disk, you can create subaccounts from within your cPanel.
These subaccounts allow you to safely share access to specific services without exposing your full cPanel login details.
Understanding cPanel Subaccounts
A subaccount is a user profile that grants access to selected services under your hosting account. You decide which services the user can access and what permissions they have.
Subaccounts can access:
- Email – Send, receive, and manage emails from their assigned address.
- FTP – Upload and manage files within a specific directory.
- Web Disk – Manage files through WebDAV protocol.
Note: Subaccounts cannot log in to cPanel itself. They only access the specific services you assign.
How to Create a Subaccount in cPanel
Follow these steps to add a new user with access to selected services:
STEP 1: Log in to cPanel.
There are three methods to log into your cPanel.
- Method 1: Log in to your cPanel directly.
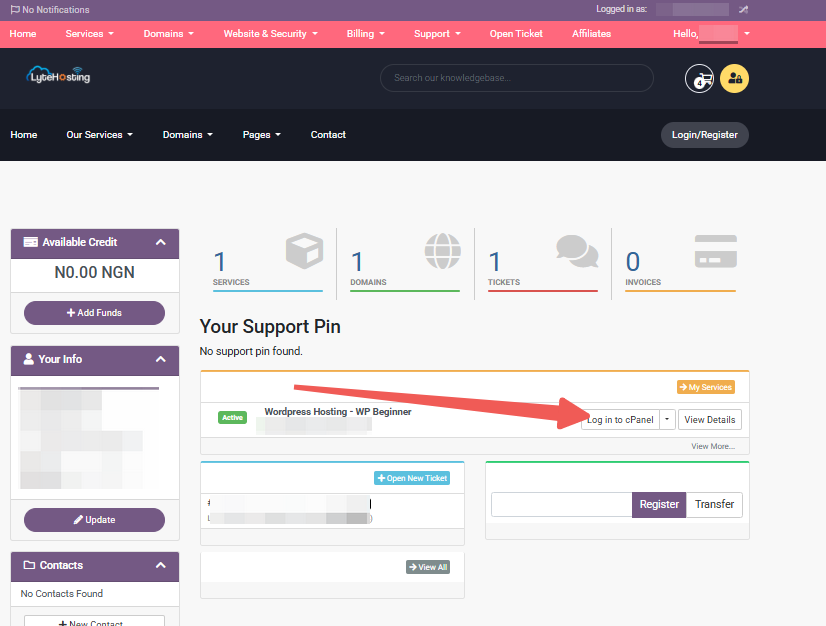
- Method 2: Log in to your cPanel through your Customer Portal.
Through your Customer Portal;
- Log in to your Customer Portal.
- Click on "Log in to cPanel".
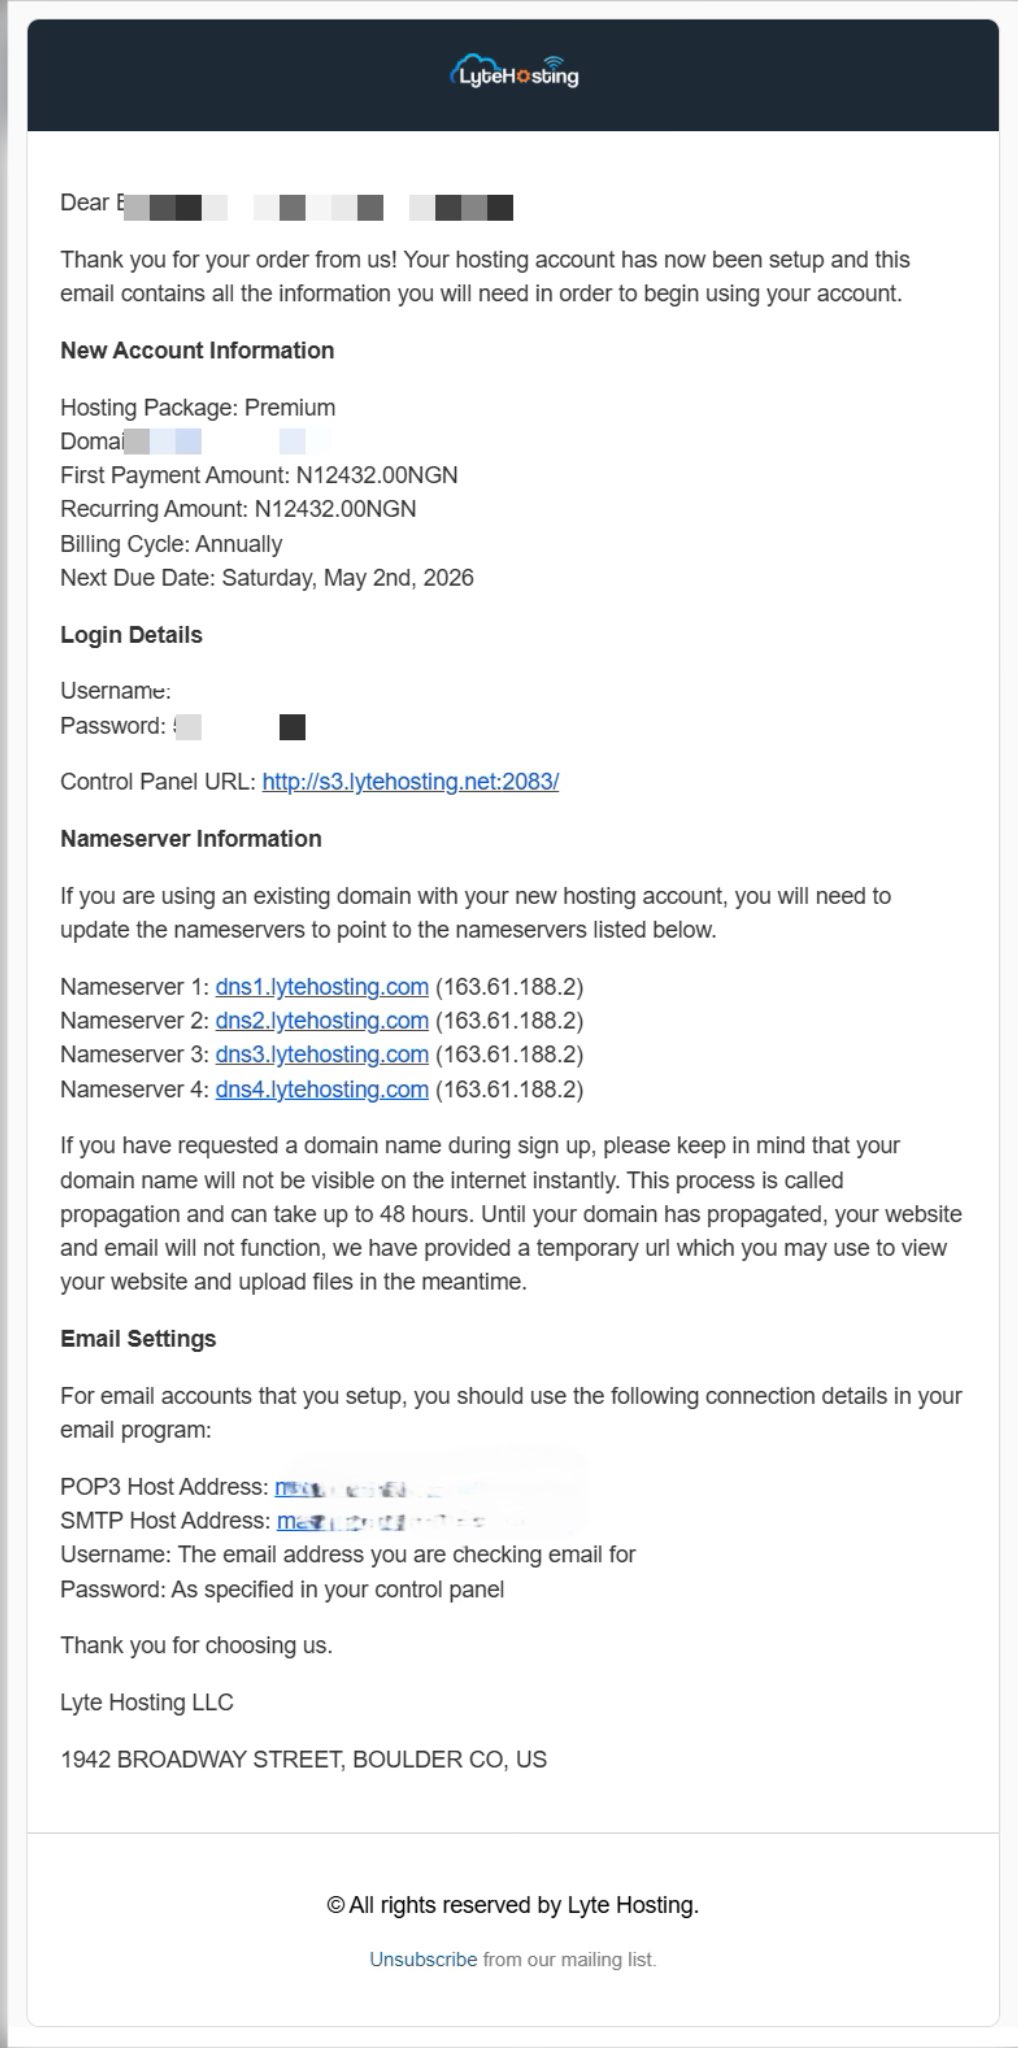
- Method 3: Log in using the details sent to your Email.
Through your Email;
- When you purchase a hosting plan, your cPanel login details (including username, password, and cPanel URL) are automatically sent to your registered email address. Simply check your inbox (or spam folder), locate the email, and use the provided credentials to access your cPanel.
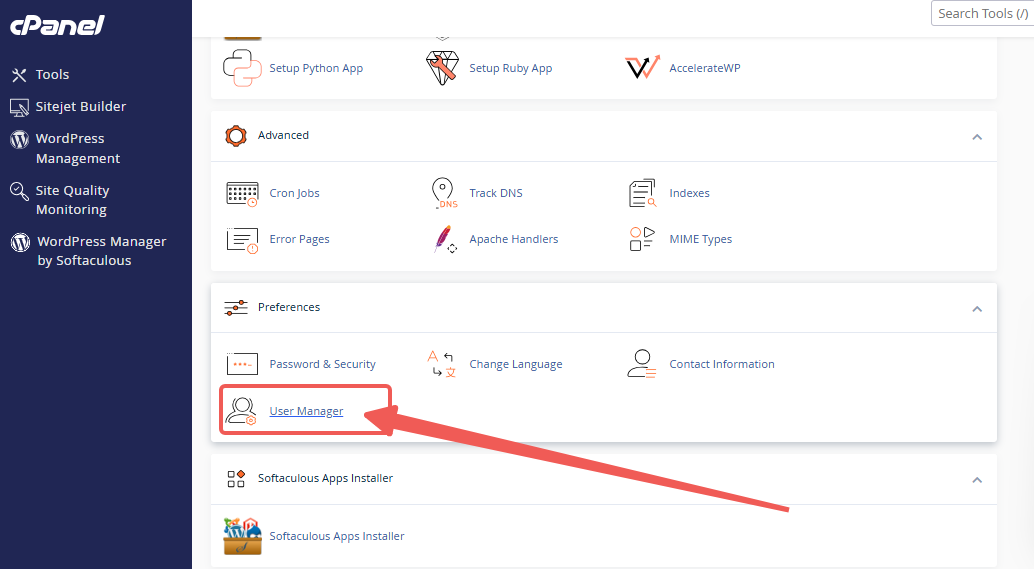
STEP 2: Locate the Preferences section and click on User Manager.
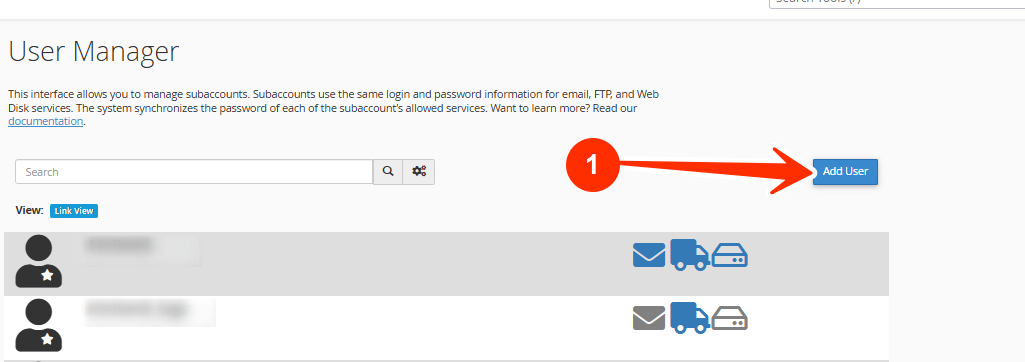
STEP 3: Click Add User. You’ll see a form to create a new subaccount.
STEP 4: Fill in Basic Information
- Full Name: A display name for the user.
- Username: The login name (formatted as username@yourdomain.com).
- Domain: Choose the domain for this user (if you have multiple).
- Email Address: A contact email for password resets and notifications.
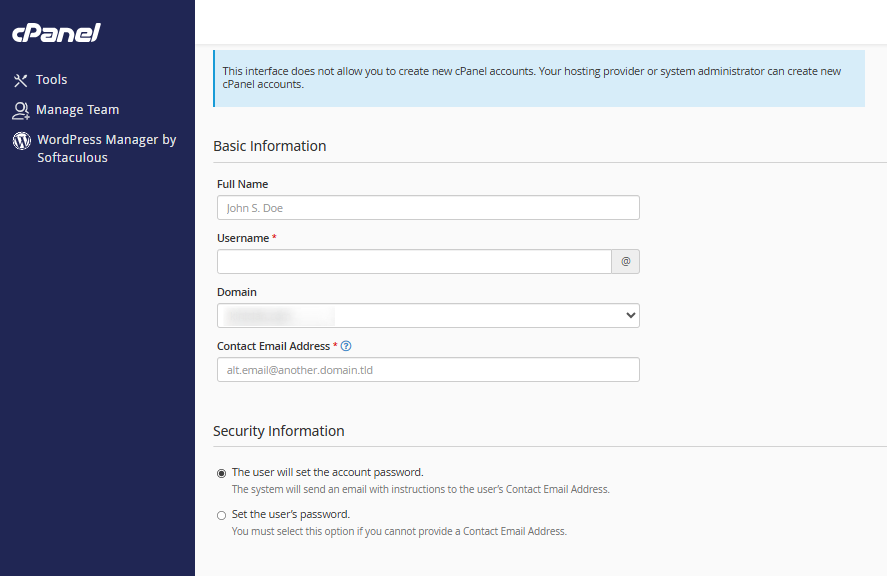
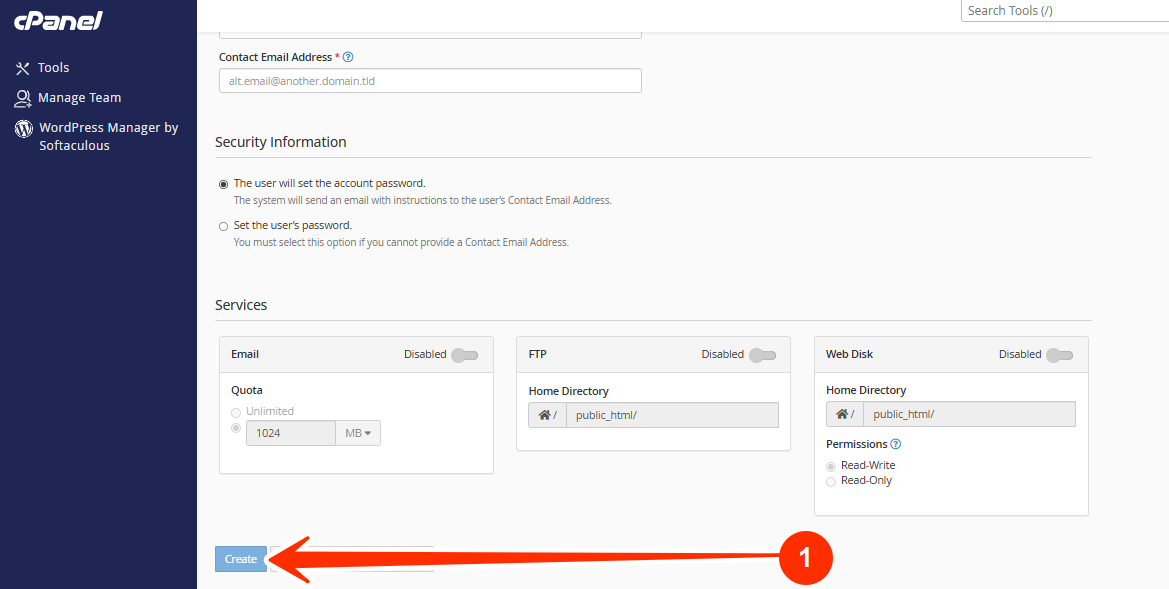
STEP 5: Choose to set a password yourself or allow the user to create their own.
Passwords apply across all enabled services for this subaccount.
STEP 6: Select which services the subaccount can access:
- Email – Assign a mailbox quota (e.g. 500MB or unlimited).
- FTP – Set a directory path and storage quota.
- Web Disk – Define directory access and read/write permissions.
STEP 7: Once done, the new subaccount will be active and ready for use.
How to Edit a Subaccount
STEP 1: Go to User Manager.
STEP 2: Locate the subaccount you want to change.
STEP 3: Click Edit.

STEP 4: Update any settings (like services, quotas, or permissions).
STEP 5: Click Save.
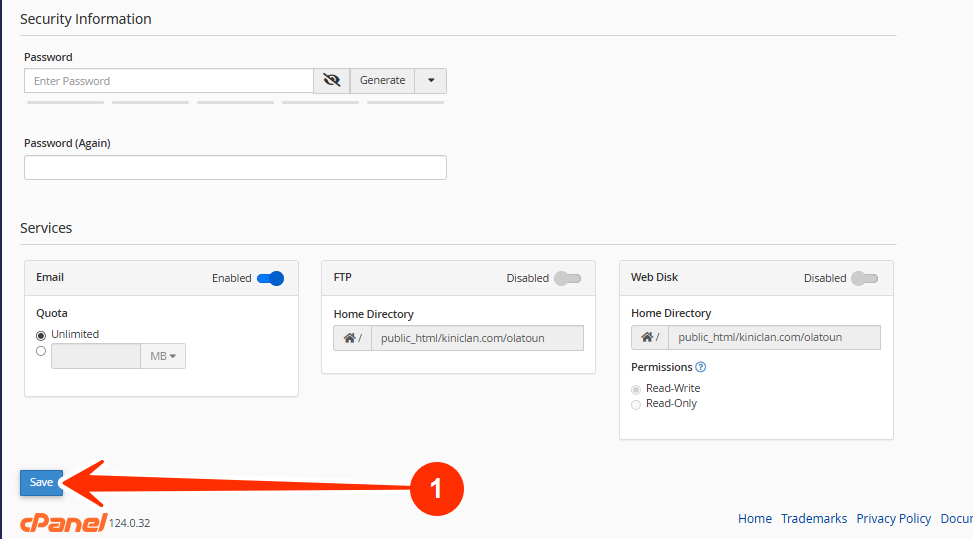
To reset only the password:
- Click Password, set a new one, and save.
How to Delete a Subaccount
STEP 1: Open User Manager.
STEP 2: Locate the subaccount.
STEP 3: Click Delete.
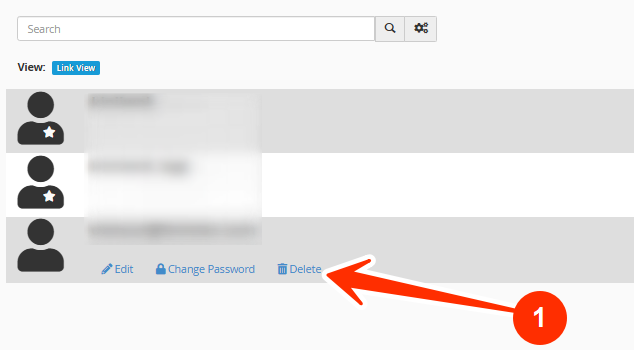
STEP 4: Confirm the deletion.
Note: Deleting a subaccount will permanently remove all associated emails and data. Make sure to back up important messages before deleting the account.
If you need assistance creating or managing subaccounts, kindly reach out to our support team.


