Directory Privacy (also known as password protection) in cPanel allows you to restrict access to specific folders on your website. When enabled, visitors must enter a username and password to view the protected content.
This feature is useful if you want to:
- Secure confidential files or private areas of your website.
- Restrict access to staging or development directories.
- Protect admin or backup folders from public access.
In this guide, you’ll learn how to enable and configure Directory Privacy in cPanel.
What is Directory Privacy?
Directory Privacy adds password protection to a specific folder on your hosting account. When visitors try to access that folder through a browser, they’ll see a login prompt requesting authentication details.
It’s a built-in cPanel security feature that helps keep sensitive content safe without requiring advanced coding or third-party tools.
How to Enable Directory Privacy in cPanel
Follow these simple steps to enable password protection for any folder within your hosting account:
STEP 1: Log in to cPanel.
There are three methods to log into your cPanel.
- Method 1: Log in to your cPanel directly.
- Method 2: Log in to your cPanel through your Customer Portal.
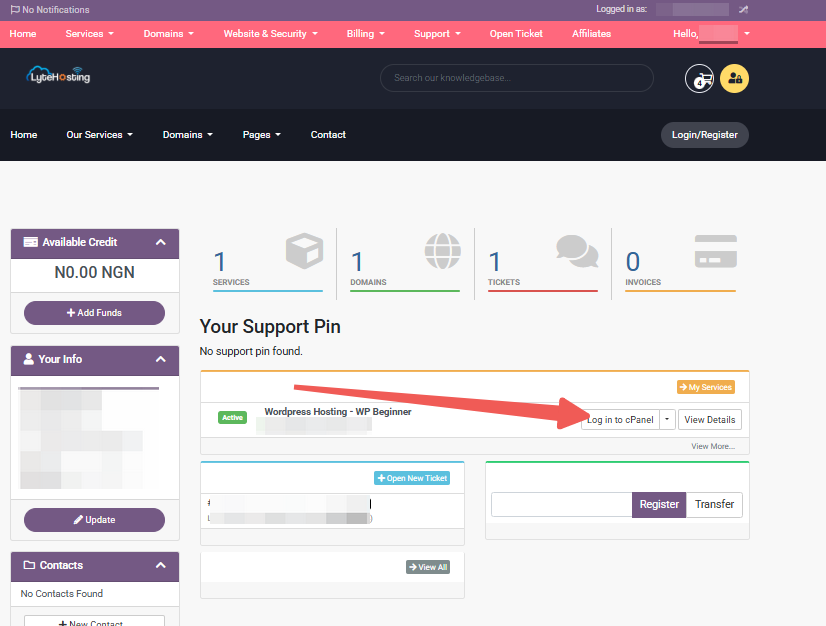
Through your Customer Portal;
- Log in to your Customer Portal.
- Click on "Log in to cPanel".
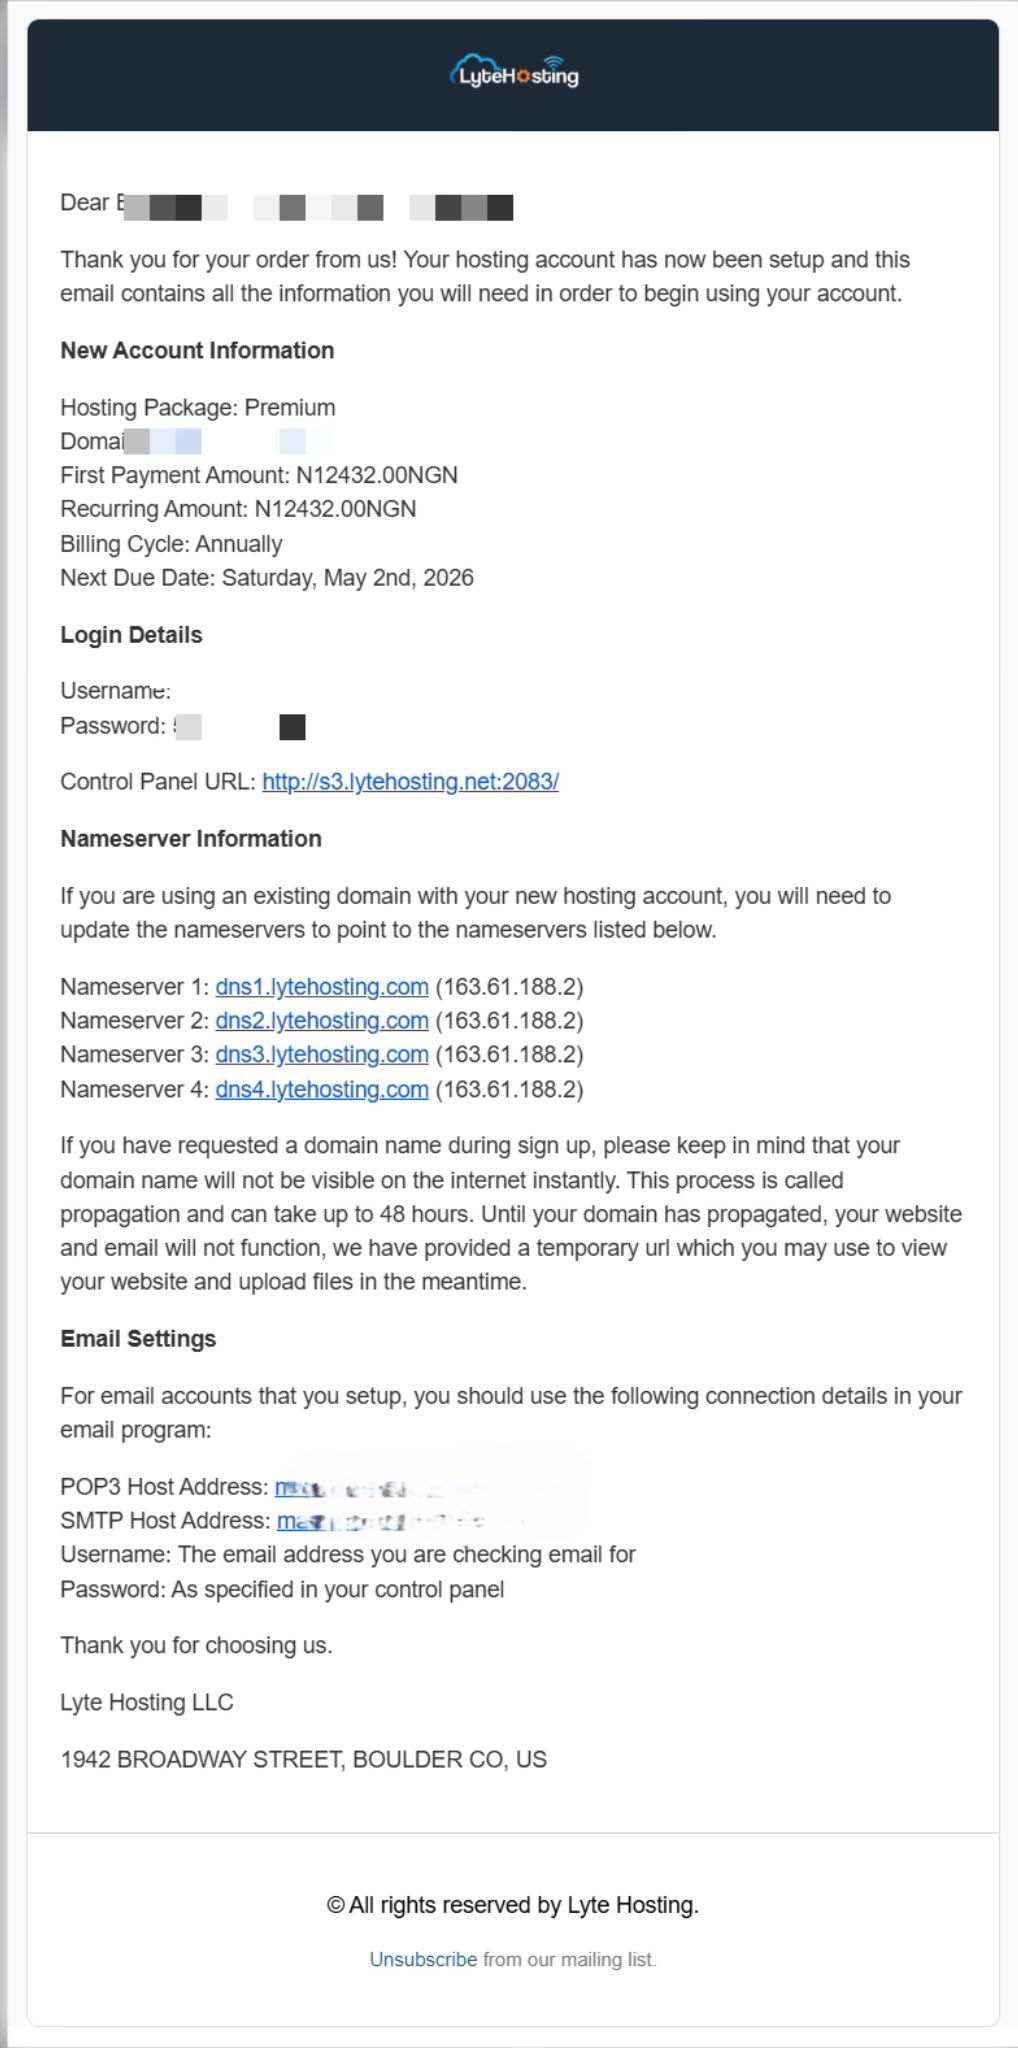
- Method 3: Log in using the details sent to your Email.
Through your Email;
- When you purchase a hosting plan, your cPanel login details (including username, password, and cPanel URL) are automatically sent to your registered email address. Simply check your inbox (or spam folder), locate the email, and use the provided credentials to access your cPanel.
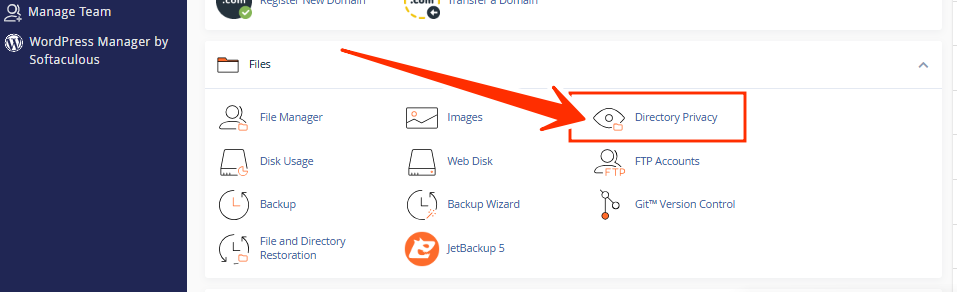
STEP 2: In the Files section, click on Directory Privacy.
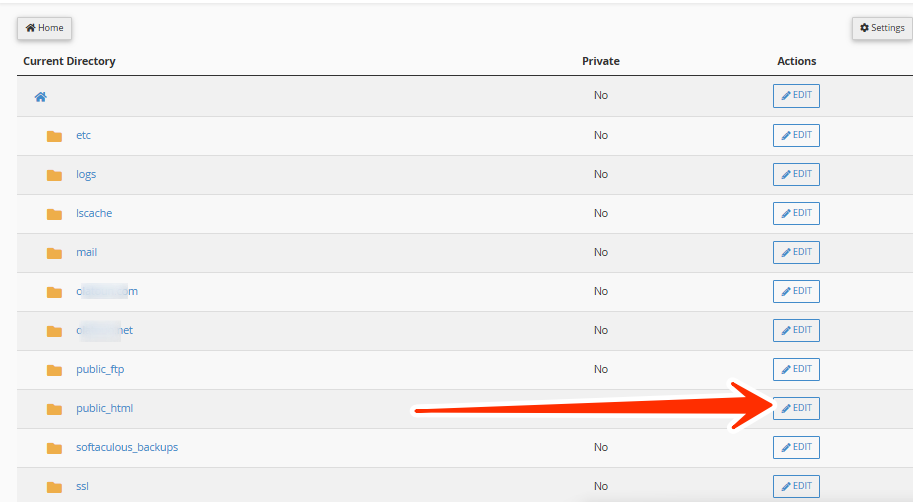
STEP 3: A list of your website folders will appear. If prompted, select the domain or subdomain where the folder you want to protect is located.
STEP 4: Click through the folders to locate the directory you want to make private. When you find the correct folder, click Edit next to it.
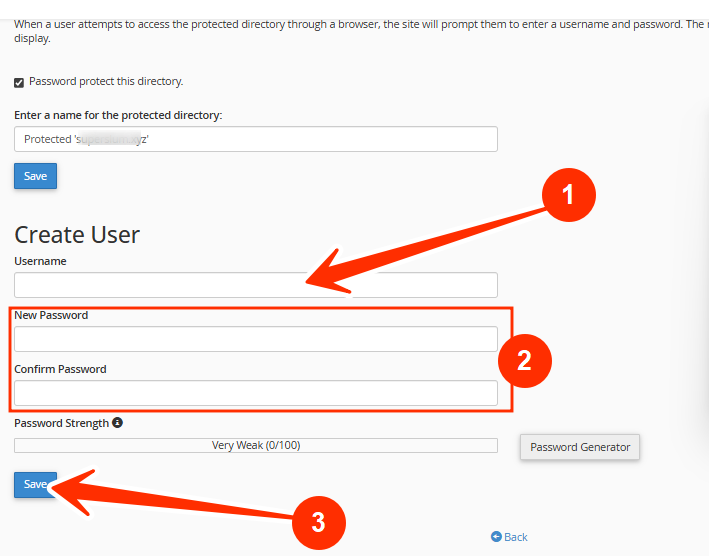
STEP 5: Check the box labeled “Password protect this directory”.
STEP 6: Enter a name for the protected directory (this name appears on the login prompt).
STEP 7: Click Save to apply the protection.

You’ll see a confirmation message stating that the directory is now password-protected.
Now that the folder is protected, you need to create a user account for access.
STEP 8: Scroll down to the Create User section.
STEP 9: Enter a username and secure password (you can use the password generator for a stronger option).
STEP 10: Click Save.
This user can now log in when visiting the protected directory in a browser.
Test Your Directory Protection
STEP 11: Open your browser and go to the protected folder URL (for example: yourdomain.com/private-folder).
STEP 12: A login box should appear. Enter the username and password you created. If entered correctly, you’ll gain access to the folder contents.
If the login box doesn’t appear, clear your browser cache or confirm that Directory Privacy is properly enabled.
How to Disable Directory Privacy (Optional)
If you no longer need to protect a directory:
STEP 1: Return to the Directory Privacy section in cPanel.
STEP 2: Locate the protected folder.
STEP 3: Uncheck the box labeled “Password protect this directory”.
STEP 4: Save your changes.
This removes the login requirement for that folder.
Tips for Better Directory Security
- Use strong passwords for directory users to prevent unauthorized access.
- Update credentials periodically or whenever an employee leaves your team.
- Avoid protecting root folders like /public_html unless necessary.
- Use SSL (HTTPS) to encrypt login credentials and prevent interception.
- Combine directory protection with a Web Application Firewall (WAF) for enhanced security.
Frequently Asked Questions (FAQs)
Q: What happens when I enable Directory Privacy?
When enabled, visitors must enter a username and password to access the protected folder or its files.
Q: Can I protect multiple directories at once?
You can protect multiple directories individually, but each folder must be configured separately within the Directory Privacy tool.
Q: Will this affect my website’s SEO?
Protected directories are typically not indexed by search engines, which is ideal for private or confidential content.
Q: Can I have more than one user access a protected directory?
Yes, you can create multiple users for the same folder, allowing shared access among team members.
Q: Why don’t I see the Directory Privacy option in cPanel?
Some hosting providers disable or rename the feature. If you can’t find it, contact your hosting support team for assistance.
If you encounter any issues setting up Directory Privacy or need further help, kindly reach out to our support team for assistance.


